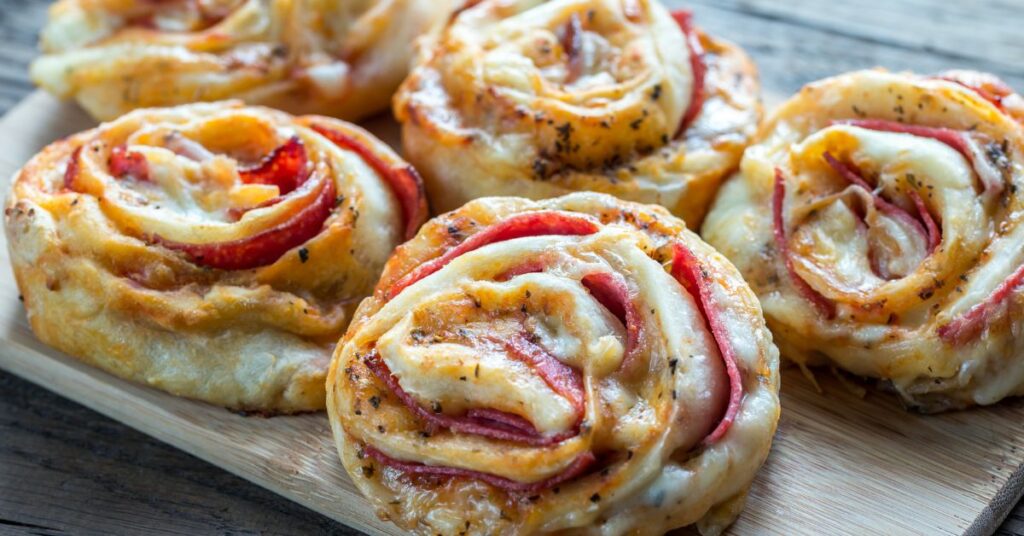
Pizza rolls have become a staple snack in many households, beloved for their delicious simplicity and the nostalgia they evoke. These bite-sized delights, often filled with gooey cheese, zesty tomato sauce, and various toppings, encapsulate the essence of pizza in a convenient, snackable form. Their versatility shines through in the myriad ways they can be customized to suit any palate, from classic pepperoni and cheese to more gourmet combinations.
In this comprehensive guide, we aim to explore the world of homemade pizza rolls. Moving beyond the freezer aisle, we’ll delve into how you can create these scrumptious treats in your own kitchen. Whether you’re a seasoned cook or a novice in the culinary arts, this article will equip you with everything you need to know about making homemade pizza rolls that are not only delicious but also a healthier alternative to their store-bought counterparts. From selecting the perfect ingredients to mastering the art of rolling and baking, we’ve got you covered. Let’s embark on this flavorful journey to elevate your snack game with homemade pizza rolls!
Ingredients and Equipment
Essential Ingredients
Creating homemade pizza rolls begins with gathering the right ingredients. Here’s a breakdown of the basics:
- Pizza Dough: The foundation of any pizza roll. You can opt for store-bought dough for convenience or make your own for a more authentic touch. The dough should be easy to roll and sturdy enough to hold the fillings.
- Cheese: Mozzarella is the go-to choice for that classic, melty texture. However, feel free to experiment with other types such as cheddar, provolone, or a blend for added flavor.
- Toppings: This is where you can get creative. Traditional options include pepperoni, sausage, and bell peppers. For a healthier twist, consider spinach, mushrooms, or even pineapple.
- Pizza Sauce: A good quality marinara sauce adds that essential pizza flavor. You can either use a store-bought version or prepare a simple sauce at home with tomatoes, garlic, and herbs.
Choosing the Right Equipment
Having the right tools can make the process of making pizza rolls much smoother. Here’s what you’ll need:
- Rolling Pin: Essential for rolling out the dough to the desired thickness.
- Knife or Pizza Cutter: For cutting the dough into squares or strips.
- Baking Sheet: A non-stick baking sheet or one lined with parchment paper is ideal for baking the rolls evenly.
- Oven: A must-have for baking. Preheating it to the right temperature is key for perfectly cooked pizza rolls.
- Mixing Bowls: Needed for preparing the dough (if making from scratch) and for mixing the fillings.
- Measuring Cups and Spoons: For accurately measuring ingredients, especially if you’re making the dough or sauce from scratch.
With these ingredients and tools at your disposal, you’re well on your way to creating delicious, homemade pizza rolls that are sure to be a hit with family and friends.
Preparing the Dough
Homemade vs. Store-Bought Dough
When it comes to pizza rolls, the dough is a critical component. You have two primary options: homemade or store-bought dough.
- Homemade Dough:
- Pros: Customizable in terms of thickness and flavor; fresher taste; no preservatives.
- Cons: More time-consuming; requires skill in dough-making.
- Simple Homemade Dough Recipe:
- Ingredients: 2 cups all-purpose flour, 1 tsp salt, 3/4 cup warm water, 1 tbsp olive oil, 1 tsp sugar, 1 packet yeast.
- Preparation: Dissolve sugar and yeast in warm water. Let it sit until frothy (about 10 minutes). Mix in flour, salt, and olive oil. Knead until smooth. Let it rise for 1 hour.
- Store-Bought Dough:
- Pros: Convenient; time-saving; consistently good texture.
- Cons: May contain preservatives; less flexibility in flavor and texture.
Rolling and Shaping the Dough
Creating the perfect base for your pizza rolls involves rolling and shaping the dough. Here’s a step-by-step guide:
- Flour the Surface: Lightly dust your working surface with flour to prevent sticking.
- Roll the Dough: Using a rolling pin, roll the dough into a rectangle. Aim for about 1/4 inch thickness for a balance between crispy and chewy textures.
- Even Out Edges: Trim the edges of the dough to make a perfect rectangle. These trimmings can be reused.
- Cut into Strips or Squares: Depending on your preference for roll size, cut the dough into strips (for larger rolls) or squares (for bite-sized rolls).
- Add Toppings: Place a small amount of sauce, cheese, and your chosen toppings on each piece. Remember, overfilling can cause the rolls to burst open during baking.
- Roll Them Up: Carefully roll each piece of dough with the fillings inside. Ensure the seam is at the bottom to keep it sealed.
- Prepare for Baking: Place the rolls seam-side down on a baking sheet, ensuring they don’t touch each other.
With your dough perfectly rolled and shaped, you’re now ready to add the fillings and bake your homemade pizza rolls to golden perfection.
Selecting Toppings and Fillings
Classic Toppings
The beauty of pizza rolls lies in their versatility, especially when it comes to choosing toppings. Here are some classic options that never fail to delight:
- Pepperoni: A pizza roll staple, offering a spicy and savory flavor.
- Mozzarella Cheese: Essential for that quintessential gooey, cheesy pull.
- Sausage: Adds a hearty and robust taste.
- Bell Peppers: For a crunch and a hint of sweetness.
- Onions: Brings a subtle sharpness and depth of flavor.
- Mushrooms: Offers an earthy taste and meaty texture.
- Black Olives: Lends a unique briny flavor.
Creative Variations
For those looking to experiment, here are some creative ideas for diverse fillings:
- BBQ Chicken: Combine cooked chicken with BBQ sauce for a tangy twist.
- Veggie Delight: Spinach, artichokes, and feta cheese for a Mediterranean flair.
- Hawaiian Style: Ham and pineapple for a sweet and savory combination.
- Buffalo Chicken: Spicy buffalo sauce and chicken, topped with blue cheese.
- Breakfast Rolls: Scrambled eggs, bacon, and cheddar for a breakfast spin.
- Pesto and Goat Cheese: For a gourmet touch, use pesto sauce with crumbled goat cheese.
- Taco Inspired: Ground beef, taco seasoning, and cheddar cheese, served with salsa.
- Vegan Rolls: Use vegan cheese and plant-based toppings like sun-dried tomatoes and roasted red peppers.
Remember, the key to perfect pizza rolls is balancing the amount of toppings with the dough. Too much filling can cause the rolls to burst open, while too little may result in a lackluster flavor experience. Feel free to mix and match these ideas to create your own unique pizza roll masterpiece!
Assembling the Pizza Rolls
Step-by-Step Assembly Guide
Assembling pizza rolls is a fun and creative process. Follow these detailed steps to ensure your rolls are both delicious and visually appealing:
- Preheat the Oven: Set your oven to 375°F (190°C) to ensure it’s hot enough when the rolls are ready to bake.
- Prepare the Dough: Roll out your dough on a floured surface into a rectangle, about 1/4 inch thick.
- Add the Sauce: Spread a thin layer of pizza sauce over the dough, leaving a small border around the edges to prevent spillage.
- Add Toppings: Sprinkle your chosen toppings evenly over the sauce. Remember, less is more – overloading can make the rolls difficult to close.
- Roll the Dough: Carefully roll the dough into a tight log, starting from the long edge. Ensure the seam is on the bottom.
- Cut the Rolls: Slice the log into 1 to 2-inch pieces using a sharp knife or a piece of dental floss for cleaner cuts.
- Place on Baking Sheet: Arrange the rolls on a baking sheet lined with parchment paper, seam side down, ensuring they are not touching.
- Optional Egg Wash: For a golden finish, brush the tops with a beaten egg before baking.
- Bake: Place in the oven and bake for 15-20 minutes or until golden brown and the cheese is bubbly.
Tips for Perfect Rolls
- Size Consistency: Keep the rolls uniformly sized for even cooking. A ruler can be handy for precise measurements.
- Sealing the Edges: Pinch the dough together at the seams and ends to prevent the filling from oozing out during baking.
- Filling Distribution: Spread the toppings evenly to ensure each bite is flavorful. Avoid piling too much in the center.
- Dough Thickness: If the dough is too thick, it won’t cook evenly; too thin, and it might tear. Aim for a consistent 1/4 inch thickness.
- Spacing on Baking Sheet: Leave enough space between each roll on the baking sheet to allow for expansion as they bake.
- Oven Positioning: Place the baking sheet in the middle rack of the oven for the most even heat distribution.
By following these steps and tips, you’ll be well on your way to creating perfect homemade pizza rolls that are sure to be a hit!
Cooking Methods
Baking vs. Frying
Homemade pizza rolls can be cooked in two popular ways: baking or frying. Each method offers a different texture and flavor profile.
Baking
- Pros: Healthier as it requires less oil; provides a uniformly crispy texture.
- Cons: Might not be as crunchy as fried rolls.
- Instructions:
- Preheat your oven to 375°F (190°C).
- Place the rolls on a baking sheet lined with parchment paper.
- Bake for 15-20 minutes or until golden brown.
Frying
- Pros: Delivers a crispier exterior and a rich flavor.
- Cons: Higher in calories and fat due to oil absorption.
- Instructions:
- Heat oil in a deep fryer or a large pan to 350°F (175°C).
- Fry the rolls in batches, careful not to overcrowd the pan.
- Cook for 3-4 minutes or until golden brown, then drain on paper towels.
Cooking Times and Temperatures
Baking
- Temperature: 375°F (190°C).
- Time: 15-20 minutes. Check at 15 minutes for doneness; continue if a darker crust is desired.
Frying
- Oil Temperature: 350°F (175°C).
- Time: 3-4 minutes. Keep an eye on the rolls as they can brown quickly.
General Tips
- Consistency: Ensure all rolls are similar in size for even cooking.
- Doneness: Rolls should be golden brown with cheese melted and slightly bubbly.
- Oven Positioning for Baking: Middle rack placement is ideal for even cooking.
- Oil Readiness for Frying: Test the oil temperature with a small piece of dough; it should sizzle upon contact.
By choosing the method that best suits your taste and following these guidelines, you can achieve delicious and perfectly cooked homemade pizza rolls every time.
Serving and Presentation
Serving Suggestions
Homemade pizza rolls are versatile and can be paired with a variety of dips and sides to enhance their flavor. Here are some suggestions:
- Dips:
- Marinara Sauce: A classic choice that complements the pizza flavors.
- Ranch Dressing: Offers a creamy and tangy contrast.
- Garlic Butter Sauce: Adds a rich and aromatic touch.
- Buffalo Sauce: For those who enjoy a spicy kick.
- Pesto Sauce: A fresh and herby alternative.
- Sides:
- Caesar Salad: A light and crisp side that balances the richness of the rolls.
- Veggie Sticks: Carrots, celery, and bell peppers provide a crunchy, healthy option.
- Italian Pasta Salad: A flavorful and filling complement.
- Mozzarella Sticks: For an extra cheesy indulgence.
Presentation Tips
The way you present your pizza rolls can make them even more appealing. Here are some tips for attractive plating:
- Platter Arrangement: Arrange the rolls in a circular pattern on a large platter, with dips in the center for easy access.
- Garnishing: Sprinkle some fresh herbs like basil or parsley over the rolls for a pop of color.
- Dip Presentation: Serve dips in small, individual bowls or ramekins to keep the presentation neat.
- Layering: If serving a large quantity, layer the rolls in a slightly overlapping fashion for an abundant look.
- Color Contrast: Use a platter or serving dish that contrasts with the color of the rolls to make them stand out.
- Themed Serving Ware: For special occasions, choose serving ware that matches the theme of the event.
By combining these serving and presentation ideas, your homemade pizza rolls will not only taste delicious but also look irresistibly inviting!
Storage and Reheating
Storing Leftovers
Proper storage is key to maintaining the freshness and flavor of homemade pizza rolls.
- Refrigerating:
- Place in an airtight container.
- Store for up to 3-4 days.
- Separate layers with parchment paper to prevent sticking.
- Freezing:
- Freeze on a baking sheet until solid, then transfer to a freezer bag.
- Can be stored for up to 2 months.
- Label with the date to keep track of freshness.
Reheating Tips
Reheating pizza rolls correctly can help retain their texture and taste.
- Oven/Toaster Oven:
- Preheat to 350°F (175°C).
- Place rolls on a baking sheet.
- Heat for 10-15 minutes or until warmed through.
- Microwave:
- Place rolls on a microwave-safe plate.
- Use the reheat setting or heat on high for 30-60 seconds.
- Note: Microwave reheating may soften the crust.
- Air Fryer:
- Preheat to 350°F (175°C).
- Reheat for 3-5 minutes.
- Ideal for restoring crispiness.
Nutritional Information
Calorie Count and Nutritional Value
The nutritional content of pizza rolls can vary based on the ingredients used. A standard homemade pizza roll with cheese and pepperoni typically contains:
- Calories: Approximately 80-100 per roll.
- Carbohydrates: Around 10-15 grams.
- Proteins: About 5-7 grams.
- Fats: Roughly 3-5 grams, depending on the cheese and toppings.
Healthier Alternatives
To make pizza rolls more nutritious:
- Whole Wheat Dough: Use whole wheat flour for added fiber.
- Low-Fat Cheese: Opt for reduced-fat cheese to cut down on saturated fats.
- Lean Proteins: Incorporate lean meats like chicken or turkey.
- Vegetable Toppings: Add veggies like spinach, bell peppers, or mushrooms for vitamins and minerals.
- Homemade Sauce: Make your own sauce to control sodium and sugar levels.
By considering these storage, reheating, and nutritional tips, you can enjoy homemade pizza rolls in a healthier and more convenient way.
FAQs Section
Can I make pizza rolls in advance?
- Yes, you can prepare pizza rolls in advance. Assemble them, place them on a baking sheet, cover, and refrigerate for up to 24 hours before baking. For freezing, flash freeze on a baking sheet, then store in a freezer bag for up to 2 months.
What are the best cheeses for pizza rolls?
- Mozzarella is a popular choice for its meltability and mild flavor. Other great options include cheddar for sharpness, provolone for a smooth taste, and a blend of Italian cheeses for complexity.
How can I make my pizza rolls crispy?
- To achieve a crispy texture, bake the rolls in a preheated oven at a higher temperature (around 400°F or 200°C) until golden brown. Using an air fryer or brushing the rolls with a bit of oil can also enhance crispiness.
Are homemade pizza rolls healthier than store-bought?
- Generally, yes. Homemade pizza rolls allow for control over ingredients, enabling the use of whole grains, less sodium, and healthier toppings. This can make them a more nutritious option compared to store-bought varieties.
Can I use puff pastry or crescent roll dough for pizza rolls?
- Absolutely. Puff pastry or crescent roll dough can be used for a flakier, buttery crust. Keep in mind that these doughs might puff up more and have a different texture than traditional pizza dough.
How do I prevent the filling from leaking out?
- To prevent leakage, avoid overfilling the rolls and ensure the edges are sealed tightly. Also, let the rolls rest for a few minutes after baking, as this helps the filling set.
Can pizza rolls be made vegan or gluten-free?
- Yes. For vegan pizza rolls, use plant-based cheese and meat substitutes. For gluten-free rolls, opt for gluten-free pizza dough and ensure all other ingredients are gluten-free.
What are some kid-friendly variations of pizza rolls?
- Kids often enjoy simple flavors like cheese and pepperoni. You can also try ham and pineapple for a Hawaiian twist, or incorporate their favorite veggies in small, finely chopped pieces.
How long can I store homemade pizza rolls?
- Cooked pizza rolls can be stored in the refrigerator for 3-4 days or frozen for up to 2 months. Ensure they are stored in airtight containers to maintain freshness.
Can I freeze uncooked pizza rolls?
- Yes, uncooked pizza rolls can be frozen. Place them on a baking sheet to freeze individually, then transfer to a freezer bag. They can be baked directly from frozen, adding a few extra minutes to the baking time.

Homemade Pizza Rolls
- Total Time: 20 minutes
Ingredients
Instructions
Notes
- Prep Time: 10
- Cook Time: 10
Conclusion
In this comprehensive guide, we’ve explored the delightful world of homemade pizza rolls, a versatile and beloved snack perfect for any occasion. From selecting the right ingredients and equipment to mastering the art of dough preparation, we’ve covered every step to ensure your pizza roll-making experience is both fun and successful.
Key Points Recap:
- Ingredients and Equipment: The foundation of great pizza rolls lies in quality ingredients and the right kitchen tools.
- Dough Preparation: Whether you choose homemade or store-bought dough, proper rolling and shaping are crucial.
- Toppings and Fillings: We delved into classic and creative options, encouraging personalization to suit your taste.
- Assembling and Cooking: Detailed instructions for assembling and cooking methods, including baking and frying, were provided to achieve the perfect texture and flavor.
- Serving and Presentation: Tips for serving and presenting your pizza rolls to make them as appealing to the eye as they are to the palate.
- Storage and Reheating: Best practices for storing and reheating were shared to maintain the deliciousness of your pizza rolls.
- Nutritional Information: We discussed how to make your pizza rolls healthier without sacrificing taste.
- FAQs: Common questions were addressed to help troubleshoot and enhance your pizza roll-making experience.
As you embark on your pizza roll-making journey, remember that the beauty of cooking lies in experimentation and personalization. Feel free to mix and match ingredients, try different cooking methods, and most importantly, have fun with the process. Homemade pizza rolls are not just a treat for the taste buds but also an opportunity to create lasting memories in the kitchen.
So, roll up your sleeves, get creative, and enjoy the wonderful experience of making and savoring your very own homemade pizza rolls!