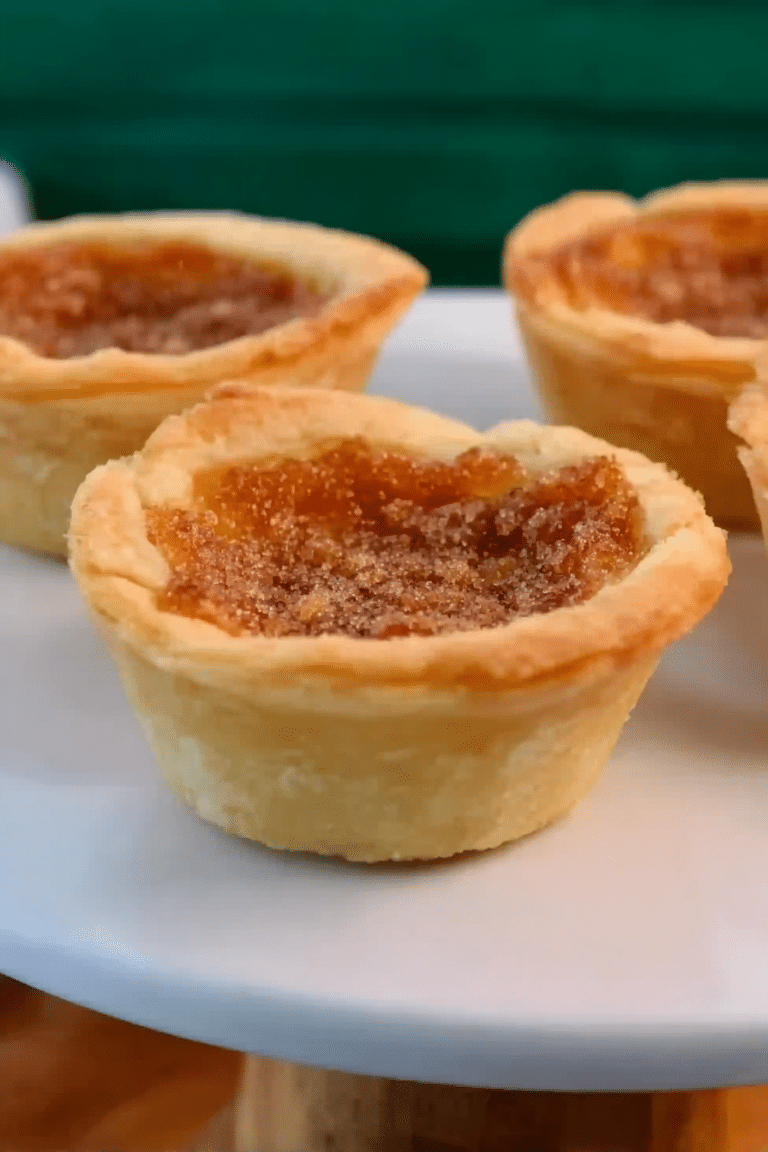
Butter tarts are one of those small, unpretentious desserts that somehow deliver a huge comforting payoff — a flaky shell giving way to a glossy, buttery, slightly sticky filling that sings of brown sugar and vanilla. I make these whenever I want something that smells like a Sunday kitchen and tastes like an old-fashioned bakery: warm, sweet, and a little bit gooey in the middle. The texture contrast is what hooks me every time — the crisp, golden edge of the pastry and the slow-moving, syrupy filling that thickens as it cools.
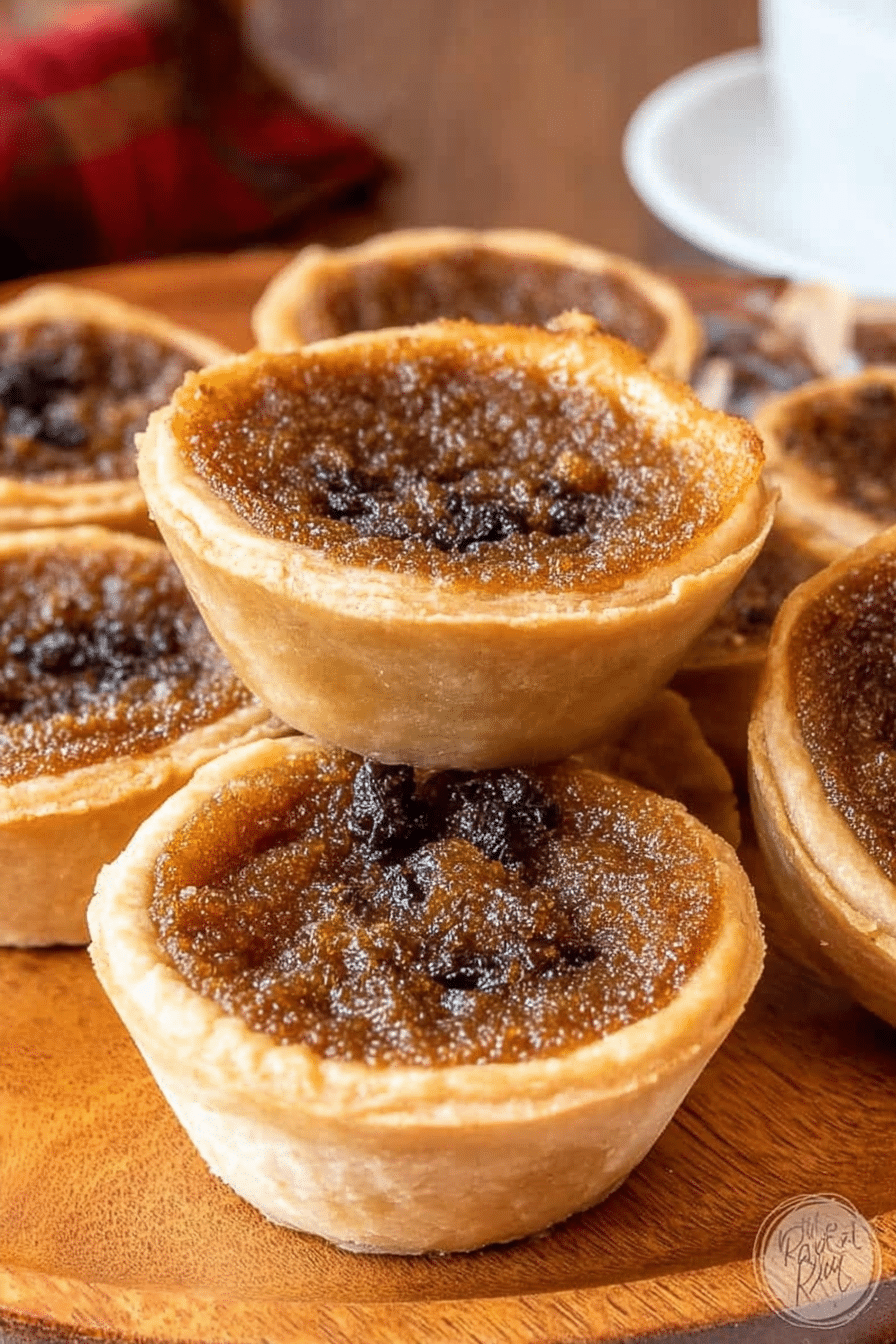
When you bite into a butter tart the smell is the first thing you notice — warm butter, a hint of caramelized sugar and the faint spice of nutmeg. The filling should be glossy and slightly wobbly when they come out of the oven, and it keeps setting as it cools to room temperature. I’ve tweaked this recipe over several winters and potlucks so I can tell you honestly what works, what doesn’t, and which shortcuts are worth keeping.
History and Cultural Significance
Butter tarts are a beloved Canadian dessert with roots that reach back to the home kitchens of early settlers who adapted British tart-making traditions to available ingredients. They became a staple because they’re simple, portable, and forgiving — all qualities that suit a household baking rhythm. Different regions and families have their own ideas: some insist on raisins, while others find that a blasphemous addition; some add pecans or chocolate chips; some prefer a puddly centre, others like it almost set.
In my family, butter tarts appeared at every holiday and harvest-time gathering. My grandmother would hand me a warm tart and say, “Don’t burn your tongue,” though she never waited for them to cool. There’s also a delightful, almost competitive spirit across Canada — small towns host butter tart festivals where bakers argue good-naturedly over who makes the flakiest crust or the best ratio of syrup to egg. That debate is part of the charm: butter tarts aren’t a single, rigid recipe; they’re a tradition that invites personal touch.
Step-by-Step Guide to Making Butter Tarts
Below is a tested, classic recipe that reliably produces 12 tarts with flaky shells and a rich, gooey filling. I include small, practical notes inside the steps — these are the little things I learned after many batches when I ruined the filling once or twice and learned how to fix it.
Ingredients
- 1 ½ cups all purpose flour
- ¼ teaspoon salt
- ½ cup salted butter (cold and cubed)
- 4-5 tablespoons very cold water
- ½ cup corn syrup (light corn syrup, or golden corn syrup)
- ⅓ cup light brown sugar
- 3 tablespoons unsalted butter (melted and cooled)
- 1 large egg (at room temperature)
- 1 teaspoon vanilla extract
- ½ teaspoon cornstarch
- ¼ teaspoon ground cinnamon
- ¼ teaspoon salt
- ⅛ teaspoon ground nutmeg
- ½ cup raisins (optional)
Ingredient Notes
- All-purpose flour – the structure for the crust; you can use a 1:1 gluten-free blend if needed (see gluten-free section below).
- Salt – balances the sweetness and helps intensify the butter flavor.
- Butter – cold butter in the crust gives flakiness; melted butter goes into the filling for silkiness.
- Cold water – keeps the dough together without warming the butter; add a tablespoon at a time.
- Corn syrup – anchors the gooey texture; light or golden works best for color and shine.
- Brown sugar – adds depth and a caramel note; don’t swap it all for white sugar without adjusting.
- Egg – helps the filling set; room temperature eggs incorporate more smoothly.
- Spices – a pinch of cinnamon and nutmeg enhance the warmth of the filling.
- Raisins – optional mix-in; swap with chocolate chips, pecans, or dried cranberries.
For a tender, flaky shell, try our all-butter flaky pie crust as the base for your butter tarts.
Detailed Instructions
- In a large bowl, whisk together the flour and salt. With a pastry cutter, cut in the cold butter until only pea-sized pieces remain. (You can use a food processor, but don’t overwork it — you still want visible bits of butter in the dough.)
- Add 4 tablespoons of very cold water and mix; add more a little at a time until the dough is shaggy and will just stick together when pressed. Form into a flat disc, wrap in plastic, and chill in the refrigerator for at least 2 hours. (Chilling prevents shrinking and keeps the crust flaky.)
- Once chilled, roll the dough to about 1/8″ thickness and cut into 4″ circles. Press each circle gently into a 12-count muffin tin so the dough comes up the sides. Gather scraps, re-roll once, and fill all 12 cups. Place the tin in the freezer while you prepare the filling — a cold shell helps it hold its shape once it hits the hot oven.
- Preheat the oven to 400°F (200°C). (If you have a fan/ convection oven, 180°C is a good adjustment.)
- In a medium bowl, whisk together the corn syrup, brown sugar, melted and cooled butter, egg, vanilla, cornstarch, cinnamon, salt and nutmeg until smooth and glossy.
- If using raisins, divide them among the chilled tart shells first. Then fill each shell about half full with the syrupy filling — don’t overfill because the filling bubbles and will rise a bit during baking.
- Bake at 400°F for 5 minutes, then reduce the temperature to 350°F and bake an additional 15–20 minutes, or until the filling is bubbling and the crust is golden. The centers should still wobble slightly — they’ll set as they cool.
- Allow the tarts to cool in the pan for at least 15 minutes before running a butter knife around the edges to help remove them. They’re easiest to remove when slightly cooled but still warm.
Yield: 12 tarts. Prep time: about 30 minutes active (plus 2 hours chilling). Cook time: about 25 minutes. Total time: roughly 55 minutes plus chilling.
Essential Tips for Perfect Butter Tarts
- Keep the butter cold for the crust. Warm butter means a tough, greasy crust. If your kitchen is warm, chill the bowl and cut butter with cold hands or a cool tool. If the dough gets too soft while rolling, pop it back in the fridge for 20–30 minutes.
- Chill the shells before filling. It’s not optional for me anymore — I learned this the hard way when my shells slumped. Cold dough holds shape and bakes up flakier.
- Don’t overfill the cups. The filling expands and bubbles; filling halfway to two-thirds is the safe zone depending on how runny you prefer the center.
- Watch the bake closely. If the tops are browning too fast, tent with foil. Underbaked centers will be puddly; overbaked centers will be hard and lose that luxurious chew.
- Temperature trick for straighter filling. Starting at 400°F for a few minutes helps set the crust edge quickly, then lowering to 350°F lets the filling cook through without burning the rim.
- If the filling tastes flat, add salt. I say this a lot with sweets — a tiny pinch of extra salt will brighten the caramel notes more than extra sugar would.
- Fixing a too-runny filling: Bake a few extra minutes and let cool to room temperature; the cooling is when it firms. For the next batch, increase cornstarch by about 1 teaspoon or add an extra egg for structure.
Creative Variations and Flavor Combinations
Butter tarts are a terrific canvas. Here are several variations I test-baked and enjoyed — each one tells you how the texture and flavor shift so you can pick the version that suits your crowd.
- Classic with raisins – the chewy, concentrated sweetness of raisins contrasts beautifully with the buttery custard.
- Chocolate chip butter tarts – fold in a small handful of semisweet chips; they melt slightly in the center and add a lovely chocolate-sweetness without overwhelming the caramel notes.
- Pecan butter tarts – chopped pecans on top provide crunch and a toasted, nutty counterpoint; they’re my go-to for fall gatherings.
- Maple butter tarts – replace some or all of the corn syrup with pure maple syrup for a deeper, more complex flavor; expect a slightly thinner filling unless you increase the cornstarch a bit.
- Orange and cranberry – stir in a teaspoon of orange zest and small-diced dried cranberries for a bright, festive version that’s not too sweet.
For inspiration on bite-sized fillings and presentation, check out our mini cannoli cups and adapt their techniques to butter tart fillings.
Add a bright, fruity twist by topping your butter tarts with a spoonful of our Cherry Yum Yum.
Gluten-Free and Vegan Alternatives
Yes — you can make inclusive versions that still honor what makes a butter tart delightful.
- Gluten-free crust – use a high-quality 1:1 gluten-free all-purpose flour blend with xanthan gum already included. Chill the dough well; gluten-free doughs can be trickier to roll, so roll between sheets of parchment and press into the tin instead of stretching.
- Vegan filling – swap the butter for a vegan butter and replace the egg with a flax “egg” (1 tablespoon ground flaxseed + 3 tablespoons water, set 10 minutes) or a commercial egg replacer. Substitute corn syrup with maple syrup or a vegan golden syrup — expect a slightly different texture and adjust cornstarch upward by a teaspoon to help it set.
- Notes on texture – gluten-free crusts can be a bit more fragile; chill often. Vegan fillings won’t set exactly like egg-based custards but can still be glossy and delicious with a little extra thickener and proper chilling.
Presentation Ideas for Special Occasions
Butter tarts are small and charming, which makes them ideal for party spreads. Present them thoughtfully and they feel fancy without fuss.
- Arrange warm tarts on a cake stand lined with parchment and sprinkle lightly with icing sugar just before serving for a pretty, old-fashioned look.
- Top pecan or chocolate versions with a single toasted pecan half or a pinch of flaky sea salt to make the flavors pop.
- Serve with a dollop of lightly whipped cream or a small scoop of vanilla ice cream; the cold cream contrasts deliciously with the warm filling.
- For elegant parties, place each tart in a ruffled paper liner and display them on mirrored trays or on a tiered stand.
Pair your butter tarts with a refreshing blueberry tea lemonade for a delightful dessert spread at gatherings.
Frequently Asked Questions
- How should I store leftover butter tarts and how long do they keep?Store cooled butter tarts in an airtight container. They keep at room temperature for up to 2 days, in the refrigerator for up to 4 days, or frozen for up to 2 months. Reheat refrigerated tarts in a 325°F (160°C) oven for 5–10 minutes to refresh the crust and filling.
- How can I make the filling firmer (not so runny)?For a firmer filling, add one extra egg or increase the cornstarch slightly (about 1 teaspoon). Also avoid overfilling the shells and bake until the centers are just set—they’ll continue to firm as they cool.
- Can I omit the raisins or use substitutions?Yes—raisins are optional. Try chocolate chips, chopped pecans, dried cranberries, or leave the tarts plain for a classic gooey filling. Add mix-ins sparingly so the filling can still set properly.
- Can I make butter tarts ahead of time or freeze them?Yes. You can make the dough and chill it ahead, or assemble tart shells and keep them chilled in the fridge for a day. Baked tarts freeze well for up to 2 months (wrap tightly). You can also freeze unbaked shells in the tin for about a month and bake from frozen, adding a few extra minutes.
- Are there gluten-free or vegan versions of butter tarts?Yes. For gluten-free, use a 1:1 gluten-free all-purpose flour blend for the crust. For vegan tarts, use vegan butter, a flax or chia “egg” (1 tbsp ground flax + 3 tbsp water) or a commercial egg replacer, and swap corn syrup for maple syrup or a vegan-friendly golden syrup; texture will be slightly different but still delicious.
Conclusion
Butter tarts are a small pastry with a lot of personality — adaptable, nostalgic, and forgiving if you pay attention to a few key steps (cold butter, chilled shells, and careful baking). I hope this recipe helps you get that glossy, gooey center and a flaky, golden crust every time. Make a batch for a cozy evening or a holiday spread; they travel well and everyone seems to have a story about their ideal tart.
If you make these, tell me which variation you tried (classic raisins? chocolate chip? maple?) and how the texture turned out. Share any favorite tweaks or questions in the comments — I read and respond to them, especially when someone offers a brilliant shortcut. And if you enjoyed this guide, please share it with a friend who loves baking — butter tarts are best when someone else gets the second one.
Butter Tarts
Ingredients
Method
- In a large bowl, whisk together the flour and salt. With a pastry cutter, cut in the butter until only pea sized pieces remain. Add cold water until the dough is shaggy, form into a disc, cover and chill for at least 2 hours.
- Roll the chilled dough to ⅛” thickness, cut into 4” circles, and press into a muffin tin. Chill again while preparing the filling.
- Preheat the oven to 400°F (200°C).
- In a bowl, whisk together the corn syrup, brown sugar, butter, egg, vanilla, cornstarch, cinnamon, salt, and nutmeg until smooth.
- If using raisins, distribute them in tart shells, then fill with the syrup mixture halfway.
- Bake for 5 minutes at 400°F, lower to 350°F, and bake for an additional 15-20 minutes until filling is bubbling.
- Allow to cool for at least 15 minutes before removing from the pan.