Introduction to Cherry Apple Pie
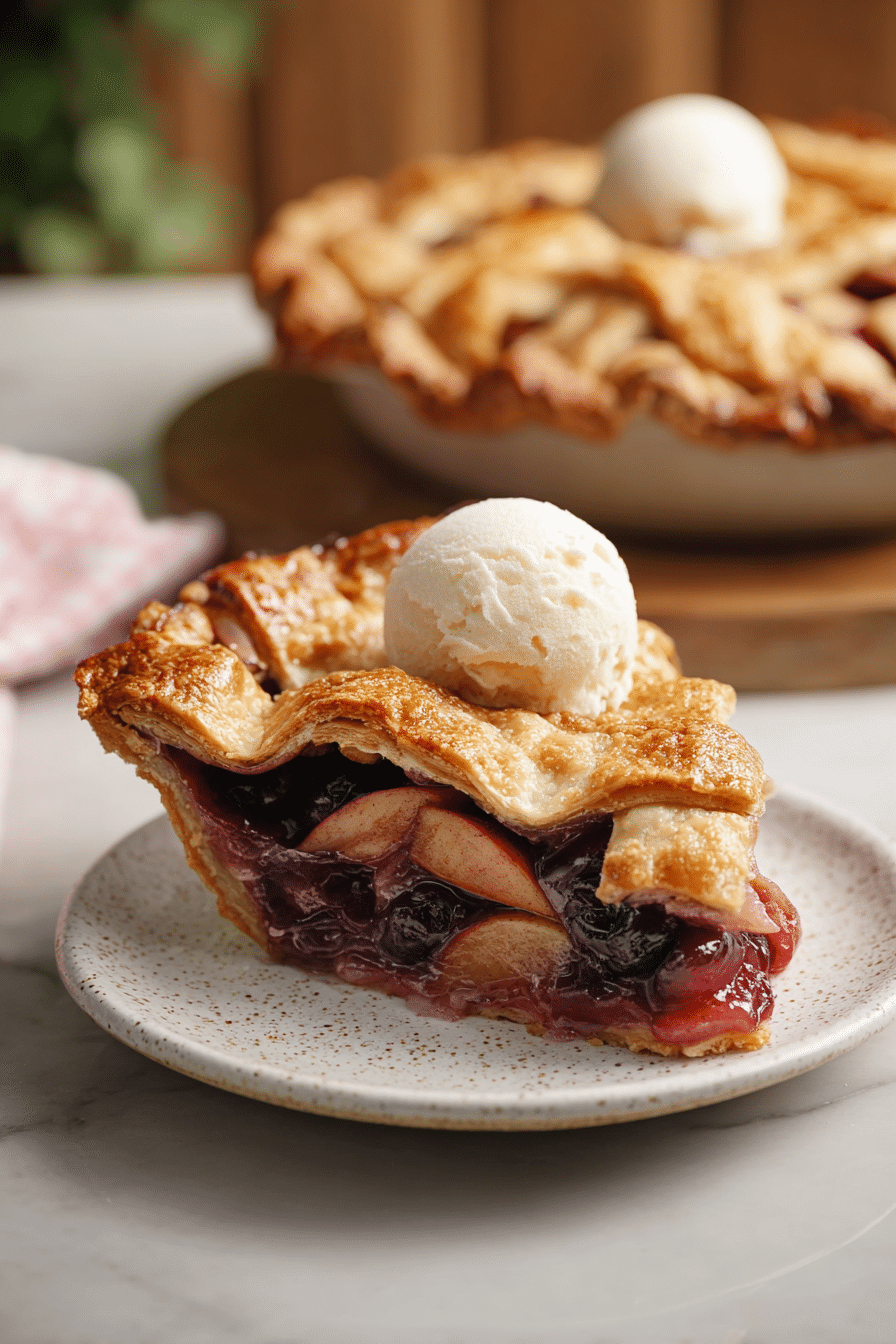
Cherry apple pie is one of those desserts that smells like a memory: warm butter and cinnamon blending with bright, slightly tart cherries and honeyed apples. I made this pie on a rainy Saturday afternoon, and the kitchen filled with a warm fruity perfume that made me open every window just to take it all in. The crust crackled as I slid the pie onto the cooling rack; the filling bubbled up in little glossy islands through the lattice, dark red meeting pale gold. It’s the perfect balance — the cherries bring a sweet-tart lift, apples add structure and body, and the crust ties it all together with that satisfying, flaky crunch.
I’ve made versions of this pie many times: with more sugar, with less, with a single crust, with a full lattice, and with different combinations of apples. Over time I landed on a version that behaves predictably in the oven and tastes like the kind of pie people ask for seconds of at potlucks. Below I’ll share the ingredients and the exact step-by-step method I used (temperatures and times tested), along with troubleshooting notes and serving ideas so you can get the same results in your kitchen.
Ingredients You’ll Need
- All-purpose flour – forms the structure of the crust; using a high-quality flour gives a tender result.
- Salt – balances sweetness and enhances the crust’s flavor.
- Unsalted butter – cold, cubed butter creates those flaky pockets; don’t substitute melted butter here.
- Ice-cold water – hydrates the dough without warming the butter; key for a flaky crust.
- Apples – tart or firm apples (like Granny Smith or Honeycrisp) add structure and bright flavor; you can mix varieties.
- Red cherries – pitted and halved, they bring that lively color and tartness; fresh is ideal but canned work in a pinch.
- Brown sugar – provides caramel notes and pairs beautifully with apples and cherries.
- Cornstarch – thickens the fruit juices so the filling isn’t runny; essential for a slice that holds.
- Ground cinnamon – warm spice that complements both fruits; feel free to add a pinch of nutmeg for depth.
- Vanilla extract – rounds and ties flavors together subtly.
- Egg – beaten and used as an egg wash to create a glossy, golden crust.
- Sugar crystals or coarse sugar – for sprinkling on top, adds shine and a pleasant crunch.
Notes on sourcing and substitutions: use the ripest cherries you can find for the most flavor. If you’re health-conscious, try part whole-grain pastry flour for nuttiness (don’t exceed 25% whole grain or the crust can turn dense), or swap some brown sugar for a natural sweetener like maple syrup — but remember syrup adds liquid, so reduce a tablespoon of the cold water if you go that route.
Step-by-Step Instructions
- Make the crust: Cut butter into flour. In a mixing bowl stir together flour and salt. Toss the cold cubed butter into the flour and use a pastry cutter, two knives, or your fingertips to work the butter until pieces are about pea-sized. You’ll still see small lumps — that’s good. The butter pieces are what make the crust flaky. If the butter starts to soften or gets greasy in your hands, pop the bowl in the fridge for 10 minutes and continue.
- Hydrate the dough. Make a well and pour in ice-cold water. Use a fork to bring the flour together into a shaggy dough. The mixture will look dry in places — that’s fine. You want just enough water so the dough holds when pressed. If it’s crumbly after 6 quick pinches, add another tablespoon of water. Too wet? Fold in a tablespoon of flour.
- Form and chill the dough. Turn the dough onto plastic wrap and fold it over itself a couple times — don’t overwork it. Shape into two flattened discs, wrap, and chill for at least 2 hours or overnight. Chilling relaxes the gluten and keeps the butter cold, both crucial for a tender, flaky crust. I often chill overnight; the dough is easier to roll and less likely to shrink in the oven.
- Roll the bottom crust. On a lightly floured surface, roll one disc to about 1/8″ thickness, lifting and rotating to avoid sticking. It helps to lightly dust the rolling pin. Roll the dough onto your pin and unroll it over a 10″ pie dish. Gently press into the edges. Leave about a 1″ overhang. If the dough resists or tears, let it rest in the fridge 10 minutes and try again.
- Prepare the filling. In a large bowl toss sliced apples, pitted cherries, brown sugar, cornstarch, cinnamon, and vanilla. Cornstarch is the thickener; make sure fruit is thoroughly coated so the juices gel as it bakes. If the fruit tastes bland at this stage, add a pinch more salt — salt brightens flavors more than extra sugar does.
- Assemble the pie. Pile the fruit mixture into the lined pie dish; it will mound high. Roll the second disc and cut into 1″ strips. I like to braid two strips for a decorative accent, then weave the lattice. When laying strips, alternate lifting strips so the lattice locks in place. Trim the edges, fold the overhang under itself and crimp with your thumb and forefinger for a neat rim.
- Egg wash and sugar. Brush the assembled crust with beaten egg and sprinkle with coarse sugar. This gives a glossy, golden finish and little sweet crunch. If you prefer less shine, use milk instead, but egg gives the most color.
- Preheat the oven and initial high-heat bake. Preheat oven to 425°F. Place the pie on a rimmed baking sheet to catch any bubbling juices. Bake at 425°F for 15 minutes — this blast of heat sets the crust quickly so the bottom won’t become soggy.
- Lower temperature and finish baking. After 15 minutes reduce oven to 350°F and continue baking for 50–55 minutes, until the crust is a deep golden brown and the filling is actively bubbling through the lattice. If the edges brown too quickly, tent with foil for the remainder of the bake. A thermometer poked through an opening should read hot and the filling should be glossy and thick.
- Cool and set. Let the pie cool for at least 1–2 hours. The filling will thicken as it cools; slicing too soon makes a watery slice. I usually wait until I can hold the bottom of the dish comfortably before cutting — that’s my cue it’s safe to slice.
Common pitfalls while following these steps: overworking the dough will develop gluten and produce a tough crust; if the crust is soggy, the most likely culprits are warm butter, too-wet fruit, or slicing the pie too soon. If the filling looks too thin before baking, toss the fruit with an extra teaspoon of cornstarch. If the top browns too quickly, shield with foil.
Tips for the Perfect Pie Crust
Pie crust is deceptively simple and forgiving if you respect a few rules. I test crusts in my own kitchen and these steps save the pie more times than any fancy technique.
- Keep everything cold – butter and water should be ice cold. Cold butter melts as it bakes and creates steam pockets that give you flakiness.
- Measure flour correctly – spoon flour into the cup and level it off if using cups. Too much flour = dry, crumbly dough.
- Don’t overwork the dough – fold just until it holds. A shaggy dough gives a better texture than a smooth, elastic one.
- Rest the dough – chill at least 2 hours or overnight. Resting relaxes gluten and firms the butter.
- Freeze for rolling if needed – if the dough warms while you’re rolling, a quick 10–15 minute stint in the freezer keeps it workable.
- Prevent shrinkage – let the dough relax after rolling on the counter for 10 minutes in the fridge and dock/poke if blind-baking. Overstretching the dough into the pan will create tension and shrinkage when baked.
For foolproof results, follow our all-butter flaky pie crust guide with step-by-step photos and troubleshooting tips.
Creative Variations on the Recipe
While the classic cherry + apple pairing is my go-to, there are small, tested variations that change the personality of the pie without breaking it.
- Spice it up – add 1/4 teaspoon nutmeg or cardamom for complexity. I like a touch of ground ginger in winter for warmth.
- Mix apples – use half tart (Granny Smith) and half sweet-crisp (Honeycrisp) for balanced flavor and texture.
- Crumb topping – swap the lattice for a buttery streusel (butter, flour, brown sugar, oats) for a rustic finish that’s especially good with the cherries’ brightness.
- Healthy swaps – replace some white flour with whole-grain pastry flour and reduce sugar slightly; use applesauce to replace a small portion of butter in the crumble, not in the pie crust.
- Shortcut idea – for a deeper apple flavor or an easy shortcut, try swirling in homemade slow-cooker apple butter as a variation on the filling.
Serving Suggestions & Pairings
Serving a pie is where it becomes a meal memory. A warm wedge with melting ice cream is my go-to, but here are a few tried combinations I reach for depending on the season.
- Vanilla ice cream – cold and creamy contrasts the warm, slightly sticky filling; the best classic match.
- Homemade whipped cream – a lightly sweetened whipped cream with a touch of vanilla keeps it light and elegant.
- Caramel drizzle – warm salted caramel over a fall slice makes a cozy, decadent plate.
- Beverage pairings – try a small cup of black tea or a fruit-forward white wine; the pie’s sugar and spice profile works well with both.
Pair a warm slice with a cup of Cherry Earl Grey milk tea for a delicate, fruit-forward beverage that complements the pie.
Nutritional Information
The original tested recipe gives the following nutrition for the entire pie: approximately 3958 kcal, 196 g fat, 517 g carbohydrates, and 47 g protein. These totals reflect the full batch as prepared with an all-butter crust and the fruit filling as listed. If you slice the pie into eight pieces, a rough estimate per serving would be around 495 kcal, though this will vary with portion size and any toppings such as ice cream.
If you’re aiming for lighter options: reduce the sugar modestly, use part whole-grain pastry flour, or serve smaller slices with fruit on the side. For calorie-conscious swaps, remember that cutting fat in the crust changes texture — replace only a portion at a time and accept a different mouthfeel.
If you’re looking for a lighter dessert alternative, consider our healthy pumpkin pie smoothie as a lower-calorie option with seasonal flavor.
FAQ
- Do I need to prebake (blind bake) the bottom crust?
No — for this cherry apple pie you don’t need to prebake the bottom crust. Chilling the dough, starting the bake at 425°F to set the crust, and using a baking sheet to catch drips are enough. Prebaking is usually only necessary for custard pies or very wet fresh-fruit tarts; pie weights help if you do blind-bake. - Can I use canned cherries instead of fresh?
Yes. Drain and rinse canned cherries to remove excess syrup, then add them to the filling. Because canned cherries can be sweeter/wetter, you may want to reduce any added sugar slightly and ensure you toss them with the cornstarch so the filling thickens properly. - How can I prevent a soggy bottom crust?
Key steps: keep ingredients and dough cold, chill or freeze the dough before rolling, toss fruit with cornstarch to thicken juices, drain very wet fruit, start baking at 425°F for 15 minutes then lower the temp, bake the pie on a rimmed baking sheet, and let the pie cool 1–2 hours so the filling sets before slicing. - What apples are best for a cherry apple pie?
Use firm, tart or balanced apples that hold their shape: Granny Smith, Honeycrisp, Braeburn, or Pink Lady are great choices. You can mix varieties for more depth of flavor—just avoid very soft or mealy apples. - How should I store and reheat leftover pie?
Let the pie cool completely, then store loosely covered at room temperature for up to 2 days or refrigerated for up to 4 days. Freeze whole or slices (wrapped well) for up to 2 months. To reheat, warm in a 325–350°F oven for 10–20 minutes until heated through; reheating in the microwave can make the crust soggy.
Conclusion & Call to Action
Making cherry apple pie is one of those projects that rewards patience: a cold dough, a quick high-heat start, and a resting period after baking give you a slice that’s both visually pretty and reliably delicious. I love that this pie is flexible — perfect for summer cherries or late-fall fruit — and that small adjustments let you tailor sweetness and spice. Try it as written the first time to get a feel for how the filling sets and how the crust bakes, then experiment with mixes of apples or a crumble top.
If you make this pie, tell me what you changed: did you mix apples, add extra spice, or swap the lattice for a crumb top? Share your photos and notes in the comments below — I read them and I’ll answer. If you enjoy tested, home-kitchen recipes like this, consider subscribing so you won’t miss the next one. Happy baking — may your crust be flaky and your filling perfectly set.
Cherry Apple Pie
Ingredients
Method
- Cut butter into flour: Stir together flour and salt, then cut in cold butter until pea-sized pieces form.
- Hydrate flour: Make a well in the flour, pour in ice cold water, and mix until a shaggy dough forms.
- Form dough: Turn dough onto plastic wrap and form into a disc. Chill for 2 hours or overnight.
- Bottom crust: Roll out first disc and fit into pie dish. Trim excess leaving 1" overhang.
- Make filling: Mix apple slices, cherries, brown sugar, cornstarch, cinnamon, and vanilla.
- Add filling: Pour filling into pie dish over bottom crust.
- Top crust: Roll out second disc, cut strips for lattice, and arrange over pie filling.
- Crimp the crust: Fold edges over and crimp to seal.
- Preheat oven: Preheat to 425°F.
- Egg wash: Brush beaten egg over dough and sprinkle with sugar.
- Bake: Bake at 425°F for 15 minutes, lower to 350°F and bake for 50-55 minutes.
- Cool: Let cool for 1-2 hours before slicing and serving.