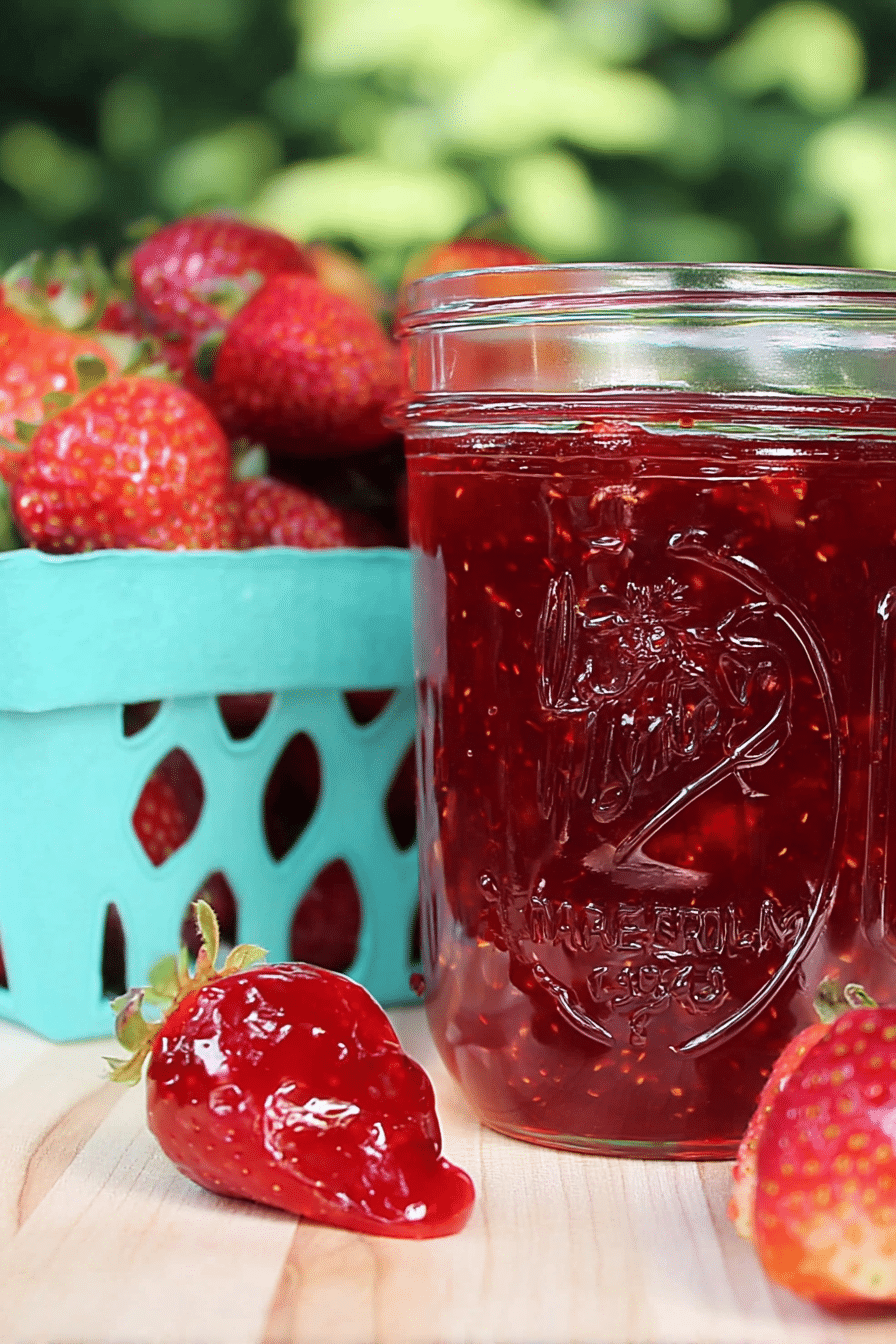
I still remember the first time I boiled strawberries into jam in my grandmother’s tiny kitchen: the room filled with a syrupy, bright scent that felt like holding summer itself. Years later, I make this same simple jam whenever berries are at their peak. I like the ritual of it — crushing fruit by hand, watching the color deepen, and hearing the satisfying pop as jars seal.
In my kitchen, jam-making is both practical and a little ceremonial. I choose berries that smell floral and look vivid — that aroma carries through the cooking and into the jars. Over the years I’ve learned which small choices make a jar clearer, a flavor truer, and a shelf-life longer.
Whether you’re preserving for your own winter breakfasts or wrapping jars as gifts for friends and family, this classic method keeps the fruit’s brightness front and center. I’ll share the techniques I rely on, plus a few shortcuts and variations that have rescued me when time or pectin ran low.
Why This Classic Strawberry Jam Captures Summer in a Jar
The best jam keeps the fruit ahead of everything else: its color, aroma, and natural sweetness. When strawberries are ripe they bring a bright acidity and a perfume that transforms when cooked into a warm, rounded sweetness. Making jam presses a season into a simple preserving process — the smell of the pot, the glossy sheen of the finished preserve, and the pop of sealed lids all feel like rites of summer.
Jam-making also carries cultural weight; families trade jars at holidays and hand down tips about which berries work best, how long to cook, and whether to skim foam. These small choices become traditions, and a jar taken from the pantry can trigger memory as easily as flavor.
Everything You Need for Classic Strawberry Jam
Gathering the right tools makes the work smooth and keeps your jam clear and attractive. Here’s what I use and recommend; if you’re missing something, there are sensible substitutes listed beside each item.
- Strawberries – The hero ingredient; choose ripe, fragrant berries for the best flavor. Overripe fruit can add natural pectin and sweetness.
- Sugar – Balances acidity and helps the jam set; you can adjust amounts in the recipe card, but understand reducing sugar may affect texture and preservation.
- Fruit pectin – Gives a reliable set when fruit alone won’t provide enough; there are boxed and powdered forms with different setting strengths.
- Butter or fat – A small amount helps reduce foam so your jars look cleaner.
- Large, heavy-bottomed pot – Prevents scorching and allows a steady boil.
- Spoons and a wide funnel – Makes ladling hot jam into jars easier and safer.
- Canning jars and lids – Mason-style jars work well; sterilize jars and use new lids for best seals.
- Water-bath canner or deep pot – For processing jars; a deep pot with a rack will do if you don’t have a canner.
- Optional thermometer – Helpful but not required; I rely on visual cues and simple tests most of the time.
The Secret to the Perfect Jam Texture
Texture comes down to three simple things: pectin, sugar, and cooking. Pectin forms the network that traps liquid, sugar helps pectin set and balances acidity, and cooking concentrates flavors and reduces water so the jam thickens. Watch the way the mixture changes — it will go from runny to glossy and then to a fuller, syrupy thickness that holds its shape when spooned.
Don’t fear a little variability: jam that’s slightly softer tastes fresh and spreads easily, while a very firm jam can feel more like a preserve. Aim for a glossy sheen and a body that clings to a spoon without immediately running off.
Why Sugar and Pectin Ratios Matter
Sugar does more than sweeten: it stabilizes the gel and preserves the fruit. Too little sugar and the jam may stay loose and spoil faster; too much and the jam can taste cloying or crystallize. Pectin brands differ, so follow package guidance for the style you choose and remember that natural pectin levels vary by fruit ripeness — underripe fruit has more, overripe fruit has less.
Think of ratios as a dialogue between texture and flavor. If you want a less-sweet spread, prepare to cook a little longer and accept a softer set, or use a pectin designed for low-sugar jams.
How to Make Classic Strawberry Jam (Step-by-Step)
- Prepare fruit: hull and crush the strawberries so you have a mix of small pieces and juice; taste and remove any off berries.
- Measure sugar into a bowl and keep it nearby so you can add it quickly when the time comes.
- Stir the pectin into the crushed fruit and add a small knob of butter to minimize foam.
- Place the pot over medium-high heat and bring the mixture to a vigorous, rolling boil that continues bubbling when stirred.
- Once at a rolling boil, add the sugar all at once and stir until dissolved; return immediately to a full, rolling boil.
- Boil for the short time your pectin instructions call for while stirring constantly; watch for the texture to thicken and the bubbles to change character.
- Remove the pot from the heat and skim any foam from the surface for a clearer jar presentation.
- Ladle hot jam into clean jars using a wide funnel, wipe rims with a clean cloth, place lids on, and tighten bands fingertip-tight.
- Process jars in a boiling water bath so water covers the jars by an inch or two; if you don’t have a canning pot, a deep stockpot with a rack works well. Remove jars carefully and let cool undisturbed.
- When jars are cool, check seals: lids that don’t flex when pressed are sealed. Store sealed jars in a cool, dark place.
How to Tell When Your Jam Has Reached ‘Set’ — Without a Thermometer
You don’t need a thermometer to know when jam is done; your eyes and a simple spoon provide reliable cues. Watch the bubble pattern and use the spoon test to confirm. I rely on these sensory checks every time I cook.
- Spoon test: dip a chilled metal spoon into the jam, let a little drip off, then run your finger through the coating; if it leaves a clear path that doesn’t immediately run back together, the jam is near set.
- Sheeting bubbles: look for thick, slow-rising bubbles that break the surface more slowly than in the early boil.
- Color and shine: the jam will darken slightly and take on a glossy sheen as water reduces and sugars concentrate.
- Plate test (optional): place a small spoonful on a chilled saucer, tip it after a minute — if it wrinkles slightly or holds together, it’s ready.
Pro Tip for classic strawberry jam: No-Pectin Option & Speed-Cooking
- No-pectin (quick) method: cook crushed fruit with additional sugar and a splash of lemon juice until the mixture reduces and thickens. Expect a softer set and a fresher fruit flavor.
- Use naturally high-pectin fruit: combine strawberries with a small amount of underripe berries or a bit of apple to boost natural pectin and reduce added pectin needs.
- Speed-cooking: increase heat to accelerate reduction, but stir frequently and use a heavy pot to avoid scorching; watch the spoon and bubble tests closely.
- Make small batches: smaller volumes concentrate faster, which shortens cooking time and helps preserve bright color and flavor.
How to Store, Can, and Gift Your Strawberry Jam
Proper canning preserves flavor and prevents spoilage. Process jars while the jam is hot, and ensure water fully covers the jars during the boiling water bath. After cooling, label jars with date and variety so you can rotate your pantry stock.
Your homemade jam can beautifully complement desserts like strawberry mousse for gifting. If you plan to give jars as presents, consider pairing them with a small loaf or boxed scones for a lovely bundle.
For presentation, wrap the lid with a square of fabric tied with twine, add a handwritten tag, and include a suggested pairing. Consider pairing your jam with strawberries and cream scones in a gift box — it’s a simple way to make a jar feel special.
Creative Variations: Elevate Your Jam Game
- Basil or mint: stir in finely chopped fresh herbs just after removing the jam from heat for a fragrant, summery twist.
- Balsamic reduction: a small splash of aged balsamic vinegar deepens flavor and adds savory balance to very sweet fruit.
- Spiced: add a cinnamon stick or a few crushed cloves during cooking and remove before canning for a warm note.
- Fruit blends: mix strawberries with rhubarb, peaches, or raspberries for interesting textures and flavor contrasts.
- Try adding a layer of our easy strawberry cold foam on top of your jam for a delightful twist when serving, or turn your classic jam into a delicious topping for strawberry cheesecake tacos to impress guests.
Troubleshooting Common Jam-Making Problems
- Jam too runny — Cook it longer to concentrate sugars and water; you can also add a little more pectin following package instructions. I’ve gently simmered a thin batch in a wide pan to speed evaporation with good results.
- Jam too stiff or rubbery — This can happen if you overcook or use too much pectin; gently remelt with a little water and reprocess if necessary.
- Excess foam — A dab of butter early in cooking helps, and skimming the foam before canning keeps jars clear. I always keep a small spoon for skimming handy.
- Lids won’t seal — Make sure rims are clean before placing lids, use new sealing lids, and process jars for the full recommended time. If a lid didn’t seal, refrigerate and use the jam first.
- Off-flavors or dark color — Overcooking or using overripe fruit can affect flavor and color; aim for a steady boil but remove from heat once the set is achieved.
Nutritional Information and Dietary Swaps
Jam is concentrated fruit and sugar; it delivers fruit flavor in a spoonable form but should be enjoyed in moderation. For lower-sugar options, use pectin formulated for reduced-sugar recipes or try a no-pectin recipe with less sugar and a softer set. Sugar alternatives and sugar-free pectins are available, but texture and shelf stability may change.
If you’re watching calories or sugar intake, consider small jars as gifts and pairings that stretch flavor — a little jam on plain yogurt or lightly buttered toast goes a long way. Natural preservatives include proper canning methods and acidity from added lemon juice.
Frequently Asked Questions
Can I use frozen strawberries for this jam recipe?
Absolutely! Frozen strawberries work well, just make sure to thaw and drain any excess liquid before crushing.
What can I substitute for pectin in jam making?
If you prefer to avoid pectin, you can use extra sugar and lemon juice to help your jam set. However, your texture may vary.
How long will my strawberry jam stay fresh?
Properly canned strawberry jam can last for up to a year in a cool, dark place. Once opened, keep it in the refrigerator and use within a few weeks.
What is the purpose of adding butter to the jam?
Adding butter helps reduce foam during cooking, making for a clearer jam and a better presentation.
Can I reduce the sugar in this recipe?
You can reduce the sugar, but keep in mind it may affect the setting and preservation of the jam.
Classic Strawberry Jam
Ingredients
Method
- Pour the crushed strawberries with all the juices into a large pot. Measure the sugar into a separate bowl and set aside. Stir the package of pectin into the strawberries and add the butter.
- Stirring frequently, bring the strawberry mixture to a full rolling boil, and then add the sugar. Stir to fully incorporate.
- Return the mixture to a full, rolling boil and boil for exactly 1 minute, stirring constantly.
- Remove the pot from the heat. Skim any foam from the surface.
- Ladle quickly into clean jars. Wipe the rims of the jars with a clean cloth.
- Place the lids on the jars and tighten the bands to 'fingertip tight,' meaning snug but not too tight.
- Place the jars in a canner and process for 10 minutes. The water should cover the jars by an inch or two. Carefully remove the jars from the canner.
- Cool completely before storing. Make sure all lids have sealed properly before storing.