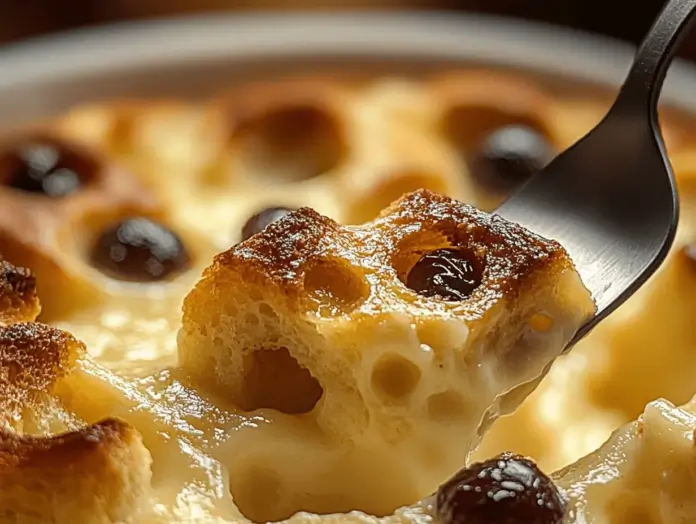
I remember the first time I made butter tarts — a rainy Saturday when I wanted something comforting that didn’t require fuss. The kitchen smelled like warm butter and brown sugar within ten minutes, and by the time the first tart came out of the oven the top had a glossy, caramel sheen that made me poke it with my finger despite knowing better. That little wobble that firmed as it cooled told me everything: this is exactly what a butter tart should be.
Butter tarts are an iconic Canadian treat — tiny individual pies filled with a rich, sweet, caramelized filling and enclosed in a flaky pastry shell. They show up at church bake sales, holiday platters, and sometimes just on a Tuesday because someone in the house wanted a sweet snack. Their history is tied to early Canadian home baking, where simple pantry ingredients like butter, sugar, eggs, and syrup produced something that felt indulgent and celebratory. The contrast is what gets me every time: a tender, slightly crisp shell giving way to a warm, gooey center that’s sweet but layered with buttery depth.
Ingredients Needed for Easy Classic Butter Tarts
- Pre-made tart shells – an easy shortcut that gives consistent, flaky shells; great when you need less hands-on time.
- Unsalted butter – brings richness and helps the filling caramelize; use unsalted so you can control the salt level.
- Brown sugar – gives the filling that deep, molasses-like flavor and a softer caramel texture than white sugar.
- Golden corn syrup – helps keep the filling glossy and stable; if you don’t have it, I explain alternatives below.
- Egg – provides structure so the filling sets but still stays slightly wobbly inside.
- Salt – a pinch brightens the sweetness and balances the caramel notes.
- Vanilla extract – rounds the flavors and adds warmth.
- Lemon juice – a little acidity lifts the sweetness and keeps the filling from tasting flat.
- Chopped pecans – optional for texture and a toasty note; toasted first for best flavor.
- Dried fruit – raisins or currants are traditional and add a chewy contrast.
- Chocolate – chips or small chunks for those who like a richer, gooey tart.
Glossary note: “corn syrup” in North American recipes usually means a light, clear syrup used to keep fillings soft and glossy. If it’s unfamiliar, think of it as a stabilizer that prevents recrystallization, keeping your tarts smooth.
Step-by-Step Instructions
Below are the tested steps I use each time. I make a 12-tart batch because that fits my muffin tin and gives me enough to share. Exact baking times and temperatures are important, so they’re included where they matter.
- Prepare the tart shells according to the product packaging if using pre-made shells. Arrange them in a standard 12-cup tart or muffin pan so they stay upright while baking.
- Preheat the oven to 375°F (190°C). A hot oven helps the pastry set quickly and encourages the filling to caramelize without burning.
- Melt about a third of a cup of unsalted butter and let it cool slightly until it’s warm but not hot — you don’t want to cook the egg when you add it. In a mixing bowl, stir the melted butter with 1 cup of packed brown sugar and 1/3 cup of golden corn syrup until the sugar is mostly dissolved.
- Add one room-temperature egg (whisked), a quarter teaspoon of salt, 1 teaspoon of pure vanilla extract, and 1 teaspoon of lemon juice. Whisk until smooth. The egg must be room temperature so it folds into the warm mixture without curdling; if you add a cold egg to warm butter, you risk scrambling it.
- If you’re using add-ins (see the next section), fold them into the filling now. Keep additions modest: about 1–2 tablespoons per tart or a small handful for the full 12-tart batch. Too much mix-in will throw off the set of the filling.
- Fill each tart shell about three-quarters full. The filling puffs slightly as it bakes and will settle; overfilling leads to spills and thin edges that bake too long.
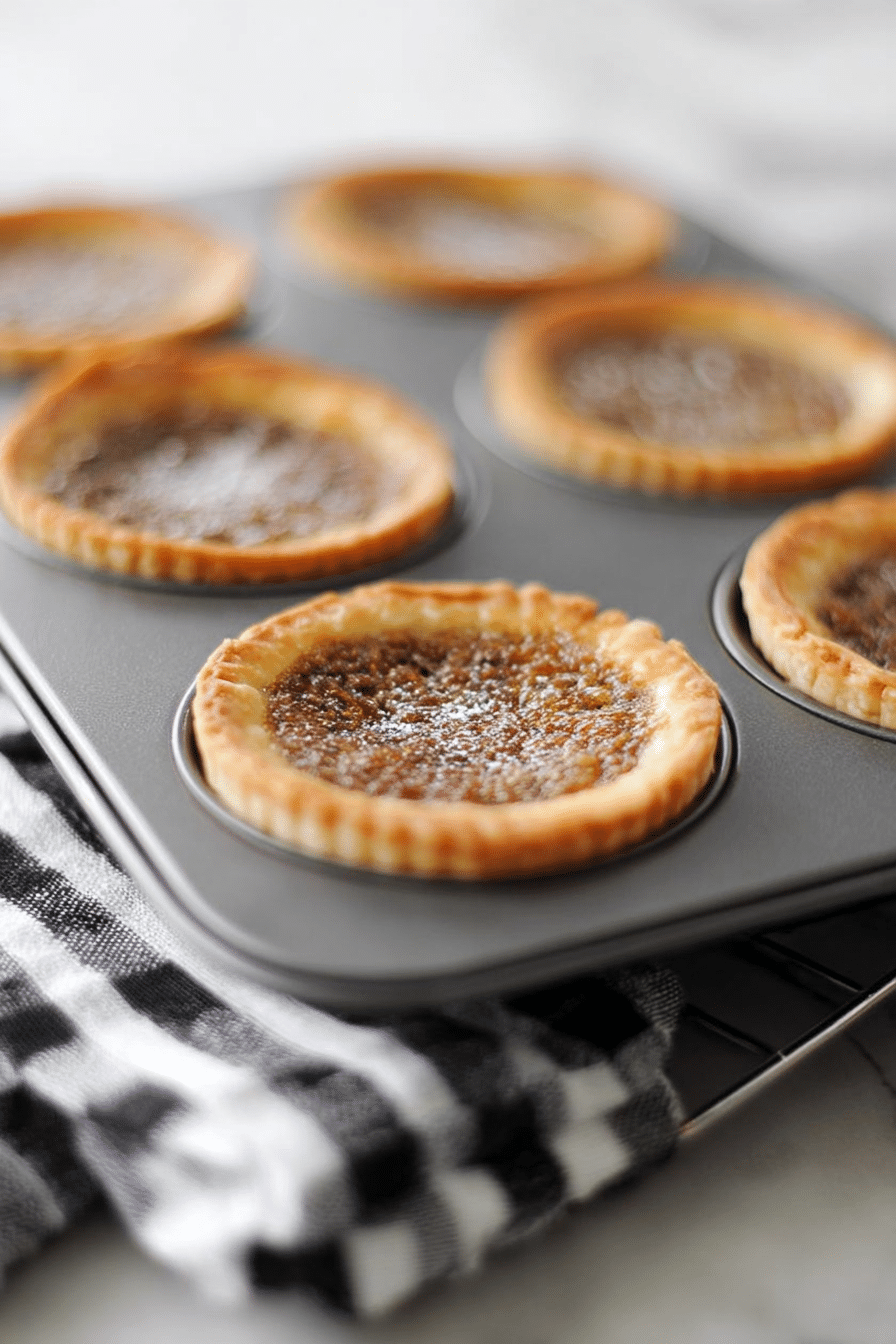
- Bake at 375°F (190°C) for 16–17 minutes. Look for golden edges on the pastry and a filling that’s bubbling and turning a light caramel color on top. If the tops are still pale and the filling is not bubbling by 16 minutes, give them another minute or two, but watch closely — the difference between glossy caramel and burnt sugar can be minutes.
- Remove the tarts and let them cool in the pan for at least 20–30 minutes; they’ll be soft when hot but set beautifully as they cool. Resist the urge to cut one immediately — the centers will firm up as they come to room temperature.
Tips for Using Store-Bought vs. Homemade Pastry
Confession: I use store-bought tart shells when I’m short on time, but I make a flaky all-butter pastry when I’m hosting. Both work — they just give different results.
Store-bought pros: convenience, consistent size and shape, and minimal cleanup. Look at labels and choose shells made with butter (or shortening for a slightly different texture) and minimal trans fats. If the package instructs you to prebake, follow that step — a soggy bottom is the usual fail when pastry isn’t handled correctly. Store-bought shells bake quickly, so watch them closely the first time you try a new brand.
If you want a tender, flaky shell for your butter tarts, try our all-butter flaky pie crust recipe for a reliable homemade pastry option.
Homemade pastry pros: flavor control and texture. When I make pastry from scratch, I use cold butter and just enough ice water to bring the dough together. Keep the dough cold — warm butter is what ruins a flaky crust. Roll it out gently and refrigerate the shells briefly before filling to prevent shrinkage. Homemade shells often take a minute or two longer in the oven because they start colder.
Delicious Add-Ins: Nuts, Chocolate, and Fruit
I’ve tried a lot of variations, and modest additions are best — they should complement, not overpower, the classic buttery-syrupy filling.
- Chopped pecans – toasty, crunchy contrast; fold in or place a couple on top of each tart before baking.
- Raisins or currants – traditional, chewy pockets of fruit; soak briefly in hot water or rum for plumpness.
- Chocolate chips – small chips melt into pockets of gooey chocolate that play nicely with the caramel filling.
- Caramel bits – add a chewier texture and deeper caramel flavor; be cautious—too many will throw off the filling’s set.
- Fresh fruit – not typical but thinly sliced apples or pear bits can give a seasonal twist if kept minimal.
Consider adding chopped pecans and a drizzle of maple for a fall-inspired twist—see how we use maple and pecan in this maple and pecan recipe for inspiration.
If you like gooey textures, consider a marshmallow or caramel twist inspired by our caramel marshmallow rice krispie balls.
Nutritional Information and Health-Conscious Alternatives
A traditional butter tart is an indulgence. For the classic version I make regularly, a single tart is about 140 kcal with roughly 9 g fat, 13 g carbohydrates, and 1 g protein. That’s enough to know these are a treat, not a daily snack — but they’re small, so moderation helps.
If you want to make lighter versions, here are successful swaps I’ve tested and what to expect:
- Reduce sugar – swapping part of the brown sugar for a natural sweetener (like a darker-tasting, less processed sugar) can lower sweetness, but the texture of the caramel will change. If it tastes flat, add a tiny pinch of salt rather than more sweetener.
- Lower-fat options – using a light butter blend will produce a less rich filling and a slightly softer set. The flavor will be milder; you might add a touch more vanilla to compensate.
- Dairy-free – I’ve made a version with vegan butter or coconut oil. Coconut oil can add a faint coconut note and makes the filling slightly more fragile; chill the tarts longer before serving to help the set.
- Egg-free – this is trickier because the egg helps the filling set. Aquafaba can work for a slightly different texture, but the filling may be looser and needs extra chilling.
These swaps work but change the classic experience. If you care most about texture, small, measured changes are better than wholesale replacements.
Variations on the Classic Recipe
Over the years I’ve settled on a few go-to variations that I’ll return to when I want a crowd-pleasing twist:
- Mini butter tarts – make them in a mini muffin tin for bite-sized treats at parties. Reduce baking time slightly and watch for quicker browning.
- Spiced butter tarts – add a pinch of cinnamon and cardamom to the filling for warmth. It’s lovely in winter and pairs well with toasted pecans.
- Maple-pecan – replace some corn syrup with pure maple syrup and add chopped pecans for a Canadian twist with extra depth.
- Chocolate-dipped – once cooled, dip half the tart in melted dark chocolate for a showy finish.
Pairings: these tarts are brilliant with a dollop of whipped cream, a spoon of vanilla ice cream, or simply by themselves with a strong cup of coffee.
Serving Suggestions and Pairings
I like to serve butter tarts warm or at room temperature. Warm tarts feel indulgent, with the filling silky and slightly more fluid; room-temperature tarts let the center set to a spoonable texture that’s satisfying without being runny. If serving at a gathering, bake them ahead and rewarm briefly in a 300°F oven for 5–7 minutes — that revives the glossy top without overcooking.
For a cozy pairing, serve warm butter tarts with a cup of Cherry Earl Grey milk tea to balance the sweetness.
Presentation ideas: place the tarts on a rustic wooden board with a few toasted pecans scattered around. If it’s a holiday, dust lightly with powdered sugar or drizzle a thin ribbon of dark chocolate. If you want to store them for a platter later, slice them from the fridge into even pieces so they look tidy and hold their shape.
Storage: cooled tarts keep well in an airtight container at room temperature for up to 2 days, and in the fridge for up to 5 days. To freeze, cool completely, freeze in a single layer on a sheet, then bag them for up to 1 month. Reheat gently so the filling loosens again; avoid microwaving too long or the pastry can get soggy.
Conclusion and Encouragement to Try the Recipe
Butter tarts are one of those simple, homey desserts that reward a little patience and attention. The technique is straightforward — warm melted butter, brown sugar, a splash of corn syrup, an egg, and a bit of acid and vanilla — but the result is layered: buttery, sweet, slightly tangy, and texturally satisfying. I’ve made these dozens of times; sometimes I skip an add-in because I ran out of raisins, other times I go all-in with pecans and chocolate for company. Both ways work, and both ways remind me why I keep the basic ingredients stocked.
If you try them, watch the filling in the oven and learn the cue of the glossy top becoming caramel-colored and slightly bubbly. That’s the moment to take them out. Let them cool, and you’ll be rewarded with a little tart that tastes like time spent well in the kitchen.
FAQ
- How long and at what temperature should I bake these butter tarts? Bake at 375°F (190°C) for about 16–17 minutes, or until the tart shells are golden and the filling is caramelized. Let them cool so the centers set before serving.
- Can I use store-bought tart shells or should I make pastry from scratch? Yes — store-bought tart shells work great and save time. Choose flaky pre-made shells and follow package prep. Homemade pastry gives more flavor and control but takes longer.
- How do I prevent runny centers in my butter tarts? Use a room-temperature egg, fill shells only about 3/4 full, and bake until the filling is bubbling and slightly caramelized. Cooling completely will also help the filling set.
- What add-ins work well with this recipe? Popular add-ins are chopped pecans, raisins or other dried fruit, and chocolate chips. Add roughly 1–2 tablespoons per tart (or a small handful total for a 12-tart batch) and fold into the filling or sprinkle on top before baking.
- Can I make butter tarts ahead and how should I store them? Yes. Store cooled tarts in an airtight container at room temperature for up to 2 days or in the fridge for up to 5 days. Freeze cooled tarts in a single layer, then bag for up to 1 month; gently reheat before serving if desired.
Easy Classic Butter Tarts
Ingredients
Method
- Prepare tart shells according to product packaging.
- Melt butter and let cool slightly. Then add brown sugar, corn syrup, egg, salt, vanilla, and lemon juice; stir until well combined. If choosing to use add-ins, stir them in here.
- Pour the filling (about 3/4 full) into prepared tart shells and bake for 16-17 minutes at 375°F or until the tart shells start to turn golden brown and sugar caramelizes. Let cool before serving and enjoy!