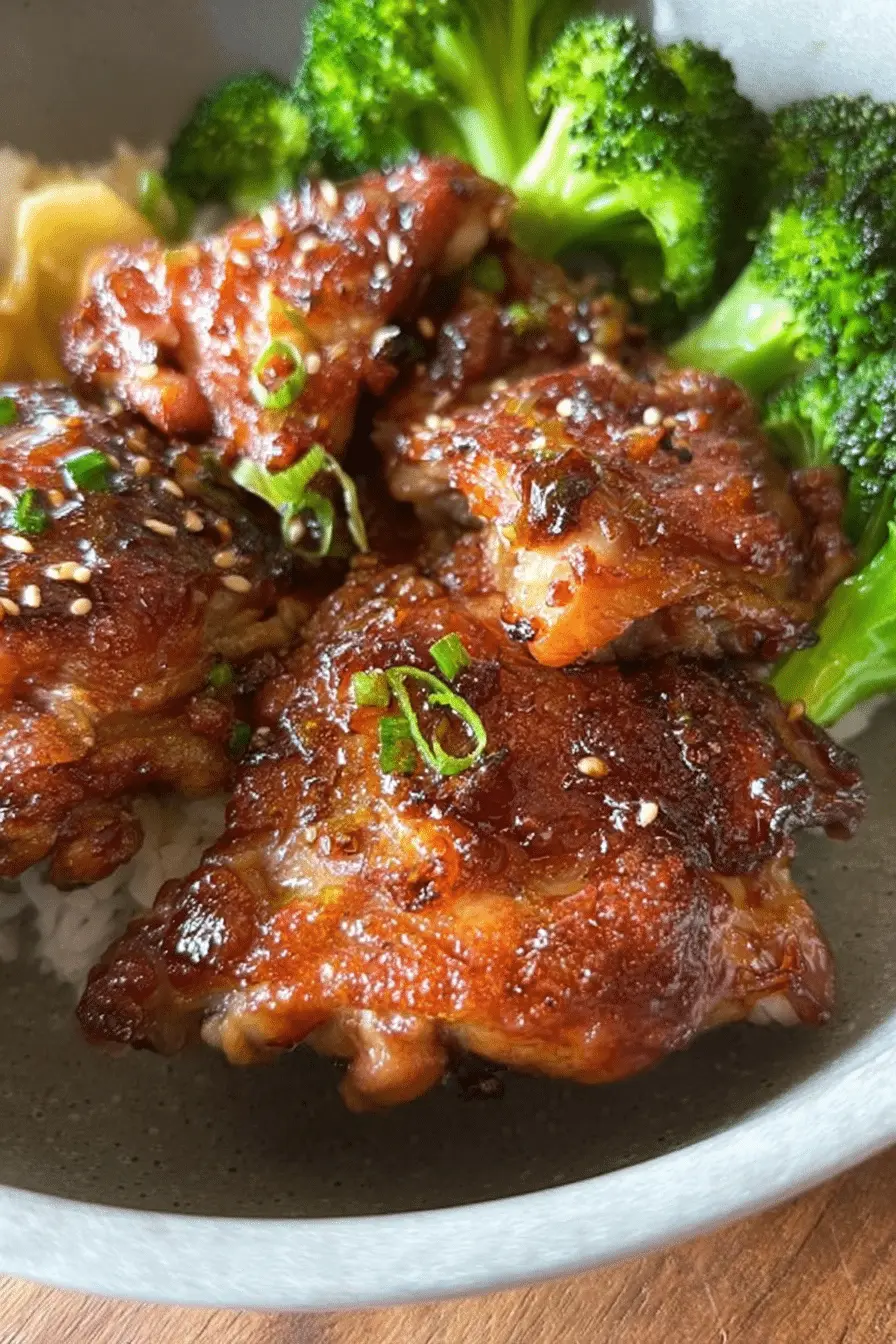
Easy Soy Garlic Chicken Thighs: A Quick Asian-Inspired Delight
- Prep
- 10 min
- Cook
- 20 min
- Total
- 30 min
- Serves
- 4
- Calories
- 300 kcal
On this page12 quick jumps
TOC
12 quick jumps
Introduction
I made these easy soy garlic chicken thighs on a Tuesday night when I pulled a bag of boneless skinless thighs out of the freezer and knew I needed dinner in under an hour. The first thing that hits you is the scent: sweet soy and warm, golden garlic filling the kitchen as the sauce reduces. The chicken ends up glossy and sticky, with little flecks of browned garlic that crunch against tender meat. It’s the kind of dish I rely on when I want something comforting, fast, and skyline-simple: one pan, a bowl of rice, and a few steamed veggies on the side.
Ingredients You'll Need
- Chicken thighs – boneless, skinless pieces are forgiving and stay juicy; thighs handle quick pan-frying better than breasts if you like slightly fattier, tender meat.
- Potato starch – used for a light, crisp coating that gives the sauce something to cling to; it fries up thin and glassy.
- All-purpose flour – adds structure to the coating; swap with more potato starch for gluten-free.
- Garlic – fresh and minced, it browns and becomes sweet; don’t skip it, it’s the backbone of the flavor.
- Green onion – both white and green parts; the white part sautés for savory body while the greens finish the dish with brightness.
- Chicken stock – gives the sauce depth; water + bouillon will work in a pinch.
- Honey – balances salty soy with sweetness; reduce or swap for a sugar substitute to reduce sugar.
- Rice vinegar – adds the acid that keeps the sauce bright and prevents it from tasting flat.
- Dark soy sauce – brings color and umami; for low-sodium pick a light soy and adjust salt accordingly.
- Cornstarch – a small slurry helps the sauce thicken and become glossy.
- Neutral oil – for pan-frying; something with a high smoke point like vegetable or canola oil.
- Red chili flakes – optional, for a touch of heat; use more or less depending on your tolerance.
- Sesame seeds – for garnish and a toasty finish; lightly toasted adds a nutty pop.
Step-by-Step Cooking Instructions (easy soy garlic chicken thighs)
I always follow the same flow: mix the sauce, dry the chicken, coat lightly, fry, then return the chicken to the pan to glaze. Below is the tested sequence with exact times and measurements so you get reliable results every time.- Make the sauce. In a small bowl combine 1/2 cup chicken stock (or sub with water and chicken bouillon), 3 tablespoons honey, 1 tablespoon rice vinegar, 1 tablespoon dark soy sauce, and 1 teaspoon cornstarch. Whisk until the cornstarch is dissolved and set aside. This slurry will thicken quickly, so don’t be tempted to walk away. Note from my stove: if the cornstarch sits too long it can settle — give it a last quick whisk right before you pour it in.
- Prep the chicken. Pat 1 lb of boneless skinless chicken thighs dry with paper towels. Moisture is the enemy of a crisp edge here — I always press down and change towels if needed. If the pieces are uneven, pound the thicker parts lightly for even cooking.
- Mix the coating. On a large plate combine 3 tablespoons potato starch, 3 tablespoons all-purpose flour, 1 teaspoon garlic powder, 1/2 teaspoon salt, and 1/2 teaspoon black pepper. Toss the thighs lightly so they get a thin, even coating; you don’t want a thick batter — just enough to form a delicate crust. Tip: if the coating clumps, shake off the excess. Too much starch will clump and create an odd gummy layer under the sauce.
- Heat the pan and fry the chicken. Heat enough neutral oil in a large frying pan over medium-high heat to cover the bottom (about 3 tablespoons). Once the oil shimmers and a pinch of coating sizzles, add the chicken thighs. Fry until golden brown on both sides — about 7 minutes per side depending on thickness. Cooking cues: you’ll hear a steady sizzle and see the edges turn a deep golden color; that’s when you flip. If the oil smokes, reduce the heat — high heat will burn the coating before the inside’s cooked.
- Remove and rest. Take the chicken out and set aside on a plate. Resting for a minute keeps juices in and gives you space to build the sauce in the same pan.
- Sauté the aromatics. In the same pan (don’t wipe it clean — the fond helps flavor the sauce), add the minced garlic (about 8 cloves) and the white part of 2 stalks of green onion, plus 1 teaspoon red chili flakes. Sauté for about 3 minutes until the garlic turns golden brown and smells nutty — watch closely because garlic can go from golden to bitter fast. Sensory note: the smell shifts from sharp raw garlic to warm, almost sweet roasted garlic right before it browns. That’s your cue to add the sauce.
- Thicken the sauce. Pour the prepared sauce into the pan and stir. Cook for about 1 minute — the cornstarch will take effect quickly and the sauce becomes glossy and slightly thicker. If the sauce isn’t thick enough, remove the chicken, give the sauce another 30 seconds; it will continue to thicken as it heats. Troubleshooting: if the sauce splits or looks grainy, lower the heat and whisk constantly. A tiny splash of cold water whisked in can bring it back together.
- Return the chicken to the pan. Nestle the thighs back into the sauce and spoon it over the top. Cook for another 4–5 minutes, spooning occasionally, until the internal temperature reaches 165°F (74°C) or the juices run clear. The sauce should be thick and coat the chicken in a glossy, clingy glaze. Final cue: the edges will puff slightly and the sauce will cling like syrup. If it’s still watery, let it reduce a minute more — but watch closely so the sugar in the honey doesn’t burn.
- Finish and serve. Turn off the heat and scatter the green parts of the green onion and a sprinkle of sesame seeds over the top. Serve immediately with steamed rice and vegetables.
Health-Focused Variations
This soy garlic recipe is flexible — you can trim calories, cut sodium, or make it plant-forward without losing much of the flavor personality. Below are tested swaps I use when I want a lighter plate.- Low-sodium soy – swap dark soy for a low-sodium soy or tamari; you may want to reduce added salt in the coating. The dish still develops deep umami when you reduce salt gradually.
- Sugar substitutes – halve the honey or use a spoon of maple syrup or a sugar substitute like erythritol; remember sweetness balances acidity and salt, so taste and adjust.
- Gluten-free option – replace the all-purpose flour with additional potato starch or cornstarch and use tamari; the texture will be slightly different — more translucent crust — but still delicious.
- Plant-based alternative – use thick tofu slices pressed dry or seitan cutlets, dusted with potato starch and pan-fried; cook until edges are crisp and reduce the sauce a touch longer for a meatier glaze.
Meal Prep Tips for Busy Weeknights
I keep this recipe in my meal-prep rotation because it reheats very well and the flavors deepen overnight. Here’s how I make it work for several days:- Marinate in advance – combine the sauce (without cornstarch) and toss the chicken in it the night before. The next day, drain (reserve the marinade), coat lightly in the starch-flour mix, pan-fry, and then add the reserved sauce with a fresh cornstarch slurry to finish.
- Cook large batches – double the recipe and fry in two batches so the pan stays hot and you keep a good crust on the chicken. Put chicken and sauce in separate containers if you plan to reheat.
- Storage – cooled chicken goes into an airtight container in the fridge for 3–4 days. For longer storage, freeze portions for up to 2–3 months and thaw in the fridge overnight before reheating.
- Reheating guidance – reheat gently in a skillet over medium heat with a splash of water or chicken stock to loosen the sauce; cover for a minute to let steam warm the interior, then finish uncovered to bring gloss back.
Suggested Sides and Pairings
The rich soy-garlic glaze pairs naturally with simple, textural sides that balance salt and richness. Here are my favorites depending on mood:- Steamed rice – plain jasmine or short-grain rice soaks up the sauce; the contrast of fluffy rice and sticky chicken is classic and satisfying.
- Garlic fried rice – for extra comfort, toss leftover rice in a hot pan with a little oil and minced garlic, then spoon the chicken over the top.
- Stir-fried or steamed vegetables – quick-charred broccoli, snap peas, or baby bok choy bring color and a crunchy counterpoint.
- Cucumber salad – thinly sliced cucumber with rice vinegar and a pinch of sugar cuts through the glaze and freshens the palate.
Unique Serving Suggestions
If you want to present this dish a little differently — for company or just to keep dinner interesting — try one of these easy ideas:- Rice bowls – layer rice, a small pile of quick-pickled cucumbers, and sliced soy garlic chicken. Finish with scallions and sesame seeds for a casual bowl that looks restaurant-ready.
- Salad topper – slice the chicken and serve on mixed greens with shredded cabbage, carrots, and a light sesame-ginger dressing for a lighter meal.
- Sandwich or slider – use soft rolls and add crisp lettuce and a smear of mayo to balance the sticky glaze.
- Garnish and texture – a final squeeze of lime and a scattering of toasted sesame seeds and sliced green onions make the plate pop visually and flavor-wise.
User Reviews and Testimonials
People who’ve made this recipe tend to comment on how forgiving and fast it is. Here are a few collected sentiments I hear often after I share this with friends and family:- “Made this on a weeknight and the kids loved it — sticky and flavorful without being spicy.” — Jenna, home cook
- “I halved the honey and used low-sodium soy. Still very tasty and saved me a few calories.” — Marco, meal-prepper
- “I used tofu instead of chicken and pan-fried until crisp. The sauce clings beautifully — a keeper.” — Priya, vegetarian variant
FAQ
- Can I use chicken breasts instead of thighs?Yes. Use boneless skinless breasts but flatten thicker parts for even cooking and reduce frying time (about 4–6 minutes per side depending on thickness). Watch internal temperature — 165°F (74°C) — to avoid drying out.
- How can I make this recipe gluten-free?Swap the all-purpose flour for more potato starch or use cornstarch in place of the flour, and use tamari or a certified gluten-free soy sauce instead of regular soy. The sauce already uses cornstarch, which is gluten-free.
- Can I meal prep or store leftovers? How do I reheat it?Yes. Store cooled chicken in an airtight container in the fridge for 3–4 days or freeze for up to 2–3 months. Reheat gently in a skillet over medium heat with a splash of water or stock to loosen the sauce — this keeps the glaze glossy and the chicken moist.
- How do I reduce the sweetness or increase the spice?To reduce sweetness, cut the honey by half or use a sugar substitute. To increase heat, add more red chili flakes or a teaspoon of gochujang or sriracha. Balance spicy or tart flavors with a touch more rice vinegar or soy if needed.
- What are good side dishes and garnishes for soy garlic chicken thighs?Serve with steamed rice, garlic fried rice, or noodles and a side of stir-fried or steamed vegetables (broccoli, bok choy, or snap peas). Garnish with sliced green onion and sesame seeds; add a simple cucumber salad or kimchi for brightness.
Conclusion and Final Thoughts
I come back to this easy soy garlic chicken thighs recipe when I want something satisfying that doesn’t take over my evening. It’s quick, forgiving, and adapts well — reduce the honey, use low-sodium soy, or swap in tofu and it still sings. The little things I’ve learned from cooking it repeatedly: pat the chicken dry, don’t overcrowd the pan, and watch the garlic closely. Those three things save the whole dish. Try it this week and see how the glossy sauce and crispy-edged thighs transform simple ingredients into something you want another helping of. If you make it, leave a note about what you swapped or paired with it — I read every comment and I always love hearing about your twists and tricks.Ingredients
- 1 lbchicken thighs boneless skinless
- 3 tbsppotato starch
- 3 tbspall purpose flour
- 1 tspgarlic powder
- 1/2 tspsalt
- 1/2 tspblack pepper
- 3 tbspneutral oil for pan frying
- 8 clovesgarlic (minced)
- 2 stalksgreen onion (green and white parts separated)
- 1 tspred chili flakes
- 1/2 cupchicken stock (sub: water & chicken bouillon)
- 3 tbsphoney
- 1 tbsprice vinegar
- 1 tbspdark soy sauce
- 1 tspcornstarch
- —Green onion (green part)
- —Sesame seeds
Instructions
- 1
Combine the sauce ingredients: chicken stock, honey, rice vinegar, dark soy sauce, and cornstarch. Mix and set aside.
- 2
Dry the chicken thighs with a paper towel. Mix the potato starch, flour, garlic powder, salt, and black pepper on a large plate. Lightly coat the chicken thighs on both sides.
- 3
Heat oil in a large frying pan over medium-high heat. Fry the chicken thighs until golden brown on both sides, about 7 minutes per side.
- 4
Remove chicken, add minced garlic, white part of green onion, and chili flakes to the pan, sauté for 3 minutes. Add the sauce and cook until thickened.
- 5
Return chicken to the pan and cook for an additional 5 minutes until the chicken is cooked and coated in sauce. Serve with veggies and rice.
Recipe Card
Easy Soy Garlic Chicken Thighs: A Quick Asian-Inspired Delight
Keep it handy for later, send it to someone cooking with you, or open the clean print view.
- Prep
- 10 min
- Total
- 30 min
- Serves
- 4
You might also like
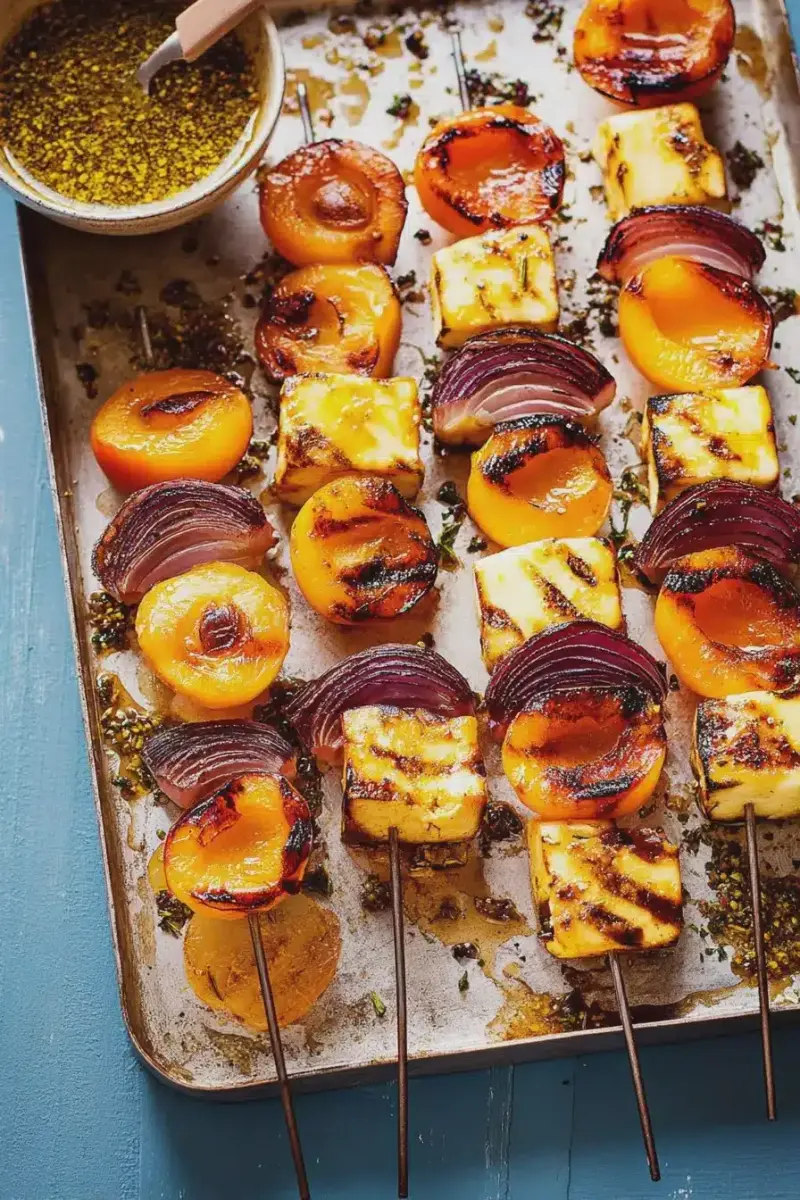
The Skewers I Make Every BBQ — Halloumi, Apricot & Pistachio
May 20, 2026

The Roasted Plum Crostini Appetizer I Make for Every Fall Gathering
May 20, 2026
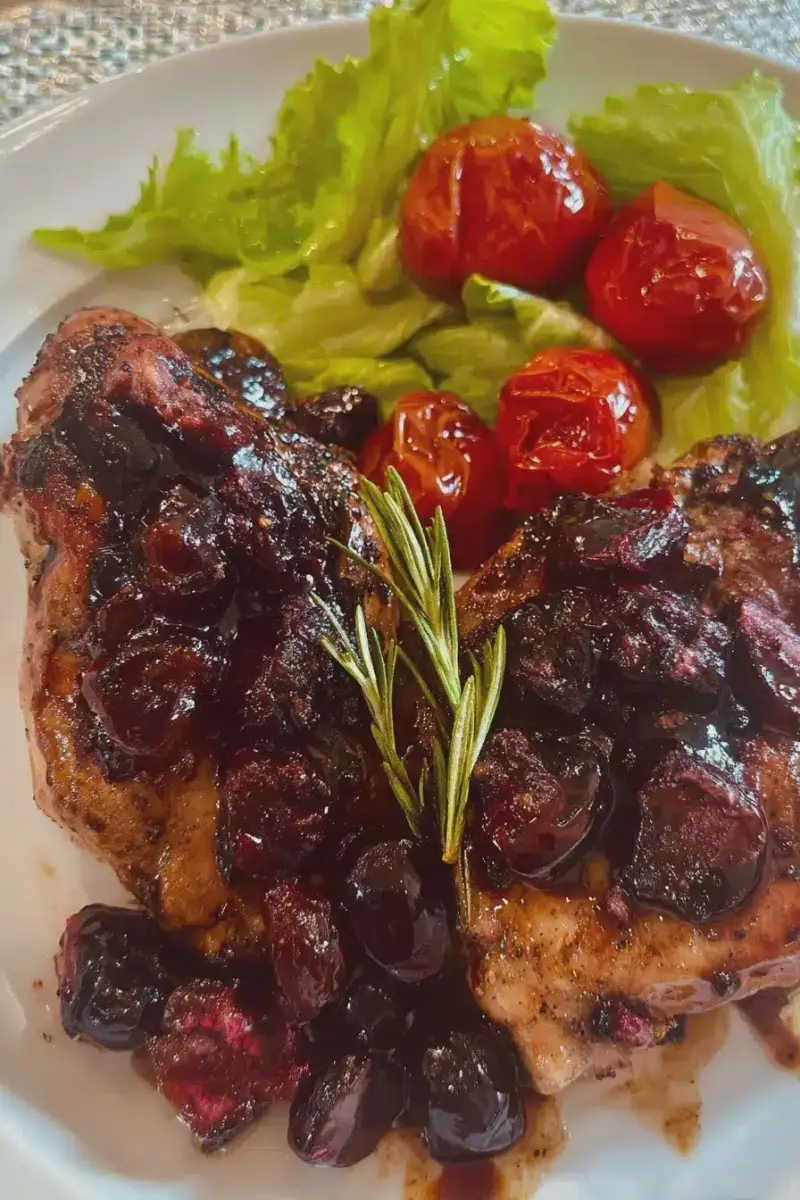
How I Make Cherry Chicken with Balsamic Rosemary Glaze in 40 Minutes
May 18, 2026

Favorite Party Bite — Balsamic Cherry and Goat Cheese Crostini
May 18, 2026
Reviews
Be the first to review this.