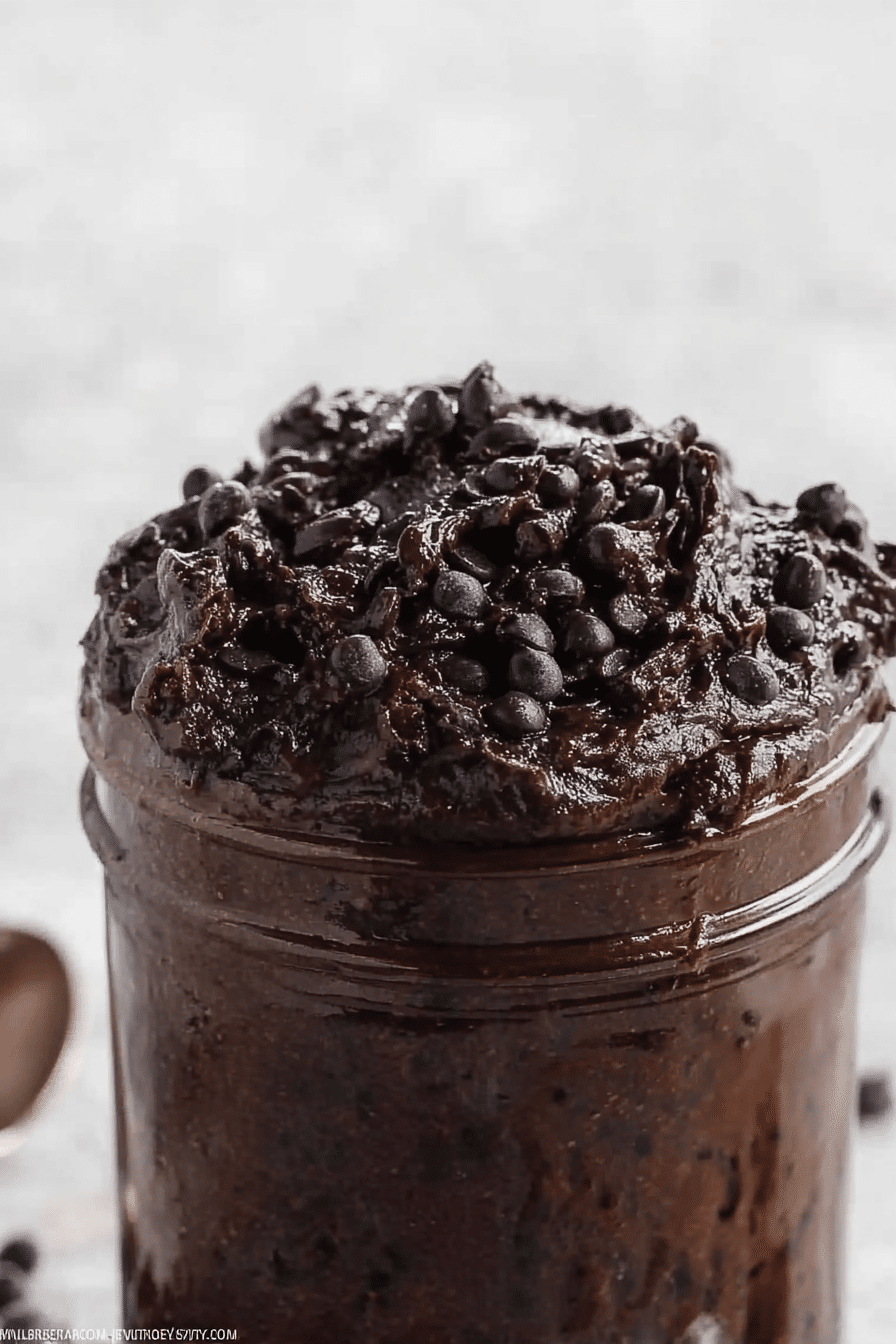
I still remember the urge to lick the bowl when I was a kid — raw batter on my spoon, the kitchen sticky with chocolate streaks. Edible brownie batter brings that exact childhood comfort back, but without the worry. Think rich, chocolatey flavor with a creamy, slightly chewy mouthfeel that gives you all the brownie vibes without turning on the oven. It’s what I reach for when I want instant comfort: smooth cocoa, melty chocolate chips, and a butter-sugar backbone that tastes like a brownie before it ever hits a pan.
I made this batch one rainy afternoon when I didn’t want to heat up the house — and I cooked it in under ten minutes. The butter melted with a soft sizzle in the microwave, the smell of toasted cocoa rose up, and the first spoonful was silky, glossy, and dangerously easy to eat straight out of the bowl. I tested it a few more times to get the texture right and to see how substitutions behaved — and that hands-on testing is what I’m sharing here so you can make it succeed the first time.
Why Choose Edible Brownie Batter?
There are a few reasons I keep a jar of this on standby. First, safety: classic raw batters rely on raw eggs (and uncooked flour), which can carry bacteria. This edible version avoids eggs altogether and calls for heat-treating the flour so you can enjoy spoonfuls without worry. Second, speed and satisfaction — you get immediate brownie flavor and the creamy texture you crave without baking, cooling, or waiting.
Compared to a baked brownie, edible brownie batter is softer and more forgiving. It won’t have a crust or distinct fudgy bite from the oven, but it has that concentrated chocolate flavor and a spreadable, spoonable texture that’s perfect as a dip, spread, or solo snack. And because it’s no-bake, it’s extremely versatile: serve it with fruit, sandwiches, scoops of ice cream, or just a big spoon.
From a practical standpoint: this recipe is fast, fridge-stable for a few days, and easy to tweak for dietary needs — so it’s a great pantry-saver for last-minute dessert emergencies or casual get-togethers.
Easy Ingredients for a Guilt-Free Treat
Below I list the ingredients in a conversational way — you’ll see the full measurements later in the step-by-step instructions. Each element plays a role in the texture and flavor, and I include substitution ideas if you need them.
- All-purpose flour – heat-treated so the batter is safe to eat; it gives structure and that familiar brownie bite.
- Salt – a pinch brightens and balances the chocolate; don’t skip it.
- Cocoa powder – the flavor backbone; use Dutch-processed for a deeper, smoother chocolate or natural cocoa for tangier notes.
- Unsalted butter – melts into a silky base; swap for a neutral oil or vegan butter for dairy-free versions.
- Brown sugar – adds moisture and a molasses undertone that tastes like baked brownies.
- Granulated sugar – for sweetness and that classic shine to the batter.
- Vanilla extract – lifts the chocolate and rounds the flavor.
- Milk (dairy or plant) – thins the batter to spoonable consistency; add by the tablespoon until you hit the texture you like.
- Chocolate chips or chunks – the melty pockets that make bites irresistible; choose dairy-free chips if needed.
Step-by-Step Instructions
I kept the method intentionally simple — this comes together in about five minutes of active work. Below I give the exact recipe steps I used when testing, with tips on how to read the batter and fix common issues.
Prep time: 5 minutes • Yield: 8 servings
- Add the flour to a microwave-safe bowl and heat treat in the microwave on 70% heat for 45 seconds to 1 ½ minutes. Stir or whisk well to break up any clumps.Why this matters: raw flour can carry bacteria, so a quick heat treatment makes it safe to eat. I usually do 1 minute at 70% in my 1000W microwave — you should see the flour warm and slightly drier when it’s done. If it’s still cool, give it 15 more seconds and stir.
- Whisk the salt and cocoa powder into the flour and set aside.Tip: whisking the dry ingredients first prevents clumps of cocoa later. If your cocoa forms lumps, press them through a fine sieve with a spoon.
- In a medium microwave-safe mixing bowl, melt the butter on medium heat for 30 seconds to 1 ½ minutes, or until melted.Sensory cue: the butter should be fully melted but not bubbling wildly — you want a warm, glossy pool that smells slightly nutty. If it starts to brown, stop and let it cool a touch; browned butter changes the final flavor.
- Whisk the brown sugar, white sugar, and vanilla extract into the melted butter until smooth and well combined.How it behaves: the sugar will dissolve partially and the mixture will look glossy. If you still have big sugar crystals, whisk a little longer or let it sit for a minute — they’ll soften.
- Slowly whisk the flour mixture into the butter mixture until there are no streaks of flour. Stir in the milk by the tablespoon until the desired consistency is reached.Consistency notes: I aim for a thick, spreadable batter — glossy, not chalky, and slow to fall off a spoon. If it’s too stiff, a tablespoon or two more milk makes it scoopable. If it gets too thin, add a little more heat-treated flour (a teaspoon at a time) to thicken.
- Fold the chocolate chips or chunks into the batter. Serve immediately or cover and chill until serving.Serving cue: the chips will soften but not fully melt if you serve right away. If you chill the mixture for an hour, the texture firms and tastes even more like a thick brownie dough.
Serving tip: I often portion this into small bowls and let guests spoon it over ice cream or dip sliced apples. It’s safe, fast, and reliably crowd-pleasing.
Exploring Vegan and Gluten-Free Options
If you need plant-based or gluten-free versions, this recipe adapts well — but small adjustments make a big difference in texture.
If you’re looking for delicious plant-based dessert ideas, check out our vegan chocolate brownie sundae for inspiration.
Vegan swaps I tested: replace unsalted butter with refined coconut oil or a good-quality vegan butter. I used coconut oil once and noticed a slight coconut aroma, so if you want neutral flavor, opt for refined coconut oil or a neutral vegetable oil. For milk, almond or oat milk works best — oat milk adds a touch of creaminess that mimics dairy.
Egg replacement: this recipe has no eggs, so you’re already set on that front. For structure when you want a firmer, more dough-like feel, a tiny bit of ground flaxseed (mixed with water) isn’t necessary here because the recipe is spoonable. But if you’re shaping balls, a teaspoon of ground flax mixed with two teaspoons of water can help bind things.
Gluten-free flours: 1-to-1 gluten-free blends will work, but expect slightly different mouthfeel. Almond flour gives a moist, nutty batter and is naturally safe-to-eat raw, but it can make the batter denser and more crumbly. Brown rice flour can taste a bit gritty unless you mill it very fine; if you use a GF blend, heat-treat it exactly as you would all-purpose flour. If you try oat flour, use certified gluten-free oats and note that oat flour absorbs liquid differently — you may need slightly less of it or a touch more milk.
Texture troubleshooting: GF flours often make a looser batter — if yours is too runny, add a small extra spoon of flour; if it’s too dry or crumbly, a splash more milk smooths it out.
Creative Variations and Toppings
Once you’ve got the base down, the fun is in the mix-ins. I’ve tested a bunch — here are my favorites and why they work.
For a fun twist, try adding some unique flavors like those found in our red velvet brownies.
- Espresso powder – a pinch deepens the chocolate without making it coffee-forward; it sharpens the richness.
- Sea salt flakes – sprinkle on top for a sweet-salty punch that brightens every bite.
- Chopped nuts – walnuts or pecans add crunch and a toasty balance to the soft batter.
- Caramel swirl – fold in a ribbon of thick caramel for molten pockets that contrast nicely with the cocoa.
- Mint or orange extract – a drop or two goes a long way; use sparingly to avoid overpowering the chocolate.
- Cookie crumbs – Oreo or chocolate wafer crumbs folded in make each scoop more textured and cookie-like.
I like folding in a mix of semisweet and milk chocolate chips; the milk chips soften faster and create melty pockets while the semisweet keeps the batter from getting cloying. For parties, I make a big bowl and set up a toppings bar: toasted coconut, pretzel bits, crushed peppermint for winter, or fresh berries in summer.
Serving Ideas and Pairing Suggestions
Serve this edible brownie batter in so many ways: as a dip, a spread, or a quick filling. Here’s how I use it depending on the mood.
Pair your brownie batter with the best chocolate chip cookies for an indulgent treat!
- With fruit – sliced strawberries or apple wedges cut the richness and add freshness.
- On ice cream – spoon warm batter over vanilla for an instant sundae; the batter softens the cold ice cream into a dreamy swirl.
- As a dip – pretzels, graham crackers, or biscotti become irresistible with a bowl of this batter next to them.
- Filling – use as a no-bake filling for pastries, tarts, or sandwich cookies; it’s especially good in between two soft cookies.
Occasions: I make this for movie nights, last-minute guests, or when I want something comforting but don’t want the oven on. It’s also great for potlucks — bring the batter in a pretty bowl with dippers and you’ll be the most popular person in the room.
Nutritional Information and Benefits
Here’s a quick overview based on the original recipe’s nutrition facts: per serving (assuming 8 servings total) this edible brownie batter is about 149 calories with roughly 4 g fat, 21 g carbs, and 7 g protein. These numbers come from the mix of butter, sugars, flour, and chocolate; substituting ingredients (like using a sugar alternative or different flour) will change them.
For those looking to balance indulgence with nutrition, consider our pumpkin pie overnight oats recipe.
Healthy swaps that still taste great: use coconut sugar or a light brown sugar alternative to lower the refined sugar impact, swap some of the butter for an equal amount of mashed banana or avocado for reduced saturated fat (note: flavor and color will change), or use higher-percentage dark chocolate to boost antioxidants. That said, this is a treat — I recommend enjoying it mindfully in small portions and pairing with fruit or yogurt if you want a more balanced snack.
Storage, Make-Ahead, and Safety Notes
Leftovers keep well covered in the fridge for about 3–4 days. The texture thickens as it chills, so before serving, let it sit at room temperature for 10–15 minutes or stir in a splash of milk to loosen. You can also freeze portions in an airtight container for up to one month; thaw overnight in the fridge and stir before serving. If the batter smells off or develops an odd texture, discard it — freshness matters, especially for dairy-containing versions.
If you want to make this ahead for a party, I often mix everything up and chill it; about 20 minutes before guests arrive I sit it at room temperature so it’s scoopable. If serving to kids or pregnant guests, remind them there are no eggs but the flour is heat-treated — follow the heat-treat step carefully to ensure safety.
FAQ
Is brownie batter edible without eggs?
Absolutely! This Edible Brownie Batter recipe contains no eggs, and the flour is heat treated in the microwave to make it safe to eat. Enjoy a delicious treat without any worries!
How can I make boxed brownie batter edible?
You can easily make Edible Brownie Batter using boxed brownie mix! Just microwave the mix in a bowl for about 1 minute, then add melted butter and milk until you reach your desired consistency. Just be sure to avoid mixes with chocolate chips!
Can I buy edible brownie batter?
Yes! There are ready-made options like Nestle Toll House Fudge Brownie Edible Batter, which is made with the same ingredients you would use at home, but it’s formulated to be safe to eat right from the tub.
Is brownie batter safe to eat?
Raw brownie batter can be unsafe due to uncooked flour and raw eggs, which may contain harmful germs. However, this recipe ensures safety by heat treating the flour and excluding eggs, making it safe to enjoy!
What are some creative ways to serve edible brownie batter?
You can serve edible brownie batter in many fun ways! Consider pairing it with fresh fruit, using it as a dip for snacks, or enjoying it as a filling for pastries. It’s perfect for parties or cozy movie nights!
Conclusion: Enjoy Your Indulgent Treat!
Edible brownie batter is one of my favorite quick fixes: comforting, chocolatey, and fast. I’ve cooked and tweaked this recipe until the texture hits that sweet spot — glossy, spoonable, and full of melty chocolate pockets. It’s safe, adaptable to vegan and gluten-free needs, and easy to dress up with mix-ins or toppings.
Make it your own: play with extracts, swap flours, or set up a dip station and let guests customize their bowls. If you try this, leave a note about what worked — did you prefer it chilled or warm? Which mix-ins stole the show? I love hearing how readers make a recipe their own. Enjoy, and don’t forget to lick the spoon (responsibly)!
Edible Brownie Batter
Ingredients
Method
- Add the flour to a microwave-safe bowl and heat treat in the microwave on 70% heat for 45 seconds to 1 ½ minutes. Stir or whisk well to break up any clumps.
- Whisk the salt and cocoa powder into the flour and set aside.
- In a medium microwave-safe mixing bowl, melt the butter on medium heat for 30 seconds to 1 ½ minutes, or until melted.
- Whisk the brown sugar, white sugar, and vanilla extract into the melted butter until smooth and well combined.
- Slowly whisk the flour mixture into the butter mixture until there are no streaks of flour. Stir in the milk by the tablespoon until the desired consistency is reached.
- Fold the chocolate chips or chunks into the batter. Serve immediately or cover and chill until serving.