The Fried Pickle Dip I Bring to Every Tailgate (No Frying Needed)
- Prep
- 25 min
- Cook
- 25 min
- Total
- 50 min
- Serves
- 4
- Calories
- 482 kcal
- Carbs
- 31.00 g
Introduction
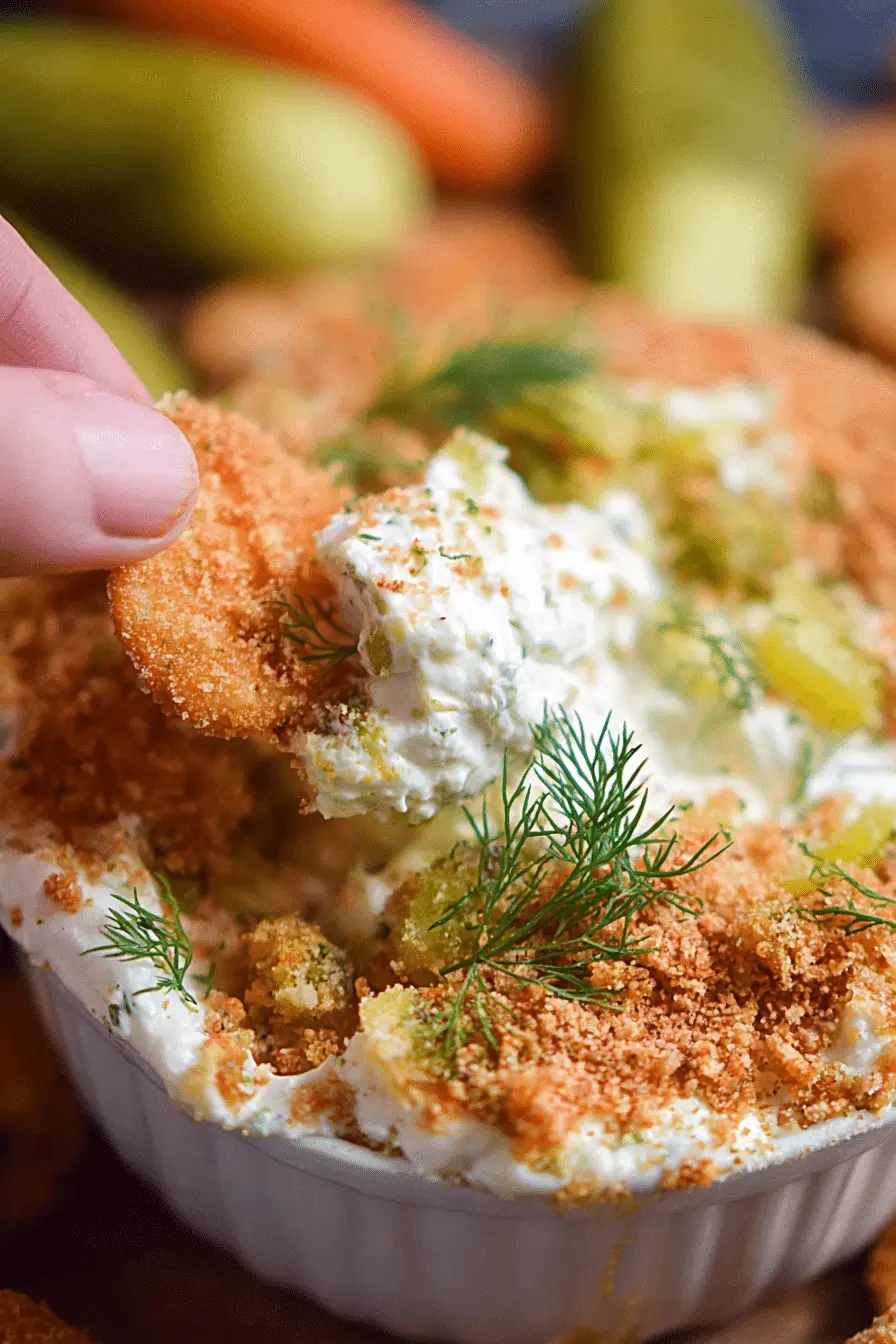
I have a habit of bringing the same bowl to every tailgate: my fried pickle dip. It sounds showy, but what I really love is how simple it is to make and how reliably people crowd around it. The combination of tang from the pickles, richness from the cream base, and the toasted Panko crunch on top makes it feel like a party in one dish.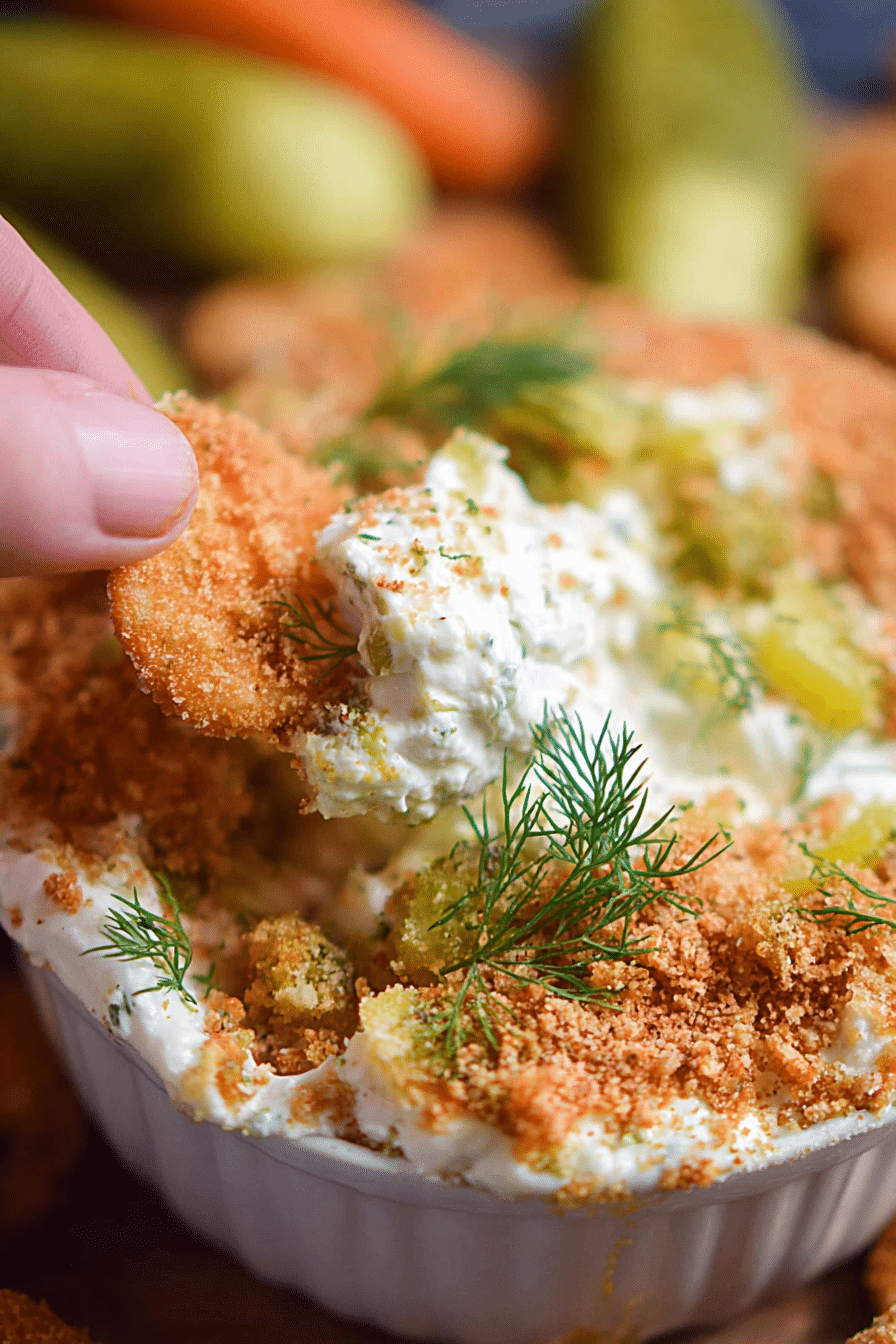
Why Fried Pickle Dip Is a Tailgate Must-Have
The appeal of fried pickle dip comes down to contrast. The tang of pickles cuts through the creaminess of the base, while the crunchy toasted Panko adds a satisfying texture that makes every bite interesting. At tailgates and parties people gravitate toward shareable bites—dips are easy to scoop, easy to pass around, and pair well with a wide variety of dippers.
Sensory note: picture a bowl of pale, herb-speckled dip with glossy pickle pieces, the bright green of chives and dill, and a golden, toasted breadcrumb crown that crackles when you scoop. That crunchy sound and tangy aroma are exactly why this fried pickle dip keeps coming back to my menu.
Everything You Need for Fried Pickle Dip
Below I break down the role each ingredient plays so you know why it matters and how to swap things if you’re trying to lighten the recipe or adjust the flavor.
- Cream cheese – Provides the thick, spreadable backbone and silky mouthfeel; choose a softer block if you want an easier blend.
- Sour cream – Adds tang and creaminess; Greek yogurt is an easy, higher-protein swap if you prefer a lighter option.
- Ranch seasoning – Brings savory, herby depth without extra chopping; use a low-sodium packet or homemade mix to control salt.
- Dill pickle juice – The acid that balances the richness; a few splashes brighten the whole dip.
- Chopped dill pickles – The star texture and briny bite; see the “Best Pickles” section for variations.
- Panko breadcrumbs – Toasted for crunch on top; Panko gives a light, airy crisp that regular breadcrumbs can’t match.
- Fresh herbs (dill, chives) – Add brightness and a fresh aroma that counters the richness of dairy.
- Garlic – Adds a savory punch; roasted garlic will mellow for a subtler background note.
- Salt, pepper, hot sauce – Finishers to taste; hot sauce is optional if you want heat without changing texture.
Healthier ingredient swaps: try Greek yogurt in place of sour cream, a light cream cheese for fewer calories, and bake or skip the butter when toasting Panko to cut fat. These swaps keep the spirit of the fried pickle dip while trimming richer elements.
The Secret to the Perfect Crunch (No Deep-Frying Needed)
Getting crispy topping without deep-frying is the heart of this recipe. Toasted Panko gives you that golden crunch while staying light—no oil bath required. Timing and heat are the two things that control success.
- Toast Panko in a skillet over medium-high heat with a bit of butter (or a neutral oil) until it’s evenly golden—watch it closely; it goes from perfect to burnt fast.
- Remove the Panko from the heat to cool completely before topping the dip—this prevents steam from softening the crumbs.
- Alternative crunchy toppings: crushed potato chips, roasted corn nuts, fried onions, or toasted gluten-free crumbs for a similar effect.
- Why Panko vs. regular breadcrumbs: Panko flakes are larger and airier, so they stay crisp longer and provide a more pronounced crunch than conventional fine breadcrumbs.
Why Pickle Juice Makes This Dip Pop
Pickle juice is the little chemistry trick that keeps this dip from tasting cloying. The acidity cuts through fatty dairy, making every bite feel lighter and more layered. That sharp, vinegary note lifts the herbs and garlic, bringing out flavors that would otherwise be muted.
Pickle juice also acts like a flavor bridge: it amplifies the brininess of the chopped pickles while brightening the cream base. If you’re using spicy pickles, the juice will carry those peppery notes through the dip; sweet pickle juice will add a subtle sweet-tart counterpoint that plays nicely with fresh herbs.
Best Pickles to Use: Dill, Spicy, or Sweet?
- Dill pickles – Classic choice: herb-forward, tangy, and reliable. Great for a familiar, crowd-pleasing profile.
- Spicy pickles – Choose these if you want an edge of heat and a bolder flavor; they pair well with additional hot sauce or smoked paprika.
- Sweet pickles – Use sparingly if you like a touch of sweetness balanced against the cream; reduce any added sugar in accompaniments.
- Mixing pickles – Combine dill and spicy for complexity, or add a few chopped bread-and-butter slices for brightness—just taste as you go.
How to Make Fried Pickle Dip (Step-by-Step)
- Toast the Panko: heat a skillet over medium-high heat, add butter or oil, then the Panko; stir frequently until evenly golden, remove to cool.
- Blend the base: into a bowl add softened cream cheese and sour cream (or Greek yogurt), then the ranch seasoning and a splash of pickle juice; beat until smooth and fully combined so the texture is silky.
- Fold in add-ins: stir in chopped pickles, minced herbs, and crushed garlic; taste and adjust salt, pepper, and hot sauce to your preference.
- Layer for serving: spoon half the dip into your serving dish, sprinkle half the toasted Panko, add the remaining dip, and finish with a final layer of Panko for maximum crunch.
- Rest briefly: let the assembled dip sit for 10–15 minutes so the flavors meld slightly—this short resting time helps the tang of the pickle juice distribute through the base without softening the topping if you add the Panko just before serving.
Pro Tip for Fried Pickle Dip: Toast Panko Just Before Serving
- I always toast the Panko right before guests arrive—freshly toasted crumbs retain their crisp, eyes-catching golden color and the aroma of butter.
- Timing note: toast the Panko while you finish assembling the dip; it only takes a couple of minutes and keeps the texture contrast sharp.
- Make-ahead adjustment: if you must prepare ahead, toast the Panko and store it in an airtight container at room temperature; add it to the dip moments before serving so it doesn’t go soggy.
- Pro-Tips, Troubleshooting, and Variations are presented as bulleted lists here for scannability and quick reference at the party.
Troubleshooting
- I left the Panko too long on the dip and it turned soggy—solution: always keep the toasted Panko separate and add it right before serving.
- My dip tasted flat—solution: add a little more pickle juice or a squeeze of fresh lemon to lift the flavors, and a pinch of salt if needed.
- The texture was too thin—solution: fold in a touch more cream cheese or refrigerate briefly to firm up before serving.
- The dip was too salty—solution: add unsalted sour cream or Greek yogurt to mellow it, and consider using low-sodium pickles next time.
How to Store, Make-Ahead, and Serve Fried Pickle Dip
Leftovers and make-ahead strategy make this dip practical for hosts. Here’s how I handle it when I’m prepping for a big game or party.
- Storage: keep the dip covered in the refrigerator; it will stay good for a few days, but the texture of the topping will change once combined.
- Make-ahead tips:
- Make the dip base up to a day ahead and refrigerate.
- Toast the Panko the day of the event and store it in an airtight container; add it just before serving.
- If transporting, keep the dip chilled in a cooler and top with Panko at the venue.
- Best serving vessels: a shallow, wide bowl makes scooping easy and showcases the Panko topping; consider a hollowed bread bowl for a rustic presentation if you’re not worried about extra carbs.
Variations and Dietary Swaps
- Gluten-free: use gluten-free Panko or crushed gluten-free crackers for the topping to keep the crunch without gluten.
- Dairy-free: swap to a dairy-free cream cheese and a tangy dairy-free yogurt; add a little extra pickle juice to mimic the tang of sour cream.
- Lower-calorie: use light cream cheese or extra Greek yogurt and skip the butter when toasting Panko.
- Flavor twists: stir in smoked paprika for a smoky note, or swap fresh dill for cilantro for a brighter, less traditional herb profile.
- Spicy version: use chopped spicy pickles and a dash of sriracha or a smoked hot sauce for heat that carries through the dip.
Serving Suggestions
- Crunchy dippers: sturdy potato chips, kettle-cooked chips, or thick pita chips are perfect for scooping.
- Fresh dippers: carrot sticks, celery, cucumber rounds, and bell pepper strips add color and a refreshing contrast.
- Portion guidance: for a party of about 8, plan for a generous appetizer serving so everyone gets multiple scoops—this dip is addictive.
- Pairings: serve alongside other salty, savory snacks like pretzel bites or a simple charcuterie board to balance the table.
Frequently Asked Questions
Can I prepare Fried Pickle Dip ahead of time? Absolutely! You can make the dip a few hours in advance and store it in the refrigerator. Just make sure to add the toasted Panko bread crumbs right before serving for that perfect crunch.
What types of pickles work best in this dip? Dill pickles are classic, but feel free to experiment with spicy or sweet pickles depending on your taste preference! Just remember to adjust the other ingredients accordingly.
Is this dip suitable for vegetarian diets? Yes, Fried Pickle Dip is vegetarian-friendly! It contains no meat and is perfect for vegetarians and non-vegetarians alike.
Can I use Greek yogurt instead of sour cream? Yes! Greek yogurt is a great alternative to sour cream. It will add a nice tangy flavor and a boost of protein to the dip.
How spicy can I make this dip? You can control the spice level by adding hot sauce to taste. Start with a few drops and increase as desired to find your perfect heat level!
Recipe Card
The Fried Pickle Dip I Bring to Every Tailgate (No Frying Needed)
- Prep
- 25 min
- Cook
- 25 min
- Total
- 50 min
- Serves
- 4
- Calories
- 482 kcal
- Carbs
- 31.00 g
Ingredients
- 1 lbveal cutlets or scallopini ((about 4 cutlets))
- —Kosher salt and pepper
- 1/2 cupflour
- 2 largeeggs
- 3/4 cupbread crumbs
- 1 cupshredded Parmesan cheese ((divided))
- 1 teaspoonparsley flakes
- 1 teaspoongarlic powder
- 1 teaspoondried basil
- 2 Tablespoonsolive oil
- 1 cupjarred pasta sauce
- 4 slicesfresh mozzarella cheese ((thick slices))
Instructions
- 1
If you're using cutlets, place them between two slices of saran wrap and pound them until they're about an 1/8-1/4 inch thick. If you're using scallopini, proceed to step 2.
- 2
Season the veal with Kosher salt and pepper on both sides.
- 3
Set out 3 bowls to bread the veal. Add the flour to one and the eggs to another. Give the eggs a quick whisk.
- 4
In the third bowl, whisk together the breadcrumbs, 1/4 cup Parmesan cheese, parsley flakes, garlic powder, and basil.
- 5
Pick up one veal scallopini and dip it in the flour, coating it on both sides. Dip in the egg, then press into the breadcrumbs, making sure they're evenly distributed. Transfer to a plate and repeat with remaining veal.
- 6
Preheat the oven to 375 degrees.
- 7
Heat the olive oil in a large skillet over medium heat. Add the cutlets and cook for 2-3 minutes per side, or until browned and crispy. Transfer to a greased baking dish. Repeat with any remaining cutlets.
- 8
Top each cutlet with the remaining Parmesan. Spoon the spaghetti sauce over top, followed by a slice of mozzarella cheese. Bake for 15 minutes.
- 9
Serve the Veal Parmesan with a side of pasta or your favorite vegetable.
You might also like
Reviews
Be the first to review this.