I still remember the first time I made these mini donuts for a weekend breakfast in my kitchen — the house filled with the warm scent of frying dough and cinnamon sugar, and my kids hovered at the counter with sticky fingers and bright eyes. Making mini donuts is one of those projects that turns ordinary time together into something playful: measuring, cutting tiny rings, and tasting the first hot donut as it comes out of the oil. I made plenty of mistakes at the start — underproofed rings that sank, dough that stuck to the cutter — and each one taught me a small fix that makes the final donuts light and tender.
I like to make the dough the night before and let the fridge do the heavy lifting — that slow rest gives the dough a richer, gently tangy flavor and makes the texture that pillowy, brioche-like treat everyone reaches for. When we fry them the next morning, the house smells like a fairground but with the comfort of our own kitchen: butter, warm milk, and toasted cinnamon sugar. I also learned how small details — using room temperature eggs and butter, testing the oil with a scrap of dough, and frying in small batches — make a huge difference.
Over the years I’ve adapted the process to fit family life: you can involve kids in rolling and cutting, swap toppings to match seasonal celebrations, and even make dough alternatives for dietary needs. Below I’ll walk you through everything I use, how I handle the dough, and the simple tricks I depend on to turn out dozens of small, irresistible donuts every time.
Why Homemade Mini Donuts are a Must-Try for Families
Making mini donuts at home turns baking into a shared activity that hits all the right notes: quick wins for kids who love shaping and decorating, and big sensory payoffs — the smell of frying dough followed by warm cinnamon sugar on your fingertips. Rather than a vague promise of fun, here are specific benefits that make this recipe worth the effort:
- Hands-on family time: Everyone can take a role — measuring, kneading, cutting rings, and rolling in sugar — so the prep becomes part of the celebration.
- Personalization at scale: You control sweetness, oil choice, and toppings. Swap the cinnamon sugar for powdered sugar, glazed toppings, or creative sprinkles based on who you’re serving.
- Health-forward swaps available: At home you can reduce added sugar, choose healthier frying oil, or bake small batches instead of frying if you prefer.
For a quick spin on powdered toppings, families will adore these mini powdered sugar doughnuts — a simple variation that highlights how easy it is to switch finishing touches and make each platter unique.
Everything You Need for Homemade Mini Donuts
Below I walk through the ingredients and tools I reach for every time. I won’t list exact amounts here — those belong in the recipe card — but I will explain what each ingredient does and what you can swap.
- Active dry yeast – The engine of rise. It creates the flavor and light texture through slow fermentation; instant yeast can work but may speed up proofing.
- Milk (whole or plant-based) – Adds tenderness and a rich mouthfeel. For vegan swaps, use full-fat plant milks like oat or soy.
- Sugar – Feeds the yeast and sweetens the dough; you can reduce the amount or substitute with a low-glycemic sweetener for a lower-sugar option.
- All-purpose flour – Builds structure through gluten. For gluten-free, use a tested blend designed for yeast baking and expect a slightly different texture.
- Salt – Balances flavor and controls yeast activity.
- Eggs – Enrich the dough and improve structure. For vegan versions, use commercial egg replacers or a flax/chia binder with added fat.
- Vanilla – Rounds out flavor. Vanilla bean paste or extract both work.
- Unsalted butter (or vegan butter) – Creates a tender, brioche-like crumb; butter also helps the donut brown evenly.
- Neutral frying oil – Use a high smoke point oil such as canola, vegetable, or light olive oil for clean frying flavors.
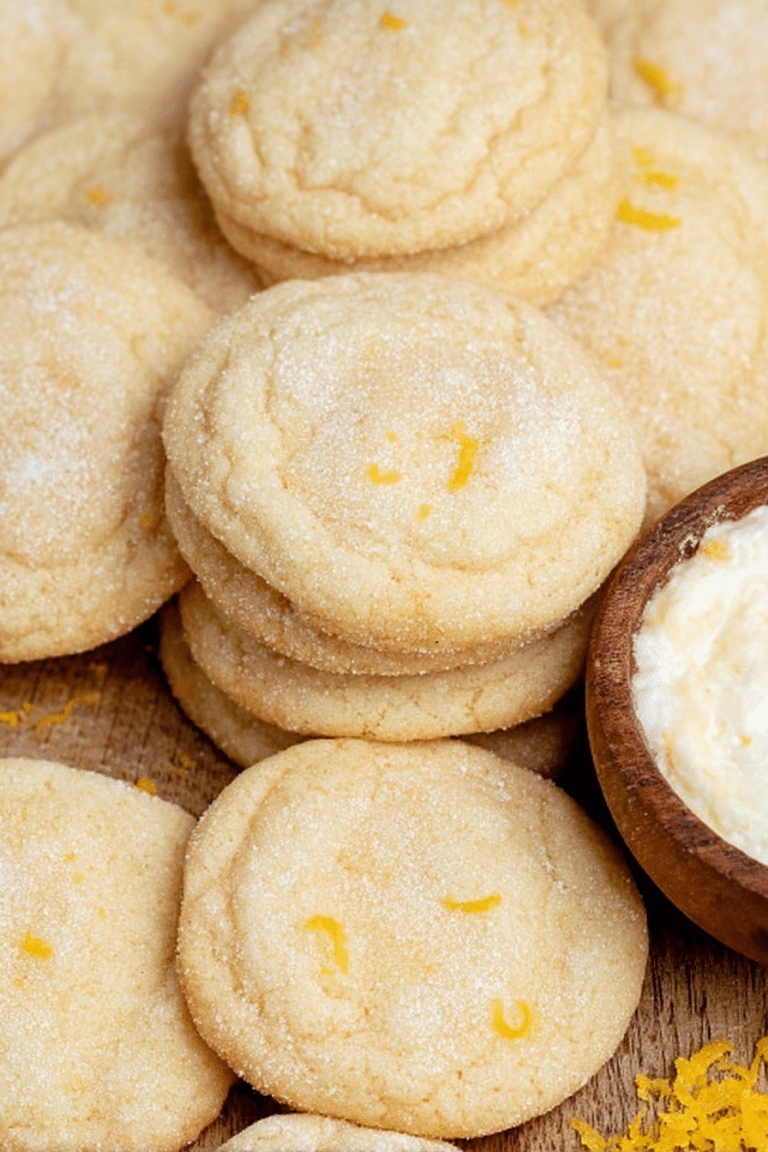
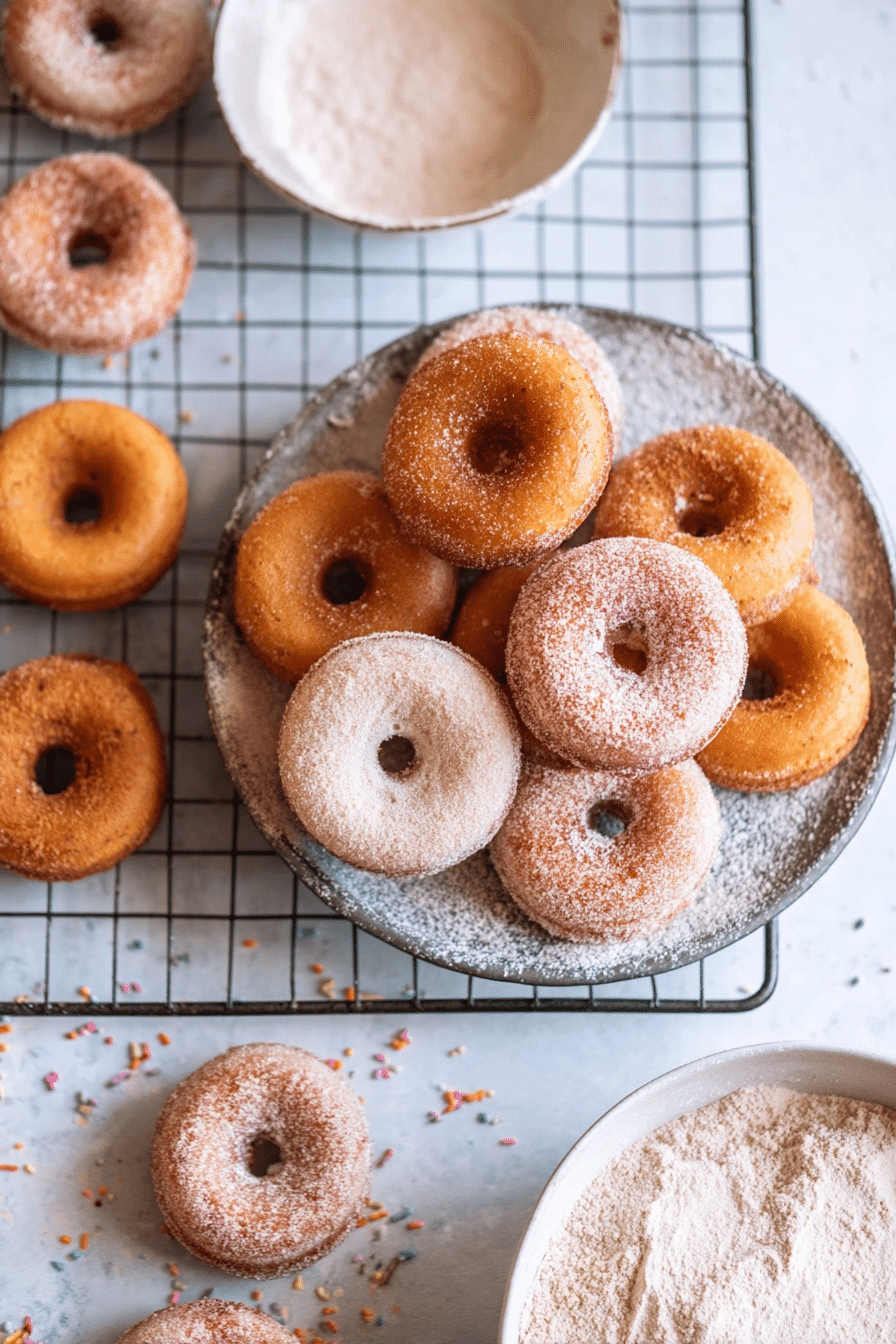
- Cinnamon + sugar – Classic finishing mix. You can reduce the cinnamon if you prefer a subtler spice.
- Thermometer – A digital frying thermometer is essential so you can keep oil at the target temperature for even frying.
How to Make Homemade Mini Donuts (Step-by-Step)
- Mix and proof the yeast: Combine warm milk, a little sugar, and active dry yeast until foamy, then add to your flour mixture. This gives you predictable fermentation and flavor development.
- Build the dough: Mix flour, salt, eggs, vanilla, and the foamy yeast on low, then increase speed so the dough becomes smooth. Proper mixing develops gluten — you want a soft, slightly tacky dough.
- Enrich with butter: Add room-temperature butter in small pieces while mixing; wait until each piece is incorporated so the dough remains cohesive and silky.
- Overnight rest: Transfer the dough to an oiled bowl, cover, and refrigerate overnight. This slow, cold proof deepens flavor and improves texture.
- Shape the donuts: On a well-floured surface roll dough to the recommended thickness and cut rings with a small cutter or a straw for the centers. Use scraps for a first test fry to judge oil temperature and frying time.
- Final proof: Let the cut rings rise until puffy and springy — they should hold a slight indentation when gently poked.
- Fry in small batches: Heat neutral oil to the target temperature with a reliable thermometer; lower donuts gently and flip often for even browning. Small batches keep oil temperature stable and give the crisp exterior and tender interior you want.
- Finish and serve: Drain briefly, then toss warm donuts in cinnamon sugar so the coating clings. If you want ideas for sweet glazes or sugar finishes, this perfect sugar donuts guide has lovely finishing tips that translate well to minis.
The Secret to the Perfect Donut Texture
Getting that soft, airy interior with a thin, crisp exterior is all about balance: fat for tenderness, gluten for structure, and precise frying for color. Here are the technical points I focus on and troubleshooting tips I personally rely on when something feels off.
- Role of butter: Rich, softened butter folded into the dough creates a tender crumb and helps the donut brown gently. If your dough lacks butter, the crumb will be drier and less tender.
- Avoid overmixing once enriched: Mix long enough for smoothness, but too much aggressive mixing after adding butter can break down the dough and lead to dense results.
- Dough temperature matters: Cold dough straight from the fridge will be firmer to shape but proofs to a fluffier interior; slightly warmer dough can puff faster but may overproof if left too long.
- Troubleshooting (quick bullets I use in my kitchen):
- – If donuts are dense: Check yeast freshness, make sure dough was kneaded until smooth, and confirm you didn’t overwork enriched dough.
- – If donuts collapse after frying: They were likely underproofed — give them more time in the final rise until they feel puffy.
- – If oil soaks into donuts: Oil was too cool; bring it up to the correct frying temperature and test with scrap dough before cooking a full batch.
- – If outside browns too fast: Oil is too hot; lower the temperature slightly and fry a touch longer at a lower heat for even cooking.
Studying similar enriched-bread techniques can help you dial in texture; reading a recipe for cinnamon donut bread shows how layering fat and fermentation changes crumb and can give you ideas to refine your mini donuts.
Why Overnight Rising is Key for Flavor
Overnight cold fermentation is the single tweak that transformed my donuts from good to memorable. Here’s why it matters and how to do it without extra fuss:
- Flavor development: Slow fermentation lets yeast and enzymes create organic acids and aroma compounds that deepen the dough’s taste — think subtle tang and a richer, more complex profile than a quick-rise dough.
- Improved texture: A long, cold rest strengthens the gluten gently and improves crumb elasticity, giving you that pillowy interior that holds up when fried.
- Storage tips for overnight dough: Keep the dough tightly covered in an oiled bowl in the fridge so it doesn’t form a skin. Bring it out to the bench just long enough to roll and cut — it should still be cool but pliable.
- Possible drawbacks and how to avoid them: If left too long, dough can over-ferment and weaken. I check for a pleasant yeasty smell (not sour) and look for dough that still springs back slowly when poked.
Pro-Tip for Making Homemade Mini Donuts
- Always test oil temperature with a scrap of dough before frying a full batch — it’s the fastest way to confirm heat and timing.
- Use a digital frying thermometer to hold the oil steady; small fluctuations change frying time and texture.
- Fry in small batches so the oil temperature stays consistent; overcrowding cools the oil and yields greasy donuts.
- Keep a wire rack over a sheet pan to drain donuts so they stay crisp on the bottom.
- Use parchment squares under each donut for easy transfer from proof to fryer without distorting shapes.
- If you’re shaping with kids, give them the scraps to roll into playful shapes so everyone has their own creation to fry.
- Store leftovers in an airtight container and refresh briefly in the microwave or a low oven for a minute to bring back softness.
Variations to Try and Storage Tips
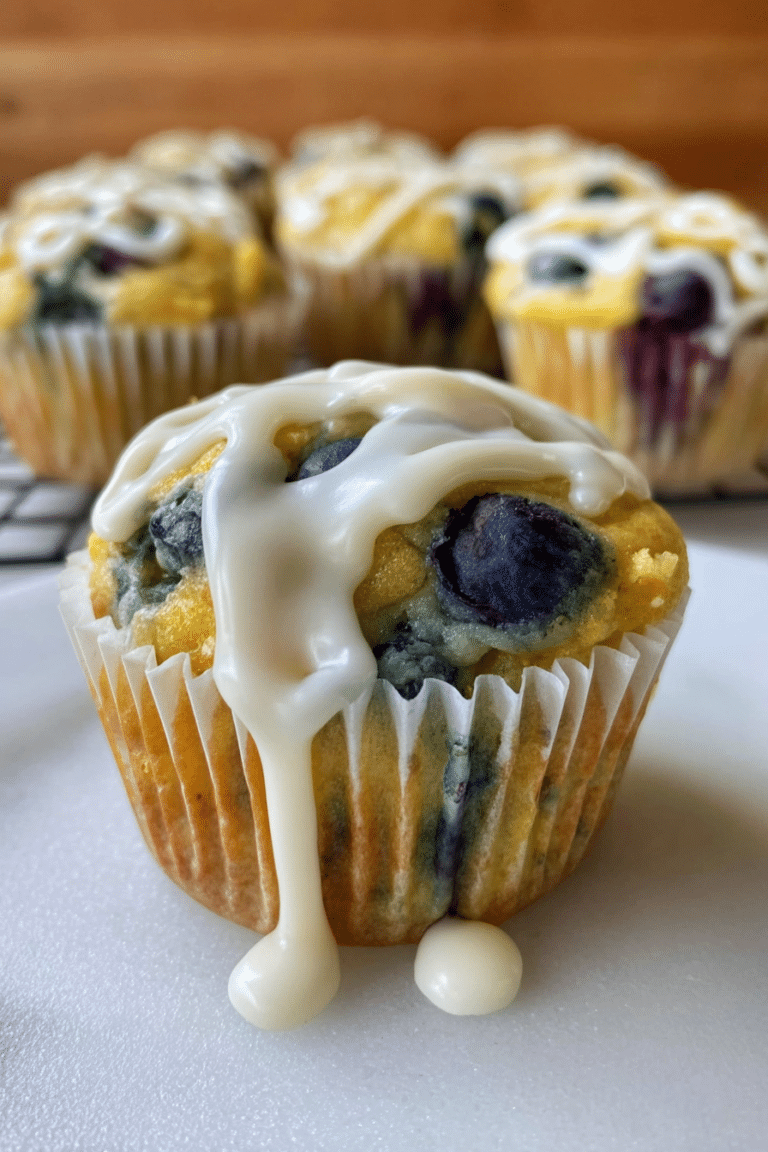
- Decorating and celebration ideas: Dip warm donuts in a simple glaze, drizzle chocolate and sprinkles, or toss in citrus sugar blends for party-ready colors and flavors.
- Maple and glaze variation: For a rich twist, try a maple glaze — it’s a great crowd-pleaser and pairs beautifully with cinnamon toppings. For a recipe idea, try this maple glazed donuts approach adapted for minis.
- Lower-sugar and healthy swaps: Reduce finish sugar, use yogurt-based glazes, or bake the donuts for a lighter option; expect slightly different textures but still delicious results.
- Gluten-free and vegan adaptations: Use a tested gluten-free flour blend designed for yeast baking and swap butter/milk for vegan alternatives; you may need slight adjustments to hydration and proofing times.
- Storage tips: Best eaten the day they’re made. For short-term storage, keep cooled donuts in an airtight container at room temperature and reheat briefly before serving. For longer storage, freeze cooled donuts individually wrapped and thaw gently before reheating.
Frequently Asked Questions
What ingredients do I need to make homemade mini donuts? To make homemade mini donuts, you’ll need active dry yeast, whole milk (or plant-based milk for vegan), sugar, all-purpose flour (or gluten-free blend), salt, eggs (or egg substitute), vanilla, unsalted butter (or vegan butter), a neutral oil for frying, granulated sugar, and cinnamon.
How long does it take to make mini donuts? The total time includes an overnight rest for the dough, so expect about 4 hours from start to finish including the cold fermentation. Active prep and cooking time is roughly under an hour.
Can I use a mini donut maker for this recipe? This recipe is designed for frying, but you can adapt the idea for a mini donut maker by using a pancake-style batter or a modified dough recipe. Adjust liquid as needed and follow your donut maker’s instructions.
Why is overnight rising important for the dough? Overnight rising develops more flavor through slow fermentation and helps produce a lighter, airier texture when the donuts are fried.
How should I store leftover mini donuts? Store leftovers in an airtight container at room temperature; they are best eaten the same day. Briefly reheat in the microwave or a low oven before serving to refresh texture.
Homemade Mini Donuts
Ingredients
Method
- In a small bowl, combine the yeast, milk, and 2 Tbsp of the sugar. Mix well and leave to sit for 10-15 minutes, or until foamy.
- In the bowl of a stand mixer fitted with the dough hook, combine the flour, salt, and remaining 2 Tbsp sugar. Mix briefly to combine. Add the eggs, vanilla, and foamy yeast mixture to the bowl. Mix on low for 2-3 minutes, until the dough starts to come together. Increase the mixer speed to medium and mix for another 10 minutes, until the dough is soft and smooth.
- Reduce mixer speed to low, and slowly add the butter, waiting until fully incorporated before adding more. This should take 3-4 minutes. Once incorporated, increase speed to medium and mix for 5 more minutes.
- Transfer to an oiled bowl, cover tightly with plastic wrap, and place overnight in the fridge to rise.
- Line two sheet pans with parchment paper and turn the dough out onto a floured surface. Roll until 1/2” thick.
- Cut out circles of dough and use a small cutter to cut holes in the middle. Place on parchment squares, cover lightly with plastic wrap, and allow to rise for 45-50 minutes.
- Heat oil to 350°F in a large pot or deep fryer. Combine cinnamon sugar in a bowl.
- Test oil temperature with dough scraps. Fry doughnuts until golden brown, about 3-4 minutes, flipping occasionally. Transfer to a cooling rack and toss in cinnamon sugar.
- Enjoy fresh, or store in an airtight container.