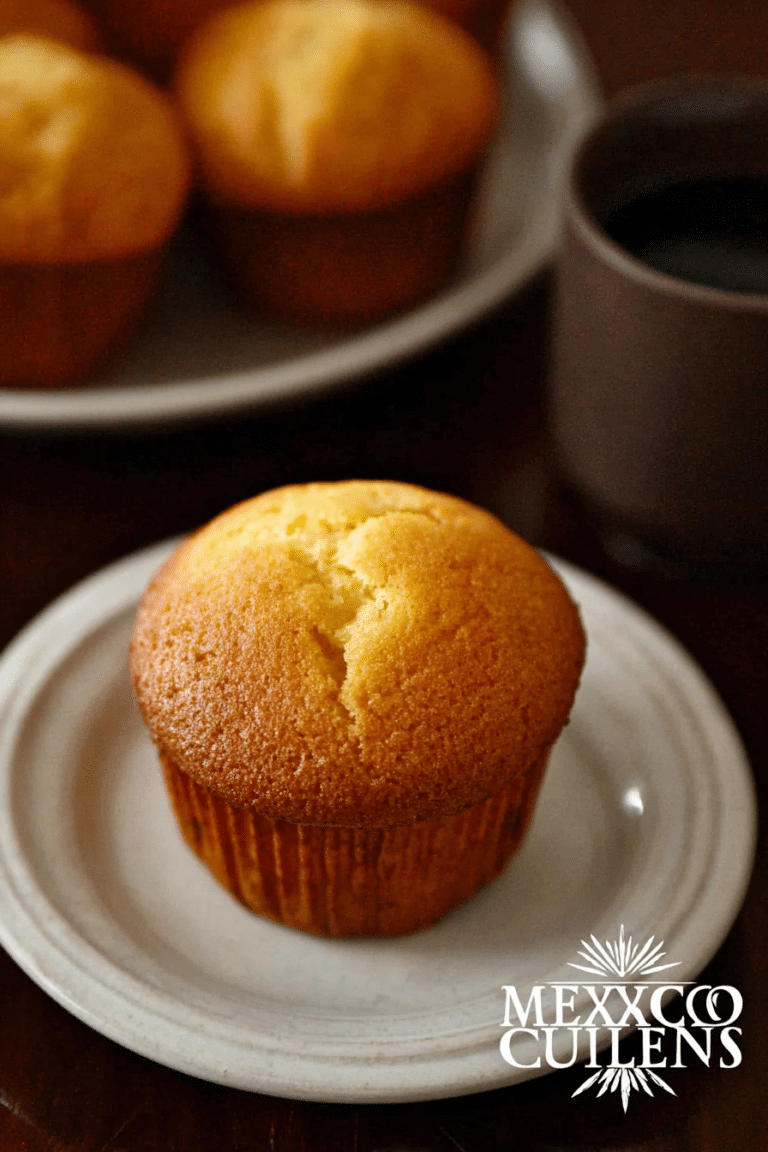
When I was small, the Pop-Tart was a ritual: a foil pouch, a quick toast, and a sugar-bright rectangle that felt like a holiday breakfast. I still remember the warm steam when I bit in and the way the filling pooled at the edges. Years later I set out to recreate that exact comfort in my kitchen, and in the process I learned how small choices — how cold the butter is, how you seal the edge, what jam you use — change everything.
I love that making pop tarts at home lets me keep the childhood feeling but make it my own: a flakier crust, a less-sweet filling, and icing colored to match the season. In my kitchen I treat the process like making a good pie dough — patient, a little messy, and absolutely worth the payoff.
This guide is for bakers who want to bring that nostalgic rectangle back to life, but better: clear, practical tips on the dough, sensible swaps for dietary needs, and a handful of filling ideas that read like a memory lane of flavors.
Everything You Need for Homemade Pop Tarts
Good pop tarts start with good ingredients and the right few tools. Below I explain why each item matters so you can feel confident before you begin. If you love baking pastries, you might also enjoy making mini chocolate tarts for an indulgent treat.
- All-purpose flour – The backbone of the dough; it gives structure while still allowing tenderness.
- Unsalted butter – Use quality butter so the fat tastes clean; salted butter makes seasoning variable.
- Granulated sugar – Balances dough flavor and helps browning.
- Eggs – Provide richness and act as an egg wash for color on top.
- Ice water – Keeps the dough cool so the butter stays in chunks that make layers.
- Jam or filling – Any preserve works; choose one you like the flavor and sweetness of.
- Powdered sugar and milk – For a simple glaze that seals and decorates.
- Food processor (optional) – Makes short work of cutting butter into flour and helps you avoid overworking the dough.
- Baking sheet and parchment – For even baking and easy cleanup.
A Brief History of Pop Tarts and Their Place in American Baking
Pop tarts began as a convenient toaster pastry and quickly became entwined with childhood breakfasts across the country. Their cultural hold comes from that tiny moment of joy — a warm sweet square that required no utensils and delivered immediate comfort.
Over the decades, people started riffing on those factory-made versions at home, preferring fresher fillings, flakier crusts, and the ability to control sweetness. That shift mirrors a larger trend in American baking: turning familiar convenience foods into items worth taking time over in the kitchen.
Think of homemade pop tarts as both a tribute and a correction: you keep the happy shape and flavor memory but restore the texture and taste the way you want it.
The Secret to the Perfect Flaky Texture
Flakiness comes down to two simple principles: distinct layers of fat between layers of dough, and minimal heat or handling before baking. Below are the practical points to keep in mind, explained without technical jargon so you can feel what to do rather than memorize rules.
- Keep the butter cold — cold butter creates pockets that steam during baking and lift the layers. If the butter softens too much, the dough loses that layered structure.
- Work quickly and lightly — you want the dough to come together, but stop as soon as it holds. Overworking develops gluten and makes the crust tough.
- Size the fat pieces like coarse peas — visible chunks of butter in the dough are good; they’re the reason the crust flakes.
- Chill between steps — chilling relaxes gluten and re-firms the butter so the layers hold their shape when baked.
- Prick the tops — small vents let steam escape so the pastry doesn’t bubble irregularly and lose its shape.
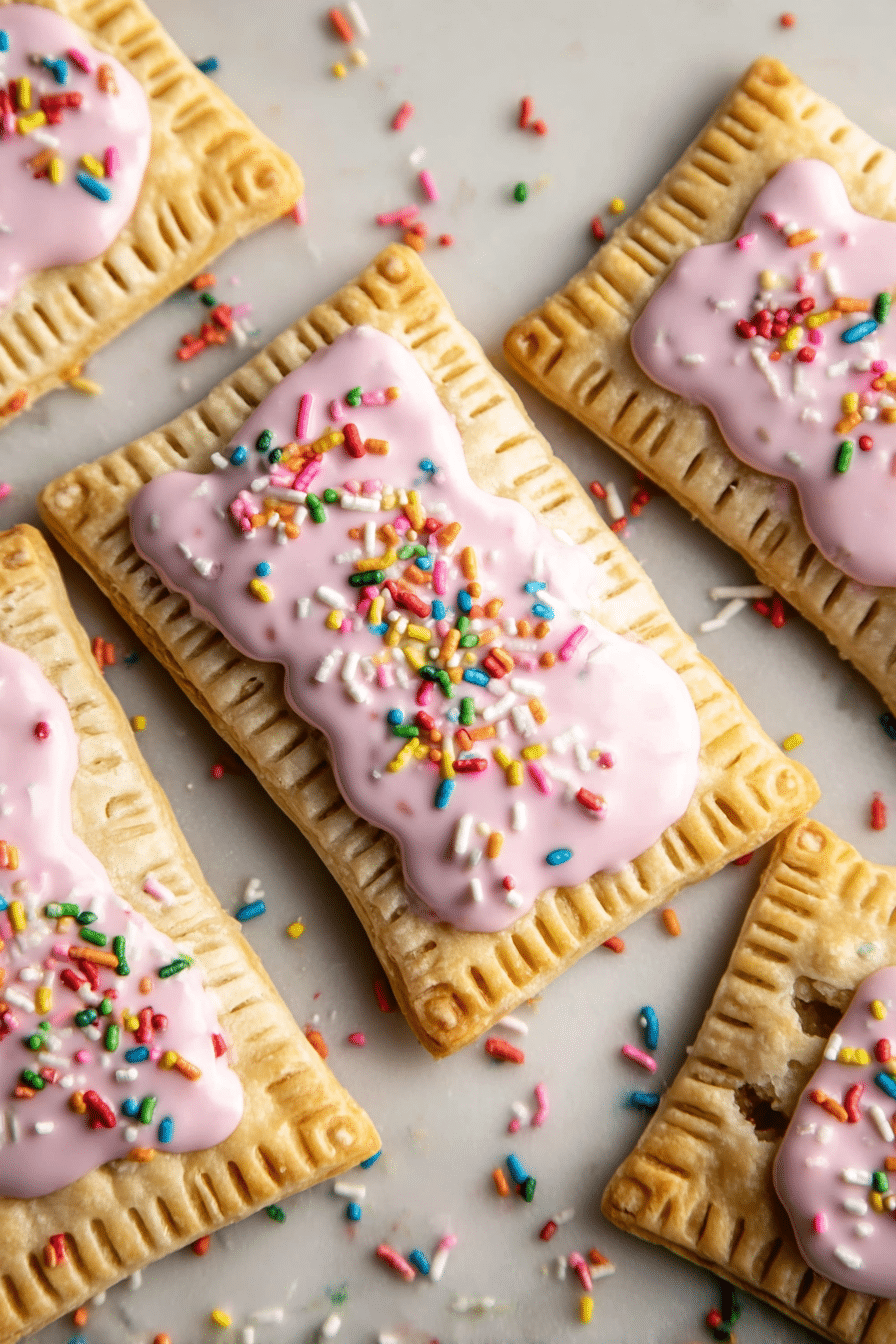
How to Make Homemade Pop Tarts (Step-by-Step)
Follow these steps and you’ll have warm, homemade pop tarts that look like they came from a bakery shelf, only better. Use your hands and a light touch; you’re aiming for structure, not perfection.
- Combine dry ingredients and pulse briefly in a food processor or mix by hand until combined.
- Add an egg and pulse once more, then add cold butter and pulse until the dough forms coarse crumbs with small butter pieces.
- Bring the dough together with just enough ice water so it holds; turn out onto a lightly floured surface and gently press into a disk. Refrigerate until firm.
- Divide, roll one piece at a time into a thin rectangle, keeping the surface lightly floured to prevent sticking.
- Cut rectangles to your desired size. Place the bottom halves on a parchment-lined sheet, spoon a small amount of filling into the center of each, leaving a margin around the edge.
- Brush the margins with a little beaten egg or water, top with the second rectangle, and press edges to seal. Use a fork to crimp the edges neatly.
- Vent the tops with a few small pricks so steam can escape, then chill the assembled tarts for a short time before baking to keep the butter solid.
- Brush with egg wash for a golden finish and bake until the crust is evenly golden and set (watch closely towards the end so they don’t over-brown).
- Let cool on a rack, then drizzle or spread glaze and decorate with sprinkles while the glaze is still tacky.
Pro Tip for Homemade Pop Tarts: Gluten-Free & Vegan Crust Swaps That Work
If you need dietary swaps, you can still make pop tarts that feel and taste like the real thing. I’ve experimented with a few alternatives and have notes on texture and handling so you won’t be surprised at the results.
- Gluten-free flour blends – Use a 1:1 all-purpose gluten-free blend that contains xanthan gum for structure; expect a slightly crumblier texture and handle the dough gently.
- Almond or oat flour – These give a nuttier flavor but often need a binder (like an extra egg or a bit of psyllium husk) to hold together.
- Plant-based butter – Choose a cold, block-style vegan butter with a high fat content for the best layers; treat it the same way you would dairy butter.
- Egg substitutes – For sealing and wash, use a little aquafaba or a cornstarch slurry brushed on top; color and shine will be different but still pleasant.
- Expectations – Gluten-free and vegan doughs can be more fragile; chill often and roll between sheets of parchment to reduce handling.
Creative Fillings and Seasonal Flavor Ideas
Pop tarts are an open invitation to play with flavor. Below are both classic and unexpected combinations that work well in a small pocket pastry. For a classic flavor, try making Brown Sugar Cinnamon Pop Tarts that will take you back to your childhood.
- Strawberry jam with lemon zest – Brightens the sweetness and keeps the filling fresh.
- Raspberry and cream cheese – Slightly tangy, luxurious mouthfeel.
- Chocolate hazelnut – Use a thick spread so it doesn’t run during baking; dust with chopped toasted hazelnuts after glazing.
- Apple-cinnamon – Cook diced apple down with a little sugar and spice until thick; this is a great fall option.
- Pumpkin spice – Mixed pumpkin purée and a thickener make a seasonal favorite.
- Nut butter and jam – A grown-up PB&J that toasts beautifully.
Another delicious option is our Frosted Brown Sugar Cinnamon Pop Tarts, perfect for satisfying your sweet tooth.
How to Store, Reheat, and Make-Ahead Homemade Pop Tarts
Proper storage and reheating preserve that fresh-from-the-oven texture as much as possible. Below are the methods I use to keep leftovers tasting like new.
- Short-term storage – Keep tarts in an airtight container at room temperature for up to three days to preserve flakiness and glaze texture.
- Refrigeration – For longer life, refrigerate in an airtight container; bring to room temperature before reheating so the crust regains some tenderness.
- Freezing – Freeze unglazed tarts wrapped well; they keep up to three months. Thaw in the fridge and reheat in a low oven to refresh the crust.
- Reheating – Use a low oven or toaster oven to warm and re-crisp the crust; avoid microwaving for extended time, which makes the pastry soggy.
While you’re at it, don’t forget to check out our Homemade Cheese Breadsticks, which pair perfectly with freshly baked pop tarts.
Pro-Tips, Troubleshooting, and Variations
Please generate the following three sections as bulleted lists for quick reference.
- Pro-Tips – Chill assembled tarts before baking to help them hold their shape; use a light dusting of flour when rolling, swap preserves for thicker fillings to avoid seepage, and always brush the edges with egg or water to improve sealing.
- Troubleshooting (I speak from experience) – If the dough felt tacky when I rolled it, I chilled it until firm and that solved it; if fillings leaked, I used less and thicker jam next time; if the crust was tough, I realized I had overworked the dough and so I rested it longer before rolling.
- Variations – Make mini pop tarts for a party tray, cut dough into different shapes for kids, or layer a thin cream cheese layer under fruit fillings for richness; try a brown-butter glaze for a toasty note.
Frequently Asked Questions
Can I use different types of jam for the filling?
Absolutely! You can use any jam or fruit preserve of your choice. Popular options include strawberry, raspberry, or even chocolate spread for a twist.
How do I achieve the perfect flaky texture?
The key to a flaky pastry is to keep your butter cold and not overwork the dough. Make sure to chill the dough before rolling it out!
Can I make these pop tarts gluten-free?
Yes, you can substitute regular flour with a gluten-free all-purpose flour blend to make a gluten-free version of the pop tarts.
What’s the best way to store leftover pop tarts?
Store them in an airtight container at room temperature for up to 3 days. For longer storage, you can refrigerate them or freeze them.
How long can I keep pop tarts in the freezer?
Homemade pop tarts can be stored in the freezer for up to 3 months. Just make sure to wrap them well to prevent freezer burn!
Ingredients
Method
- In the bowl of a food processor fitted with the dough attachment add the flour, sugar and salt. Pulse a few times to combine.
- Add one egg to the food processor and pulse a few more times. Next, add the butter and water pulsing until the dough just comes together.
- Turn the dough out onto a clean lightly floured workspace and knead until the dough is smooth but there are still visible chunks of butter. Wrap the dough in plastic wrap and refrigerate for 30 minutes.
- Once it has chilled, divide the dough in half and roll each half out into a rectangle about ¼” thick. Cut each piece of dough into 8 rectangles about 3” x 4” in size. You may have to reroll the scraps to make 8.
- Place 8 of the rectangles on a parchment paper lined baking sheet. Add a rounded teaspoon of jam into the center of each rectangle. Place a second rectangle of dough over the top and use your fingertips to press the edges of the dough together.
- Use the tines of a fork to seal the edges and make indents around the edges of the dough. Prick the top of each tart with the fork or using a knife so that steam can escape. Refrigerate uncovered for 30 minutes.
- Preheat oven to 350ºF (180ºC).
- In a small bowl whisk the remaining egg and brush on the top of the pop tarts. Bake until golden brown, about 20 minutes. Remove to a wire rack to cool.
- In a small mixing bowl whisk together the sugar and milk until it is completely smooth and the consistency of glue. If using food coloring add it now and whisk to combine.
- Spread the icing on top of each pop tart then add sprinkles if desired. Serve warm or at room temperature.