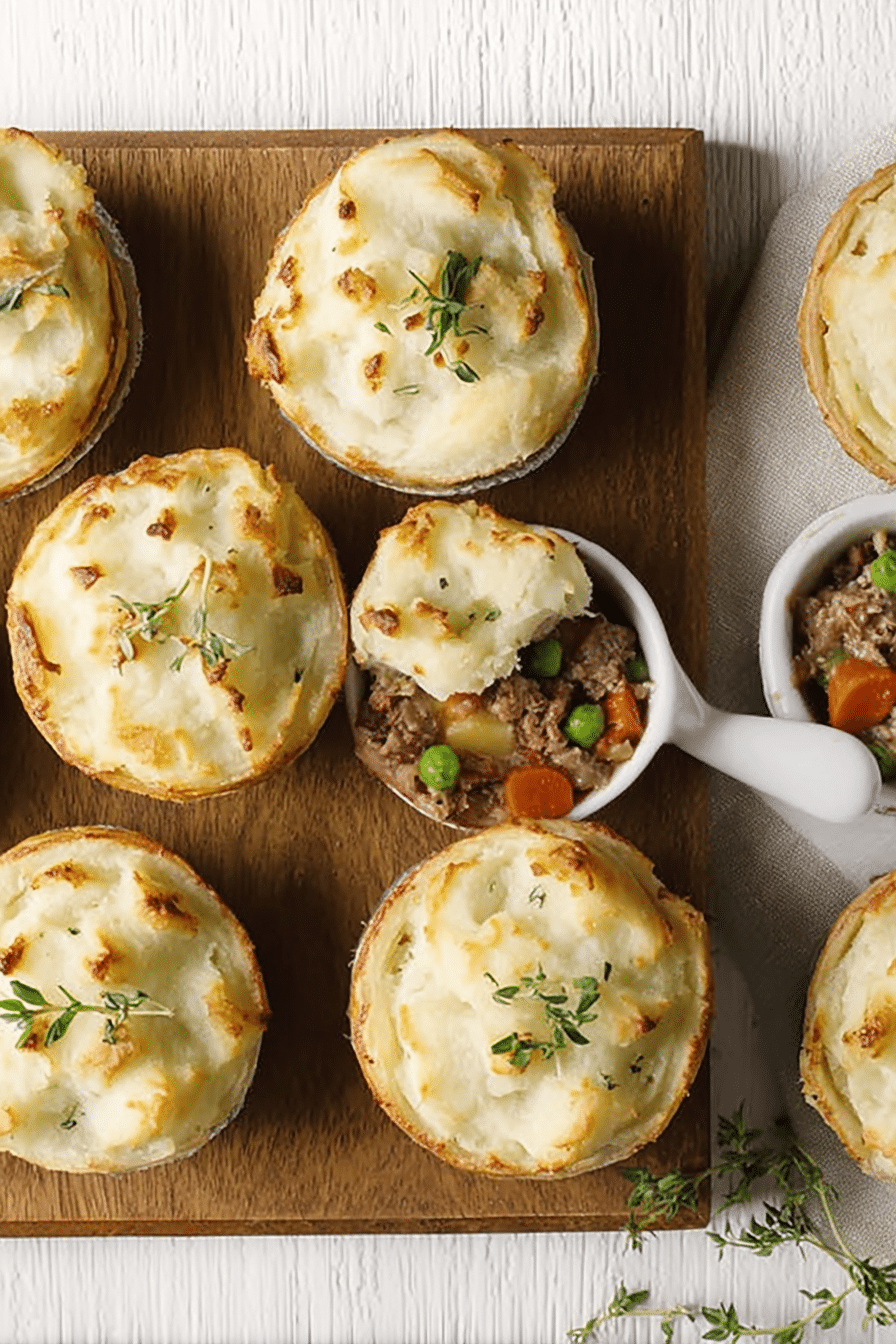
I love recipes that feel like a hug on a plate, and these mini shepherd’s pot pies are exactly that. I first started making them when my kids insisted on a tray of individual dinners just like at a diner—something they could hold, poke, and personalize. The result? Golden little crusts that snap when you bite in, warm savory filling, and mashed-potato tops that make everyone grin.
What I appreciate most is how forgiving the recipe is on wild weeknights: the dough comes from the refrigerator, the filling cooks up fast, and the little pies bake into satisfying hand-sized portions. I’ll tell you my favorite shortcuts and the small mistakes I made the first few times—like overfilling the cups or skipping a quick drain—that taught me how to get dependable results every time.
These mini pies are a great way to get kids involved: they can press the dough into the muffin tin, spoon the filling, and swirl the mashed-potato topping. While they work, your kitchen will smell like browned beef and simmered broth—comforting and familiar. If you like kid-friendly dinners, try my slow cooker beef ramen noodles for another easy weeknight option that kids usually love:
If you’re looking for more kid-friendly weeknight meals, try our slow cooker beef ramen noodles that are sure to please the whole family.
Why Mini Shepherd’s Pot Pies Are a Kid-Friendly Weeknight Win
These pies hit a sweet spot for families because they combine fast prep, familiar flavors, and portion control in a playful package. Kids respond to anything they can hold, and mini pies are naturally portioned so there’s less waste and fewer negotiations about “one more spoonful.” The mix of savory beef, soft veggies, and a mashed-potato lid is cozy and very approachable for picky eaters.
Sensory snapshot: picture warm steam escaping when you lift a mashed-potato lid, the little crunch of a browned crust, and the smell of seasoned beef and broth that signals dinner is ready. They’re also a fun hands-on project for kids—measuring, filling, and topping keeps little hands busy while you manage the stove.
Everything You Need for Mini Shepherd’s Pot Pies
Here’s what to have on the counter before you start so the process feels breezy. I separate ingredients and tools so you can glance quickly and get going.
- Ingredients
- Refrigerated pie crust – Convenient store-bought dough saves time and still bakes into a flaky shell; use chilled crust for best texture.
- Ground meat (beef or swaps) – Provides savory backbone; see the flavor swaps section for alternatives like turkey, chicken, or lentils.
- Onion – Adds sweet savory depth when softened; swap with shallot for a milder bite.
- All-purpose flour – Thickens the filling into a kid-friendly gravy.
- Beef broth – Keeps the filling saucy and flavorful; low-sodium gives you more control.
- Mixed vegetables (frozen) – A quick, colorful way to add nutrition kids accept (peas, carrots, corn, etc.).
- Mashed potatoes (refrigerated) – Shortcut topping that browns nicely; you can also swap for mashed sweet potato or a cheese topping.
- Tools
- Muffin tin – Regular-size cups create perfectly portioned pies.
- Rolling pin or hands – To flatten crust rounds evenly.
- 12-inch skillet – Spacious pan to brown meat and combine the filling quickly.
- 4-inch round cutter – For neat crust circles; a clean glass rim works in a pinch.
- Spoon or piping bag – For topping with mashed potatoes neatly.
The Secret to a Flaky Mini Crust
Flakiness is all about temperature and minimal handling. Work with cold dough, roll gently and evenly, and let the crust rest if it feels warm. Here are the concrete steps I use to get that satisfying crisp snap:
- Keep the dough chilled until the last moment—cold fat creates steam pockets as it bakes, which makes layers.
- Lightly flour your surface and roll from the center outward to an even thickness so each cup bakes uniformly.
- Press the rounds into muffin cups without stretching; stretching tightens gluten and leads to a dense crust.
- Partially blind-bake the shells until just lightly browned—this prevents soggy bottoms once the filling is added.
Speed Tricks: Prep & Bake in Under an Hour
If you’re short on time, a few smart moves get dinner on the table fast without losing comfort-food flavor.
- Use refrigerated dough and refrigerated mashed potatoes to skip homemade mixing steps.
- Brown meat and soften onions while crust rounds are par-baking—multitasking trims the clock.
- Keep frozen mixed vegetables in the pan; they thaw in the hot filling and don’t need prior cooking.
- Assemble the pies while the skillet simmers—this parallel work saves several minutes.
Flavor Swaps Kids Will Actually Eat
Kids can be particular, so small, familiar changes make these pies more appealing. Try swapping proteins or veggies to match what your family prefers.
- Ground turkey or chicken – Milder flavor kids accept readily; season with a bit more salt and a pinch of dried herbs.
- Vegetarian – Cooked lentils or a mix of mushrooms and lentils make a hearty meat-free filling with similar texture.
- Vegetable swaps – Use peas and corn for a sweeter profile, or shredded zucchini and carrots for sneaky veg boosts.
- Gentle seasonings – A touch of Worcestershire or a small sprinkle of smoked paprika adds depth without heat.
- For a kid-friendly side, pair the pies with a crispy vegetable spring roll that adds crunch and a fun dipping element.
How to Make Mini Shepherd’s Pot Pies (Step-by-Step)
Follow these clear, bulleted steps while you cook. I keep the verbs direct so you know exactly what to do at each stage.
- Heat the oven and prepare muffin cups by pressing chilled crust rounds into each ungreased cup; partially bake until lightly browned.
- In a wide skillet, brown the ground meat with chopped onion over medium-high heat until fully cooked; drain excess fat if necessary.
- Stir in flour to coat the meat, then add broth and seasonings; simmer until the mixture thickens into a saucy filling.
- Fold in frozen mixed vegetables so they thaw and heat through in the sauce.
- Spoon the warm filling into each par-baked crust cup—aim for a modest mound so the top can brown without spilling.
- Top each filled cup with a dollop of mashed potatoes, smoothing or creating rustic peaks to encourage browning.
- Bake until the potato tops are lightly browned and the filling bubbles at the edges.
- Let the pies rest briefly in the tin before removing so the filling sets a little and doesn’t run.
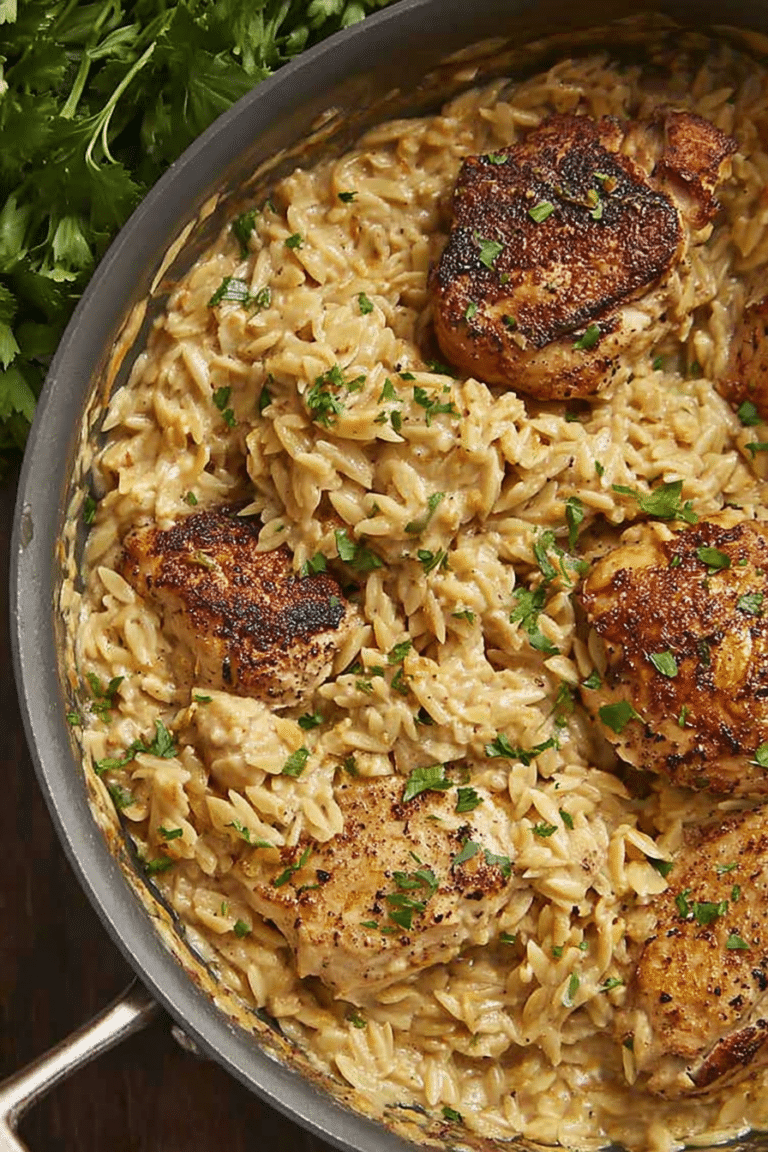
For another comforting dish that pairs well when you want variety on a weeknight, try this creamy skillet option:
For another comforting dish, check out our creamy chicken and orzo skillet that pairs well with mini shepherd’s pot pies.
Pro Tip for mini shepherd’s pot pies: assemble to freeze or bake ahead
- Assemble pies up to the point of baking, cover the muffin tin tightly, and freeze flat—this keeps shapes consistent and makes bake-and-serve dinner fast.
- Label the container with the date and baking directions; I always jot the bake time on the lid so I don’t guess later.
- To bake from frozen, add a few extra minutes to the oven time and cover loosely with foil if the tops brown too quickly.
- If you prefer to freeze baked pies, cool completely, then wrap individually before storing in an airtight container to protect texture.
Store, Freeze, and Reheat Mini Shepherd’s Pot Pies
- Short-term storage: keep pies in an airtight container in the refrigerator for up to a few days to preserve freshness.
- Freezing assembled pies: freeze on a tray until solid, then transfer to a freezer bag or airtight container to prevent freezer burn.
- Reheating from fridge: warm in a preheated oven until heated through to keep crust crisp; microwave will soften crust quickly.
- Reheating from frozen: bake in a moderate oven until warm in the center, adding foil if the potato tops brown too fast.
- Best containers: use rigid containers or sturdy freezer bags and remove as much air as possible to protect texture and flavor.
Nutrition-Focused Tips for Healthy Options
If you want to lighten the dish or boost nutrients, small swaps go a long way without changing the fun. Serving suggestions below help balance the meal.
- Choose leaner ground meat or ground turkey to lower saturated fat and calories while keeping savory flavor.
- Swap regular mashed potatoes for mashed cauliflower or a half-and-half mash to cut carbs and add veg.
- Increase vegetable content with extra peas, shredded carrots, or diced bell peppers for fiber and color.
- Use a low-sodium broth so you control the salt, and let kids add a small sprinkle of cheese at the table if they want more flavor.
- Serve with a fresh fruit side or a small dollop of a kid-friendly spread like healthy apple butter to add sweetness without added sugar:Enhance the nutritional profile of your meal by serving it with healthy apple butter for a tasty treat.
Creative Toppings Beyond Mashed Potatoes
Mashed potatoes are classic, but topping options can bring new textures and flavors kids enjoy.
- Cheesy crown: sprinkle grated cheddar or Monterey Jack on top and broil briefly for melty appeal.
- Herbed breadcrumb crust: toss breadcrumbs with a little butter and herbs for a crunchy finish.
- Sweet potato mash: a slightly sweet top that’s colorful and nutrient-rich—kids love the orange hue.
- Mini puff pastry lid: for occasional treats, top with a cut circle of puff pastry for extra lift and flakiness.
Incorporating Seasonal Vegetables for Freshness
Use what’s fresh locally—seasonal produce brightens flavor and stretches your food budget. Here are seasonal pairings that work especially well in the filling.
- Spring: fresh peas and diced new potatoes add sweetness and texture.
- Summer: finely diced zucchini and bell pepper bring color and lightness.
- Autumn: roasted root veggies like diced butternut squash or parsnip add warmth and sweetness.
- Winter: hearty additions like steamed kale or shredded Brussels sprouts pair well when finely chopped and mixed into the filling.
- Visit a farmers market and ask vendors for the sweetest storage-friendly options—they often have tips on what’s best right now.
Troubleshooting & My Notes from the Test Kitchen
I learned a few hard lessons in my kitchen; these troubleshooting tips save time and frustration. I write from experience—here’s what I watched for during my first dozen attempts.
- If crusts puff unevenly, they were rolled unevenly—return the dough to the fridge and re-roll gently.
- If filling is too runny, simmer a bit longer to reduce, or sprinkle in a touch more flour while cooking to thicken.
- If tops brown too quickly, tent with foil mid-bake so the centers can finish without burning the peaks.
- If pies stick in the tin, let them cool slightly before easing out with a small offset spatula; a quick pass with a knife around the edge helps.
Variations Kids Love
These quick variations are presented as bulleted options so you can pick and choose based on what your family prefers.
- Chicken pot pie version – Use shredded cooked chicken and a touch of cream for a familiar taste.
- Cheesy beef – Mix a handful of shredded cheese into the hot filling for extra richness.
- Mini shepherd’s with lentils – Use cooked brown lentils for a vegetarian-friendly, protein-rich filling.
- Breakfast twist – Swap mashed potatoes for scrambled egg and top with a sprinkle of cheese for a brunchy spin.
Frequently Asked Questions
Can I use ground turkey instead of ground beef? Absolutely! Ground turkey is a great substitute that can make the dish leaner while still tasting delicious.
How can I make the crust extra flaky? To achieve a flakier crust, make sure not to overwork the pie dough and chill it briefly before rolling it out.
Can I prepare these pot pies ahead of time? Yes! You can assemble the pot pies and freeze them before baking for a quick meal later.
What vegetables can I use in the filling? Feel free to swap in any frozen vegetables your kids love, such as peas, corn, or carrots for great flavor and nutrition.
How do I reheat leftovers? Simply reheat the mini pot pies in the oven at 350°F for about 10-15 minutes or until heated through. Enjoy!
Mini Shepherd's Pot Pies
Ingredients
Equipment
Method
- Heat oven to 375°F. Unroll pie crusts. On lightly floured surface, roll or press each crust to 12-inch diameter. Using 4-inch round cutter, cut 6 rounds from each crust.
- Gently press rounds floured-side-down in bottoms and up sides of 12 ungreased regular-size muffin cups. Bake 9 to 11 minutes or until lightly browned.
- Meanwhile, in 12-inch nonstick skillet, cook beef and onion over medium-high heat, stirring frequently, about 5 minutes or until beef is thoroughly cooked; drain. Stir in flour until blended.
- Add broth, salt, and pepper. Cook about 2 minutes or until mixture thickens. Stir in frozen mixed vegetables.
- Fill each muffin cup with about 1/4 cup beef mixture.
- Top each with slightly less than 2 tablespoons potatoes. Bake 20 to 25 minutes or until potatoes are lightly browned.