Chicken thighs are the kind of weeknight workhorse I reach for when I want a meal that feels both comforting and a little special. They have more flavor than breasts and are forgiving in the oven — you can get crisp, browned skin and meat that stays succulent if you treat them right. I started making this particular method on busy nights when I wanted something hands-off but reliable: a hot oven, a preheated rimmed pan, and a simple seasoning paste. The first time I tried preheating the sheet pan in the oven I noticed the skin sizzled the moment the chicken hit the surface — that sound alone tells you the crust is forming and juices are staying inside rather than steaming away.
I’ll be honest: the first few times I followed a baked-thigh recipe it came out a little disappointing — either the skin was floppy or the center was dry. Over the years I tested a few small changes that made a big difference: patting the skin completely dry, using a little butter on top of each thigh for browning, and a short baste mid-bake. Those small steps changed the result from “fine” to “the kind of dinner you want to eat straight from the pan.” Below I’ll share the method I use when I want dependable results, plus the seasoning ideas, troubleshooting tips, and serving suggestions that make this a repeat recipe in my kitchen.
Ingredients for Juicy Chicken Thighs
- Chicken thighs – bone-in, skin-on is my go-to for flavor and juiciness; boneless cooks faster if you’re short on time.
- Olive oil – helps the seasoning stick and promotes even browning on the skin.
- Garlic powder – adds savory depth without the risk of burning like fresh garlic might at high heat.
- Onion powder – gives a rounded base flavor that lifts the meatiness of the thighs.
- Paprika – I use regular or smoked depending on how intense I want the color and smoky note.
- Italian seasoning – a convenient herb blend that plays well with butter and lemon; swap with oregano/thyme if you prefer.
- Dried parsley – for a bright, herbaceous finish; fresh parsley can be added at the end for color.
- Salt & black pepper – fundamental for seasoning; salt is the real flavor enhancer here.
- Butter – dotted on top before baking for extra browning and a silky mouthfeel.
- Optional additions – things like minced garlic, lemon slices, honey, or soy for different marinades and finishing notes.
These are the building blocks. In the step-by-step below I use the measured quantities I developed and tested: 2 tablespoons olive oil, specific teaspoons of seasonings, and roughly 2 pounds of thighs for a typical 6-serving batch. If you’re scaling up or down, keep the salt proportional — that’s the easiest place to under- or over-season.
Step-by-Step Baking Instructions
- Prep the oven and pan: Preheat the oven to 400°F (about 200°C). Line a rimmed baking sheet or a large rimmed pan with foil for easy cleanup, then place the pan in the oven as it heats up. I like the pan piping hot so the skin starts to sear the moment it hits the metal.
- Make the seasoning paste: In a large bowl combine 2 tablespoons olive oil, 2 teaspoons garlic powder, 2 teaspoons onion powder, 1 teaspoon ground paprika, 1 teaspoon Italian seasoning, 1 teaspoon dried parsley, 2 teaspoons salt, and 1/2 teaspoon black pepper. Stir into a paste — the oil helps everything cling to the skin and distributes flavor more evenly than dry rub alone.
- Dry and season the thighs: Pat 2 pounds of chicken thighs completely dry with paper towels. Moisture is the enemy of crisp skin. Working in batches if needed, toss the thighs in the seasoning paste and rub it into the skin and the crevices near the bone. Don’t be shy — a good rub is what you’re tasting later.
- Place on the hot pan and add butter: Carefully remove the heated pan from the oven (use a mitt — it’s very hot) and arrange the thighs skin-side up with space between them; overcrowding steams the skin. Dot each thigh with a little diced butter (about a tablespoon total distributed over the pieces). The butter promotes browning and gives a richer mouthfeel.
- Bake, baste, and finish: Return the pan to the oven and bake for 20 minutes. After 20 minutes, carefully pull the pan out and baste each thigh with the juices collecting in the pan — you’ll see the juices are glossy and golden. Return to the oven for 10 more minutes, baste again, then bake a final 5–15 minutes until an instant-read thermometer inserted into the thickest part away from the bone reads 165°F. Total bake time will usually be about 35–45 minutes at 400°F, depending on thigh size.
- Rest and serve: Let the thighs rest 5–10 minutes on the pan after removing from the oven. Resting lets the juices redistribute, so when you cut into the meat it won’t flood the plate — it’ll be juicy and spoonable instead.
Timing notes: If you want crisper skin, you can push the oven temperature to 425°F for the final 10 minutes, but watch closely so the skin doesn’t burn. Conversely, if your thighs are on the larger side, give the final phase the full 15 minutes to ensure the center is done. Always rely on a thermometer for safety and best texture.
Tips for Crispy Skin and Juicy Meat
I treat this section like an FAQ I’d written into my own brain — these are the practical things that saved me dozens of disappointing batches:
- Pat the skin dry: I cannot overemphasize this. Before seasoning, use paper towels to blot skin until it’s dry to the touch. If you skip this, the skin will steam and never crisp properly.
- Preheat the pan: Putting the chicken onto a very hot rimmed pan gives an immediate sizzle and helps render fat quickly so the skin browns rather than steams.
- Don’t overcrowd: Arrange thighs with space around them. If you crowd the pan the escaping steam will make the skin soft.
- Use the right fat: Olive oil plus a little butter is my preference — oil helps conduct heat and seasoning, butter adds nutty, browned notes. If you need a higher smoke point, use avocado or vegetable oil and still dot with butter for flavor at the end.
- Use a meat thermometer: 165°F is the safe internal temp for chicken. It’s precise and takes the guesswork out of whether a thigh is done but still juicy.
- Broil for an extra push: If the skin is close but not as crisp as you’d like, switch to broil for 1–3 minutes with the pan about 6 inches from the element — watch it the entire time to prevent burning.
- Avoid frequent opening: Every time you open the oven you drop temperature. Try to time your basing checks so you’re not constantly peeking.
For oven-crispy techniques you can use on both sides and potatoes, check out our oven-crispy Parmesan potatoes—many of the same tips help achieve crisp chicken skin.
Creative Marinades and Seasoning Options
I treat the seasoning paste above as a neutral foundation — it goes with everything, but sometimes I want a very specific direction. These marinades are ones I’ve actually made and adjusted in my kitchen; I note timing and what to expect from each flavor profile so you can pick your mood for the night.
- Honey-mustard – sweet, tangy, and kitchen-friendly. Mix honey, Dijon mustard, a splash of apple cider vinegar, and a pinch of smoked paprika. Marinate 30 minutes to 2 hours. Expect a glossy, slightly sticky finish.
- Teriyaki-style – soy sauce, mirin (or a little honey), fresh ginger, and garlic. Marinate 1–4 hours. Brush fresh glaze on during the last 10 minutes to avoid burning; it adds a lacquered sheen and deep umami.
- Mediterranean herb blend – lemon zest, oregano, thyme, and olive oil. Marinate 30 minutes to 2 hours. Bright and aromatic; finish with a squeeze of lemon and chopped parsley.
- Lemon-garlic – crushed garlic, lemon juice/zest, olive oil, and a touch of crushed red pepper. Marinate 30–60 minutes. Tangy and sharp, this really perks up the richer thigh meat.If you love bright, tangy flavors, try a lemon garlic marinade inspired by our lemon garlic chicken bites for your thighs.
- BBQ rub – brown sugar, smoked paprika, cumin, garlic powder, and salt. Dry rub and rest 30 minutes or refrigerate overnight for deeper flavor. Good if you want a charred crust and caramelized edges.
General marinating rule: longer is not always better with citrus or highly acidic marinades — acid can begin to ‘cook’ the meat and change texture if left overnight. For herb- and oil-based marinades, overnight is fine and often beneficial.
Side Dish Pairings for Complete Meals
These thighs are pretty versatile — here are a few of my go-to plates depending on mood and season. I test these combos regularly because I like leftovers that reheat well together.
- Roasted vegetables – carrots, Brussels sprouts, or a medley tossed in olive oil and roasted alongside the thighs (if you have space) make an easy one-pan meal. The veggies pick up savory chicken juices and crisp up nicely.
- Rice or grains – plain steamed rice, pilaf, or quinoa help soak up pan juices. For a bright, zesty side, pair your baked chicken thighs with our cilantro lime rice to round out the meal.
- Potatoes – roasted wedges or mashed potatoes are classic. Serve crispy-skinned chicken thighs with baked garlic Parmesan potato wedges for a comforting, family-friendly plate.
- Salads – a crunchy green salad with a vinaigrette cuts the richness. Try a simple fennel and orange salad for contrast in texture and flavor.
Two complete meal ideas I rotate through: (1) Mediterranean: herb-marinated thighs, roasted baby potatoes, and a lemony arugula salad; (2) Comfort weeknight: honey-mustard thighs, garlic-Parmesan wedges, and steamed green beans. Both reheat well and are crowd-pleasers.
Nutritional Information
Per serving (based on the original recipe yield of 6 servings):
- Calories – approximately 347 kcal
- Fat – ~28 g
- Carbohydrates – ~2 g
- Protein – ~21 g
Notes on health and tweaks: chicken thighs are higher in fat than breasts but that fat is what keeps them moist and flavorful. If you want to reduce fat, remove the skin after cooking or use boneless, skinless thighs which will cut calories and fat but also reduce surface crispiness. You can also trim visible fat beforehand and rely on olive oil sparingly. For lower-sodium options, reduce the added salt and amplify flavor with fresh herbs, lemon, and garlic.
Frequently Asked Questions
- How long does it take to cook chicken thighs at 400°F?Bake at 400°F for about 35–45 minutes, until the internal temperature reaches 165°F. The recipe approach is to bake 20 minutes, baste, 10 minutes, baste, then finish for 5–15 minutes depending on thigh size — use a meat thermometer for best results.
- Can I bake chicken thighs from frozen?Thawing overnight in the fridge is best for even cooking and crispy skin. If you must bake from frozen, expect a much longer cook time (around 50–60 minutes at 375–400°F). Start covered loosely with foil to allow the center to thaw without drying, then uncover toward the end to crisp the skin, and ensure the center reaches 165°F.
- How do I get crispy skin but keep the meat juicy?Pat the skin very dry, rub with oil and seasoning, place thighs on a hot rimmed pan (preheated in the oven), avoid overcrowding, and bake at a higher temp (400–425°F). Finish under the broiler 1–3 minutes if needed and use a thermometer to avoid overcooking.
- Should I use bone-in or boneless chicken thighs?Bone-in, skin-on thighs give more flavor and stay juicier but take longer to cook (the times above). Boneless thighs cook faster — typically about 20–30 minutes at 400°F — so reduce baking time and still aim for 165°F internal temperature.
- How do I store and reheat leftover baked chicken thighs?Cool within 2 hours and store in an airtight container in the fridge for 3–4 days (or freeze up to 3 months). Reheat in a 350°F oven until 165°F (about 10–15 minutes), or use an air fryer for 5–7 minutes to re-crisp the skin; the microwave works but will soften the skin.
Final Notes from My Kitchen
I make this oven-baked chicken thighs method regularly because it’s adaptable, forgiving, and fast. Small changes — a lemon squeeze, a swap of smoked paprika for regular, or a quick broil at the end — let me shape it to what I have on hand and what we’re craving. Expect golden, slightly crackly skin with tender meat underneath when you follow the drying, preheating, and basting cues. If you’re feeding a crowd, I like to double the seasoning and roast on two pans, rotating them halfway through for even color and doneness.
Yield: 6 servings. Prep time: about 10 minutes. Cook time: about 35 minutes (total time roughly 45 minutes). This is the kind of recipe that keeps well as leftovers and shines in both casual family dinners and slightly fancier weeknight entertaining when paired with a bright salad or roasted vegetables.
If you try this, I’d love to hear how you seasoned yours or what side you paired it with — small tweaks are part of the fun, and I still learn something new every time I bake a pan of thighs.
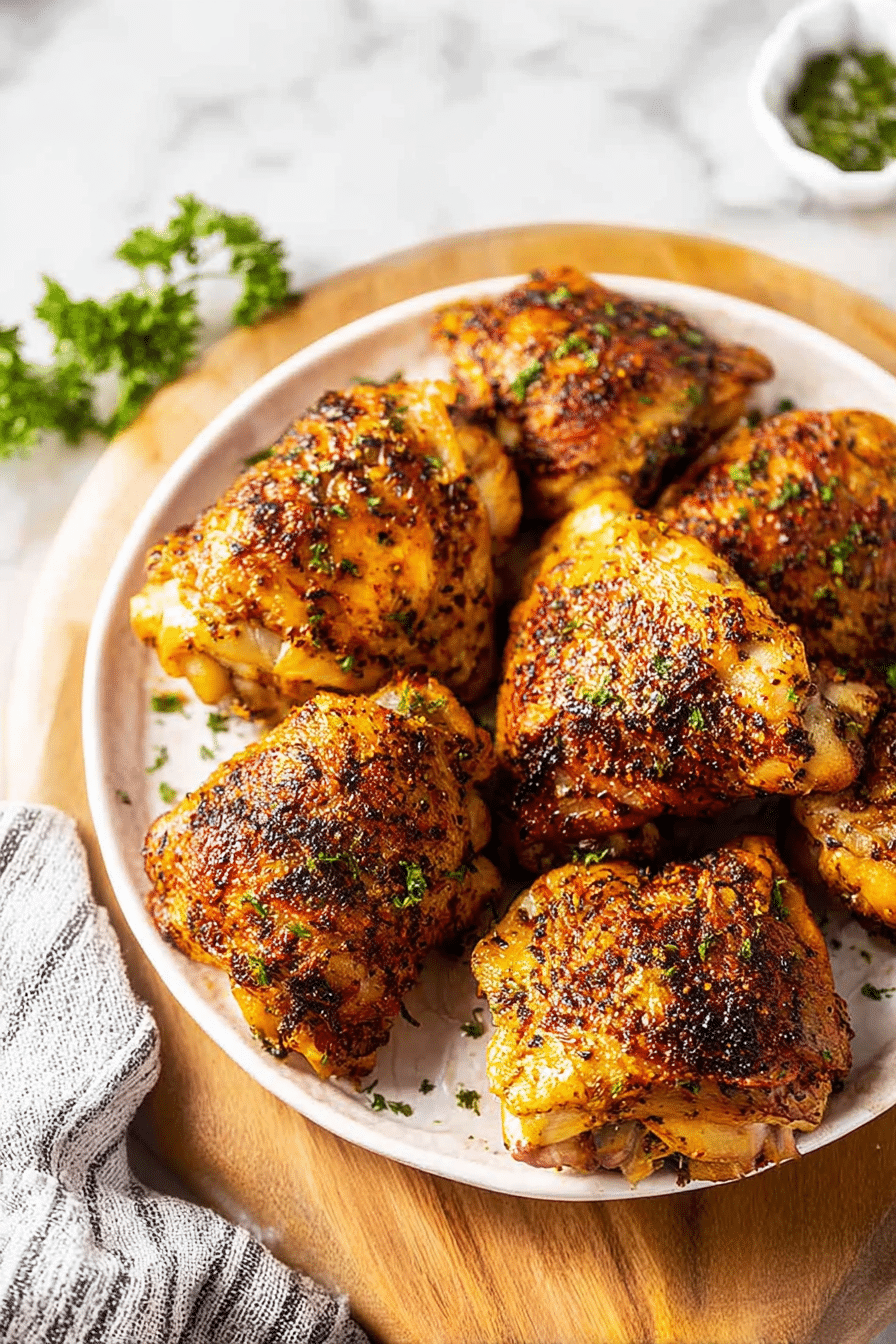
Oven Baked Chicken Thighs
Ingredients
Method
- Preheat oven to 400°F. Line a rimmed baking sheet or large rimmed pan with foil and place in the oven as it heats up (you want the pan to be hot when you add the chicken).
- Combine olive oil and all seasoning in a large bowl until a paste forms.
- Place chicken thighs in bowl with seasoning and toss to coat. Remove each thigh individually, rubbing the seasoning into the skin.
- Place chicken thighs on heated pan; dot with butter. Bake in the hot oven for 20 minutes. Carefully remove and baste chicken with emerging juices from the pan. Return to the oven and bake for 10 more minutes, then baste again. Finally, finish baking for 5-15 minutes, until chicken reaches an internal temperature of 165°F.