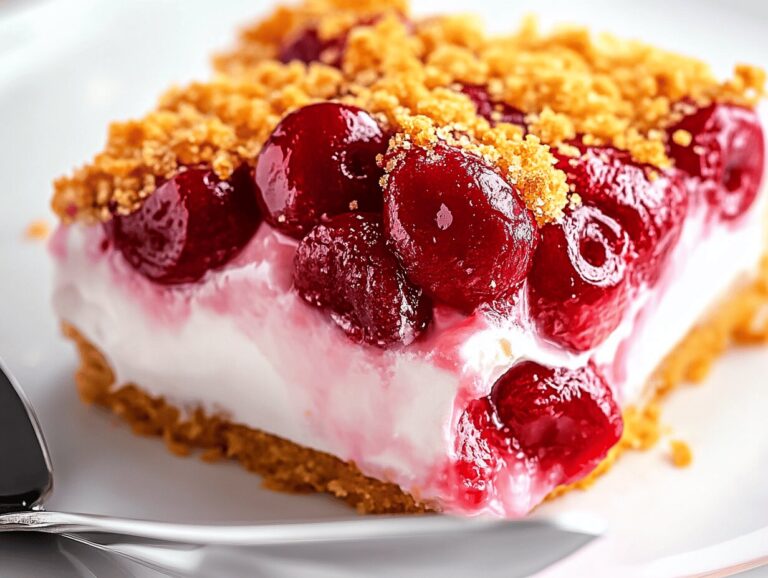
I make these triple-layer fudgy mint Oreo brownies whenever I want a dessert that stops conversation and starts a line at the dessert table. I remember the first time I brought them to a holiday gathering: the pan came back half-empty, guests asked for the recipe, and a cousin requested they be the centerpiece at his birthday. They’ve become my go-to party brownie because the textures—dense chocolate, airy mint, and crunchy Oreos—play together so well.
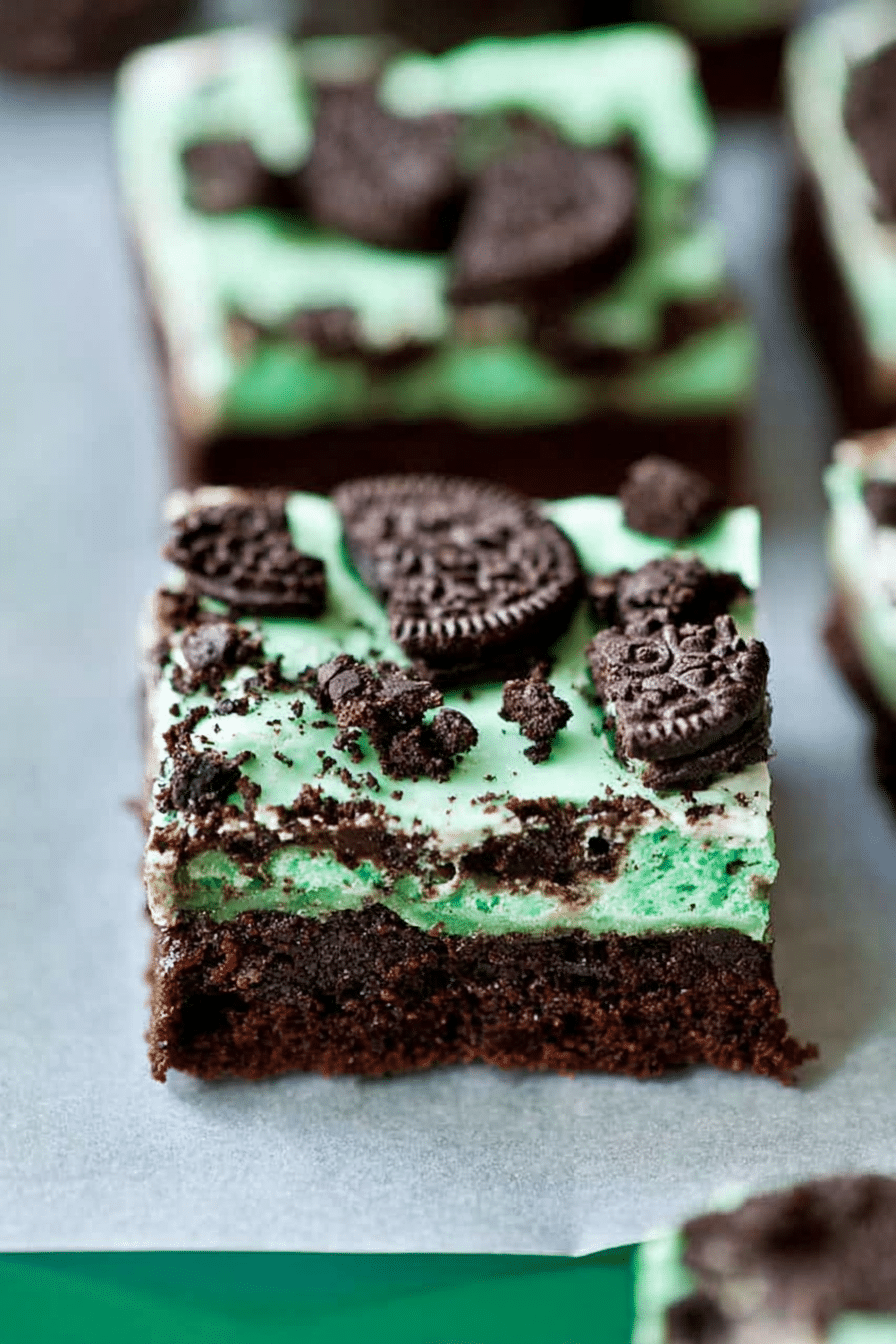
I’ve learned a few hard lessons making these: underbake a fraction and you’ll have gooey, irresistible brownies; overbake and guests will politely nibble and look elsewhere. It’s also taken a few tries to get the mint layer just right—bright without chemical bite, fluffy without being runny—so I’ll tell you exactly how I balance the flavor and texture so your pan looks as beautiful as it tastes.
These are a great canvas for party creativity: I’ll sometimes press extra crushed Mint Oreos into the top for drama or drizzle a little melted white chocolate for shine. If you like other crowd-pleasers, pair this with a classic cookie recipe I often serve alongside:
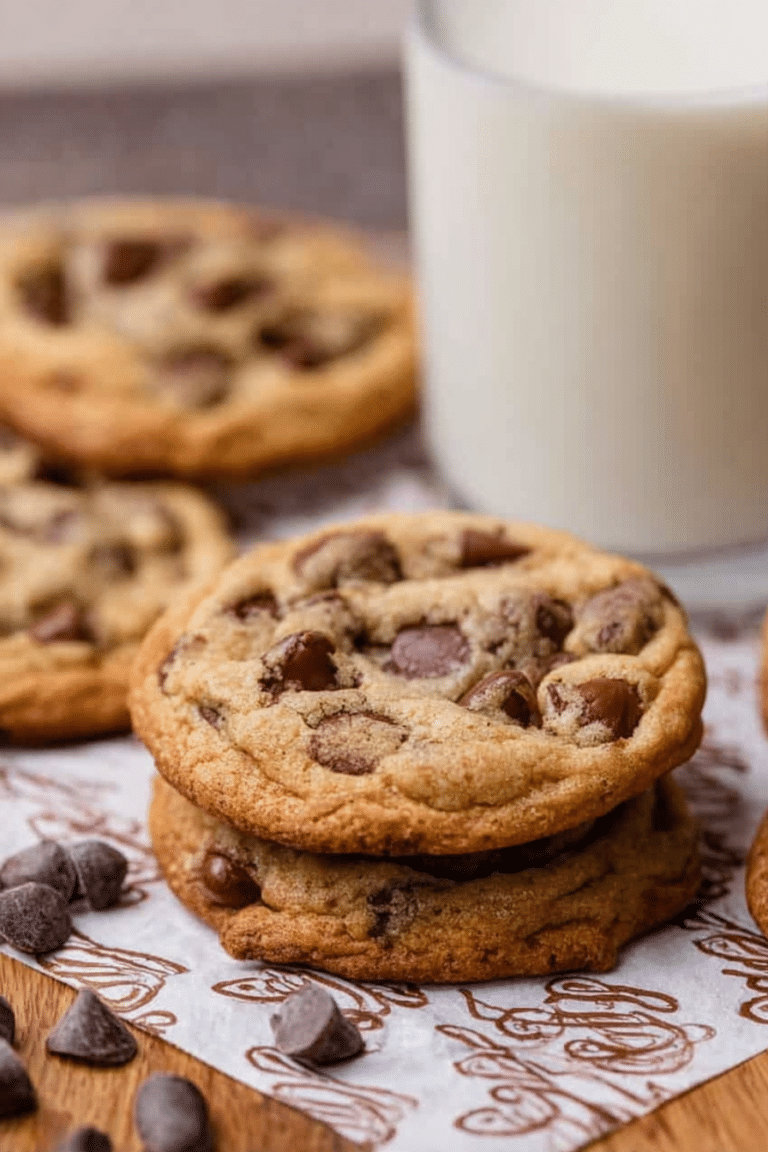
Looking for another crowd-pleaser? Try our Ultimate Chocolate Chip Cookies for a guaranteed hit at your next gathering.
Why These Triple Layer Fudgy Mint Oreo Brownies are Perfect for Parties
I bring these to birthdays, holiday potlucks, and summer BBQs because they feel special without being fussy. Guests comment on the layers before they taste them—there’s a real visual payoff when you cut a square and the mint layer sits proud between rich chocolate and crunchy cookie.
- The rich textures and flavors create an indulgent experience that guests will love; the fudgy base gives deep chocolate satisfaction while the mint layer brightens each bite.
- The layers add visual intrigue, making them an attractive centerpiece that photographs well on a dessert table.
- They’re versatile: swap the Oreos or adjust mint intensity for birthdays, St. Patrick’s Day, or winter holidays.
For another crowd-pleasing option I serve at gatherings, pair them with a simple cookie plate—people love variety and it creates a polished dessert spread. If you want complementary treats, try keeping a few smaller snacks nearby to balance the richness.
Everything You Need for Triple Layer Fudgy Mint Oreo Brownies
Below I list the ingredients and tools in plain, conversational terms so you know what’s doing the work in each layer and what to lean on if you want to tweak things. Remember: higher-quality base ingredients pay off in a richer, more satisfying final bar.
- Unsweetened or baking chocolate – Provides deep chocolate flavor and helps control sweetness; choose unsweetened if you want to control sugar.
- Butter – Gives fudgy texture and glossy sheen; can be swapped for a neutral oil in some vegan versions.
- Sugar – Sweetness and structure for the brownies; granulated for classic fudginess.
- Eggs – Bind and add richness; replaceable in vegan swaps (see swaps section).
- All-purpose flour – Structure without drying; you can use a gluten-free blend as noted below.
- Marshmallow fluff – Backbone of the mint layer for lightness and body; white chocolate helps stabilize it.
- Mint extract – Potent; a little goes a long way—use a few drops and taste as you go.
- White chocolate – Sweetens and stabilizes the mint layer; use a good-quality bar or chips for smooth melt.
- Cool Mint Oreos – Provide crunchy, chocolaty pockets and visual interest; hand-crumbled for texture.
- Tools – A 9×13 pan, offset spatula for smooth spreading, and a sharp knife for clean slices will make your life easier.
- Food coloring (gel) – Use gel for more concentrated color without thinning the mint layer.
The Secret to Ultra-Fudgy Brownies (and How to Avoid Dryness)
The fudgy texture comes from technique and proportions more than magic. I’ll be candid about common mistakes I made early on and the simple fixes that gave me dependable results every time.
- Melted chocolate plus butter = fudgy foundation. I melt them together gently so the batter stays dense and glossy; reheating too hot will seize the chocolate.
- A higher fat-to-flour ratio keeps brownies tender. I avoid adding extra flour and measure carefully to prevent dry, cakey results.
- Stir the flour in just until no streaks remain. Overmixing develops gluten and makes brownies tough—when I feel resistance, I stop.
- Bake to the sweet spot: the center should look set but still a touch glossy. Ovens vary—I dial in the extra minute or two on the second batch rather than guessing on the first.
- Cool fully before adding the mint layer. I once skipped this and the warmth melted the mint topping into a sad, runny puddle—cooling prevents that.
- Common mistakes and fixes: underbaked but too gooey—try a longer rest out of the oven; dry and crumbly—check oven temp and reduce bake time next batch.
Perfect Mint Layer Tips: Color, Texture, and the Right Mint Intensity
Balancing color and flavor is one of those small things that makes a big impression. I’ll tell you exactly how I get a cheerful mint green without an artificial taste and a light, spreadable texture that holds Oreos on top.
- Color: use gel food coloring so you get vivid green without adding liquid. Start with a tiny amount and add until you like the shade—you can always darken, not lighten.
- Mint intensity: mint extract is potent. I usually add a drop or two at a time, tasting cautiously; peppermint oil is stronger, so use even less if you choose it.
- Texture: mix marshmallow fluff with melted white chocolate and a butter-based frosting to make the layer fluffy but stable. If it’s too stiff, a splash of milk loosens it; if too loose, add a touch more powdered sugar or white chocolate.
- Ingredient suggestions: if you want a more natural mint note, fold in finely chopped candy cane for winter treats or use the crème filling from extra mint cookies for a subtle boost.
- Sensory cue: when the mint layer is right it smells fresh and cool, not medicinal—trust your nose and taste before slathering the pan.
Presentation & Plating: Slicing, Stacking, and Garnish Ideas for a Polished Tray
Presentation matters at parties. I keep plating practical so serving is smooth and everything looks intentional. A few small steps make the tray feel curated rather than slapped together.
- Slicing technique: chill the pan briefly to firm the top, then use a sharp knife wiped between cuts. For uniform squares, score the top first and cut with even pressure.
- Stacking for service: build small stacks of two squares on dessert plates for a bakery-style presentation; alternate directions so the mint layer is visible.
- Garnishes: press extra crushed Oreos lightly into the mint layer, add a few small mint leaves, or drizzle warm melted white chocolate for shine. Keep garnishes simple to avoid competing textures.
- Tray styling: use contrasting plates or a dark tray to make the pale mint pop; leave small gaps between squares so guests can pick them up easily.
How to Make Triple Layer Fudgy Mint Oreo Brownies (Step-by-Step)
Below I break the process into manageable stages so you can pace yourself at a party prep pace. Follow the order and timing notes if you want to work efficiently and avoid common pitfalls.
- Prep and tools – Line your pan and preheat the oven so you’re not scrambling. Have Oreos hand-crumbled and your mint mix ready to go before the brownies finish cooling.
- Make the fudgy brownie base – Melt chocolate and butter together gently, stir in sugar, then the eggs and vanilla. Fold in the flour until just combined and stir in the hand-crumbled Oreos for pockets of cookie texture.
- Swirl in the mint dollops – Drop spoonfuls of the mint mixture on top of the brownie batter and swirl lightly with an S-shaped motion of a knife so you get pretty ribbons without fully combining the layers.
- Bake and judge doneness – Bake until the edges are set and the center has a slight glossy wobble; oven temperatures vary, so err on the side of slight underbake if you like gooey brownies.
- Cool completely – Let the pan cool fully to room temperature; if you’re rushed, a short stint in the freezer will speed things up but don’t freeze solid.
- Finish the top layer – Whisk butter with powdered sugar for a stable frosting, then fold in melted white chocolate and the reserved mint-marshmallow mixture. Adjust color with gel food coloring as needed and spread evenly.
- Final garnish and set – Press remaining crumbled Oreos on top and allow the mint layer to set before slicing so you get clean edges.
Pro-Tips (short, scannable list)
- I chill the pan slightly before the final cut for the cleanest slices.
- If your white chocolate seizes, warm a bit of cream and whisk it in off heat to smooth it back out.
- To keep the mint layer from sliding, make sure the brownie base is fully cooled; I once skipped this and had the top melt away.
Troubleshooting (short, scannable list)
- Dry brownies: check oven temp and reduce next time; also avoid overmixing once flour goes in.
- Runny mint layer: more powdered sugar or extra white chocolate will help stabilize it.
- Faded mint flavor: add extract in tiny increments and taste as you go—it’s easy to overshoot.
Variations (short, scannable list)
- Swap Cool Mint Oreos for regular Oreos and add a touch more mint extract if you want a stronger mint note.
- Add a layer of thin chocolate ganache between brownie and mint for extra richness.
- Top with chopped dark chocolate instead of white for a more adult flavor profile.
Pro Tip for Triple Layer Fudgy Mint Oreo Brownies: Easy Vegan & Gluten-Free Swaps
If you need to accommodate dietary preferences, these swaps keep the spirit of the dessert without losing texture or flavor. I’ve tested several options and include what worked best in my kitchen.
- Egg replacement: use a neutral-flavored egg replacer or a flax “egg” (ground flaxseed mixed with water) to add structure in vegan versions.
- Butter replacement: coconut oil or vegan butter works in both the brownie and mint layers; expect a slightly different mouthfeel but excellent fudginess.
- White chocolate alternative: use vegan white chocolate chips or a thick coconut cream and powdered sugar mixture to stabilize the mint layer.
- Marshmallow fluff: look for vegan marshmallow fluff alternatives or use aquafaba whipped with powdered sugar for a similar lift.
- Gluten-free flour: a 1:1 gluten-free all-purpose blend usually works; I prefer blends with xanthan gum for structure.
- Flavor considerations: when you swap ingredients, taste the mint layer before setting—it may need a touch more extract because some vegan and gluten-free bases mute flavor slightly.
If you’re looking for a vegan option, check out our Vegan Chocolate Brownie Sundae recipe for inspiration.
How to Store, Make-Ahead, and Serve These Brownies
These brownies travel well and can be prepared ahead—perfect for holiday planning. Here’s how I keep them tasting fresh and looking party-ready.
- Room temperature: store in an airtight container for up to a few days if your kitchen is cool; keep them covered to prevent the mint layer from drying out.
- Refrigeration: you can refrigerate for up to a week—bring to near-room temperature before serving for the best texture.
- Freezing: freeze cut squares on a tray, then transfer to an airtight container; thaw in the fridge and then briefly at room temp so the mint layer softens before serving.
- Make-ahead timeline: bake the brownies a day ahead, add the mint layer the day of the event for the freshest look, or finish entirely up to two days ahead if you’re short on time.
- Best containers: rigid, shallow containers prevent squashing and keep decorations intact; wrap layers between paper to avoid sticking if stacking.
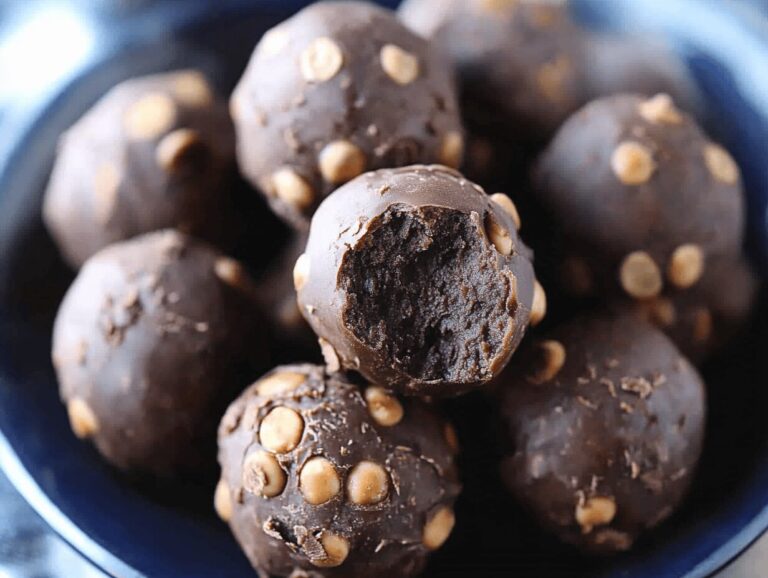
For a complementary treat, try our Chocolate Peanut Butter Protein Balls for a healthy snack option alongside the dessert table.
Serving Suggestions or Pairing Ideas with Beverages
These brownies balance rich chocolate and cool mint, so the beverage you pair with them should either echo those notes or offer a contrast. I like offering two or three drink options at a party so guests can choose their favorite.
- Coffee: a dark roast or an espresso cut through the sweetness and accentuate chocolate. Try serving a small cup of espresso or a mug of medium-dark drip brew alongside each plate.
- Mint tea: a chilled or warm mint tea complements the mint layer without adding sweetness; steep fresh mint or use a quality mint tea bag and serve with lemon wedges.
- Dessert wines: a slightly sweet wine like a tawny port or a late-harvest Riesling bridges the mint and chocolate—pour small tasting portions.
- Non-alcoholic option: a rich hot chocolate or a mint-infused cold brew is cozy and party-friendly for all ages.
- Presentation tip: serve beverages in small carafes or labeled dispensers so guests can self-serve while admiring the dessert tray.
Emotional Experience of Sharing These Brownies During Celebrations
For me the best part of baking these brownies is watching the room change when the pan is set down. Conversations pause, forks reach, and I get the little hum of approval that tells me I brought something worth remembering. One year a friend asked for an extra-large pan for their family reunion—the recipe has become a bridge to moments where people gather and linger.
Sharing these brownies has also taught me the joy of small rituals: slicing them carefully, nudging a mint leaf on top, and stacking two squares on a dessert plate. Those little gestures turn an ordinary bite into a moment people recall later. Take the time to plate with care; your guests will notice.
If you have a story about serving them at a celebration, tuck it into a note for the host or on a card beside the tray—people love the personal touch and it makes the dessert feel even more special.
Frequently Asked Questions
Can I make these brownies gluten-free?
Yes! You can use a gluten-free all-purpose flour blend instead of regular flour to make these brownies gluten-free.
How long do these brownies last?
These brownies can be stored in an airtight container at room temperature for up to 3 days or in the fridge for up to a week. For longer storage, consider freezing them.
Can I substitute the mint extract?
Absolutely! If you prefer a different flavor, you could use vanilla extract or even almond extract for a different twist. Just adjust the quantity according to your taste.
What if I don’t have white chocolate chips?
You can substitute white chocolate chips with a mixture of powdered sugar and a little milk for the frosting, or simply use more vanilla frosting for the top layer.
Are there any tips for cutting the brownies neatly?
To get clean cuts, you can use a sharp knife and wipe it clean between each slice. You can also chill the brownies in the fridge for a bit before cutting.
Triple Layer Fudgy Mint Oreo Brownies
Ingredients
Method
- Preheat oven to 350°F. Line a 9×13-inch pan with foil and spray it with cooking spray.
- Mix the Mint Filling: In medium bowl, stir together marshmallow fluff, mint extract, and food coloring; set aside.
- Melt Chocolate: Microwave chocolate and butter in large bowl for 90 seconds until melted. Stir until smooth.
- Combine Ingredients: Stir in sugar, then eggs and vanilla. Mix in flour until just combined, then fold in 12 crumbled Oreos.
- Bake: Spread brownie batter in prepared pan and swirl in green filling. Bake for 23-25 minutes until set.
- Cool: Cool completely for about 1 hour or in the freezer for 10 minutes.
- Make Frosting: Whisk together butter, powdered sugar, vanilla, and milk until smooth. Melt white chocolate and mix with frosting and food coloring.
- Frost and Crumble: Spread frosting over brownies and sprinkle with 18 crumbled Oreos. Allow to set before serving.