I make peanut butter banana bars most weeks because they travel, they keep well, and my kids actually ask for them. In my kitchen these bars have become a go-to when I need a quick, wholesome snack that will calm hungry kids between activities. The aroma of warm peanut butter and caramelized banana is enough to stop anyone in their tracks.
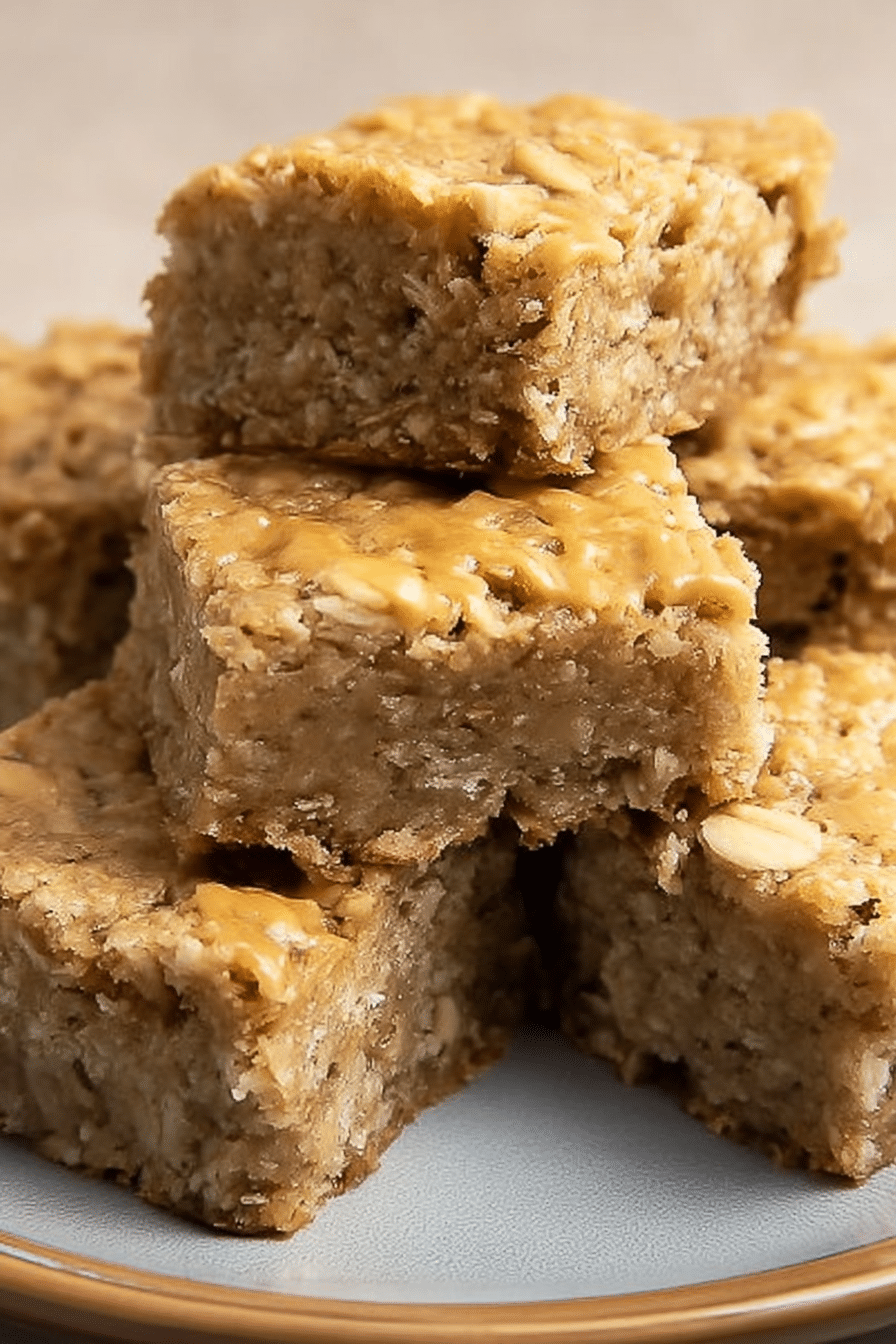
The first time I baked these I learned a few things the hard way: use overripe bananas for natural sweetness, watch the butter temperature, and don’t over-bake if you want a soft center. Once I adjusted those details, the bars came out chewy and tender—just what little hands reach for every time.
I love that these bars are both pantry-friendly and forgiving. They blend fruit, oats, and peanut butter into something that feels like a treat but still supports steady energy and concentration for school and play. If you want a drink to pair with these, try serving them with a peanut butter banana smoothie for a complete snack.
Why Peanut Butter Banana Bars Are a Parent’s Go-To Snack
These bars check a lot of boxes for parents: they’re portable, filling, and made from ingredients many families already keep on hand. Bananas bring natural sweetness and potassium that supports growing bodies; oats add fiber for steady energy; and peanut butter contributes flavor and healthy fat that helps kids feel satisfied between meals.
Snacks are a small but important part of a child’s day—good ones help concentration before homework and provide quick calories after play. I’ve watched these bars become a classroom favorite in packed lunches and a quiet helper for afternoons when my kids need something to tide them over until dinner.
Pair them with a simple drink when you want a fuller snack—here’s an easy suggestion to try alongside your bars:
For a quick and nutritious drink, pair these bars with a peanut butter banana smoothie.
Everything You Need for Peanut Butter Banana Bars
Below is a conversational ingredient discussion so you know why each item matters and what to swap if needed. I use “you” here because these choices help you tailor the bars to your family’s needs.
- All-purpose flour – Provides structure; swap with a gluten-free blend if you need the bars to be celiac-friendly.
- Old-fashioned rolled oats – Add chew and fiber; they help give the bars a hearty texture kids love.
- Baking powder – A little lift keeps the bars from becoming too dense.
- Salt – Balances sweetness and enhances the peanut butter flavor.
- Unsalted butter – Gives tenderness and a rich mouthfeel; you can use a neutral oil or dairy-free spread for vegan swaps.
- Granulated and brown sugar – Together they sweeten and contribute to a soft, slightly caramelized crumb; alternative sweeteners can work but may change texture.
- Egg – Binds the batter and adds moisture; see vegan swaps below if you avoid eggs.
- Vanilla extract – Rounds out flavors and makes the bars smell irresistible.
- Ripe bananas – The star for sweetness and moisture; always use very ripe bananas (spotted or brown) for best flavor.
- Peanut butter – For flavor, fat, and richness; swap with seed butter for nut-free households.
Tools you’ll want on hand: a mixing bowl, electric mixer (or sturdy whisk and elbow grease), spatula, measuring tools, and an 8-inch square baking pan. Having parchment or a nonstick spray makes removing bars easy for little hands.
How to Make Peanut Butter Banana Bars (Step-by-Step)
- Preheat your oven and prepare an 8-inch square pan by greasing it so the bars release cleanly.
- Whisk together the dry ingredients—flour, oats, baking powder, and salt—so you have a uniform mixture; this helps the bars bake evenly.
- Using an electric mixer on medium speed, beat the butter with both sugars until the mixture is light and fluffy; this step traps air and makes the final bars less dense.
- Add the egg and vanilla, mixing until incorporated, then mix in the mashed bananas and peanut butter just until combined.
- Reduce mixer speed and add the dry ingredients gradually, mixing only until they disappear into the batter to avoid a tough texture.
- Transfer the batter to the prepared pan, smooth the top, and bake until the edges are golden and a toothpick inserted near the center comes out clean—usually around 40–45 minutes at a moderate oven temperature.
- Cool the pan on a rack before cutting into kid-friendly squares so the bars set and don’t crumble.
Common troubleshooting tips I use when a batch isn’t perfect:
- Bars turn out dense: I noticed that overworking the batter or using cold butter is often the culprit—let the butter soften and mix just until combined.
- Uneven baking: Check your oven temp with an oven thermometer and place the pan in the center rack; rotate once if your oven has hot spots.
- Bars are dry: Reduce baking time slightly or use very ripe bananas for extra moisture.
The Secret to a Soft, Chewy Texture Kids Will Love
Texture comes down to three things: the temperature of your butter, the moisture from the bananas, and baking time. Soft butter cream together with sugar will trap air that gives a tender crumb; over-beating or using butter that’s too cold changes how the batter comes together. Oats add chewiness while bananas add natural moisture and shine to the crust when baked just right. Watch the edges and center rather than the clock—when the crust has a light golden sheen and the center is set, you’ve hit the sweet spot.
For more tips on achieving perfect snack textures, you might also find these ideas helpful:
To discover more about achieving perfect textures in snacks, explore our peanut butter rice krispie treats.
Boost the Protein: Kid-Friendly Add-Ins and Safe Swaps
If you want to increase the staying power of these bars, add protein in ways kids will accept without changing the flavor too much. Consider folding in a little protein powder (mild-flavored), stirring in chopped nuts or seeds for crunch, or mixing in a dollop of Greek yogurt to the batter for extra protein and moisture.
Portion suggestions: one small square per younger child and a slightly larger piece for older kids keeps snacks balanced—you can always add a side of fruit or a few whole grain crackers if appetites are bigger.
For a quick extra-protein option in your snack rotation, try these:
Consider adding some chocolate peanut butter protein balls for an extra protein boost in your snack rotation.
Allergy-Friendly Swaps: Vegan, Nut-Free, and Gluten-Free Options
Making these bars inclusive is easy with a few swaps. Here are practical alternatives that keep the bars tasty:
- Egg substitutes – Use a flaxseed “egg” (ground flaxseed mixed with water) or unsweetened applesauce to bind the batter for a vegan option.
- Butter alternatives – Use a solid plant-based spread or refined coconut oil to keep a similar texture without dairy.
- Nut-free peanut butter swap – Sunflower seed butter or soy nut butter gives the same creamy richness without tree nuts.
- Gluten-free flour – A one-to-one gluten-free baking blend works well; make sure your oats are labeled gluten-free if serving someone with celiac disease.
These swaps usually change texture slightly, so expect the bars to be a touch more crumbly with some alternatives—still very snackable and kid-approved.
Pro Tip for Peanut Butter Banana Bars: Kid-sized Portions and Protein Boosts
- Cut bars into small squares or fun shapes to make portions feel special and keep sugar intake in check for younger kids.
- Top bars with a thin spread of peanut butter and a banana slice for visual appeal and extra protein at serving time.
- Pack one or two bars with a small container of yogurt or a handful of seeds to round out a balanced snack.
- Use colorful liners or cookie cutters to make snack time playful—this helps picky eaters give them a try.
How to Store, Freeze, and Reheat Peanut Butter Banana Bars
Storage is simple and keeps the bars tasting fresh for busy families. Store cooled bars in an airtight container in the refrigerator for up to a week—this helps preserve moisture and prevents them from becoming stale. If you want to keep bars longer, wrap individual pieces in plastic wrap or parchment and freeze in a zip-top bag for up to two months. Thaw overnight in the fridge or unwrap and warm briefly in the microwave for 10–15 seconds when your child is ready for a quick snack.
For on-the-go mornings, I keep a small stash in the freezer that I can pull out the night before—this makes breakfast or snack prep effortless on hectic days.
Creative Flavor Variations to Try
- Fold in chocolate chips for a classic nod to kids’ tastes—use mini chips so the texture stays soft.
- Add a sprinkle of cinnamon and nutmeg for warm, comforting notes that pair beautifully with banana.
- Stir in dried fruit like raisins or chopped dates for extra chew and sweetness.
- Swap peanut butter for almond or sunflower seed butter to change the flavor profile and accommodate allergies.
- Swirl in a little jam on top before baking for a fruity surprise in each square.
For different takes on banana-based bars, try our banana oatmeal bars for fresh ideas and inspiration:
For more delicious options, check out our banana oatmeal bars which offer a different yet nutritious take on banana-based snacks.
Frequently Asked Questions
How do I know when the peanut butter banana bars are done baking?
The bars are done baking when the edges are browned and a toothpick inserted into the center comes out clean. This usually takes around 40-45 minutes at 350°F (175°C).
Can I make peanut butter banana bars gluten-free?
Absolutely! You can use a gluten-free all-purpose flour blend in place of regular flour to make these bars gluten-free.
What can I add to boost the protein content?
You can mix in some protein powder, nuts, or seeds, or even add some Greek yogurt to the batter for an extra protein boost!
How should I store leftovers?
Store the bars in an airtight container in the fridge for up to a week. You can also freeze them for up to two months for longer storage.
Can I use ripe bananas that are starting to brown?
Yes! Overripe bananas are perfect for this recipe as they are sweeter and more flavorful, making them ideal for peanut butter banana bars.
Peanut Butter Banana Bars
Ingredients
Method
- Preheat oven to 350°F (175°C). Grease an 8-inch square baking pan.
- Whisk together the flour, oats, baking powder, and salt. Set aside.
- Using an electric mixer on medium speed, beat the butter, sugar, and brown sugar until light and fluffy.
- Add the egg and vanilla, and mix well. Mix in the bananas and peanut butter, mixing just until combined.
- Reduce mixer speed to low. Gradually add the flour mixture, mixing just until combined.
- Transfer the batter to the prepared pan and spread evenly. Bake 40-45 minutes, or until edges are browned and a pick inserted into the center comes out clean. Cool in the pan before cutting into bars.