I make this coconut jelly when I want a fast, creamy dessert that still feels special. It takes minutes to prepare and chills into a glossy, silky pudding that’s cool and refreshing on a hot day. In my kitchen I like how minimal ingredients leave room for fresh fruit or bright citrus notes on top.
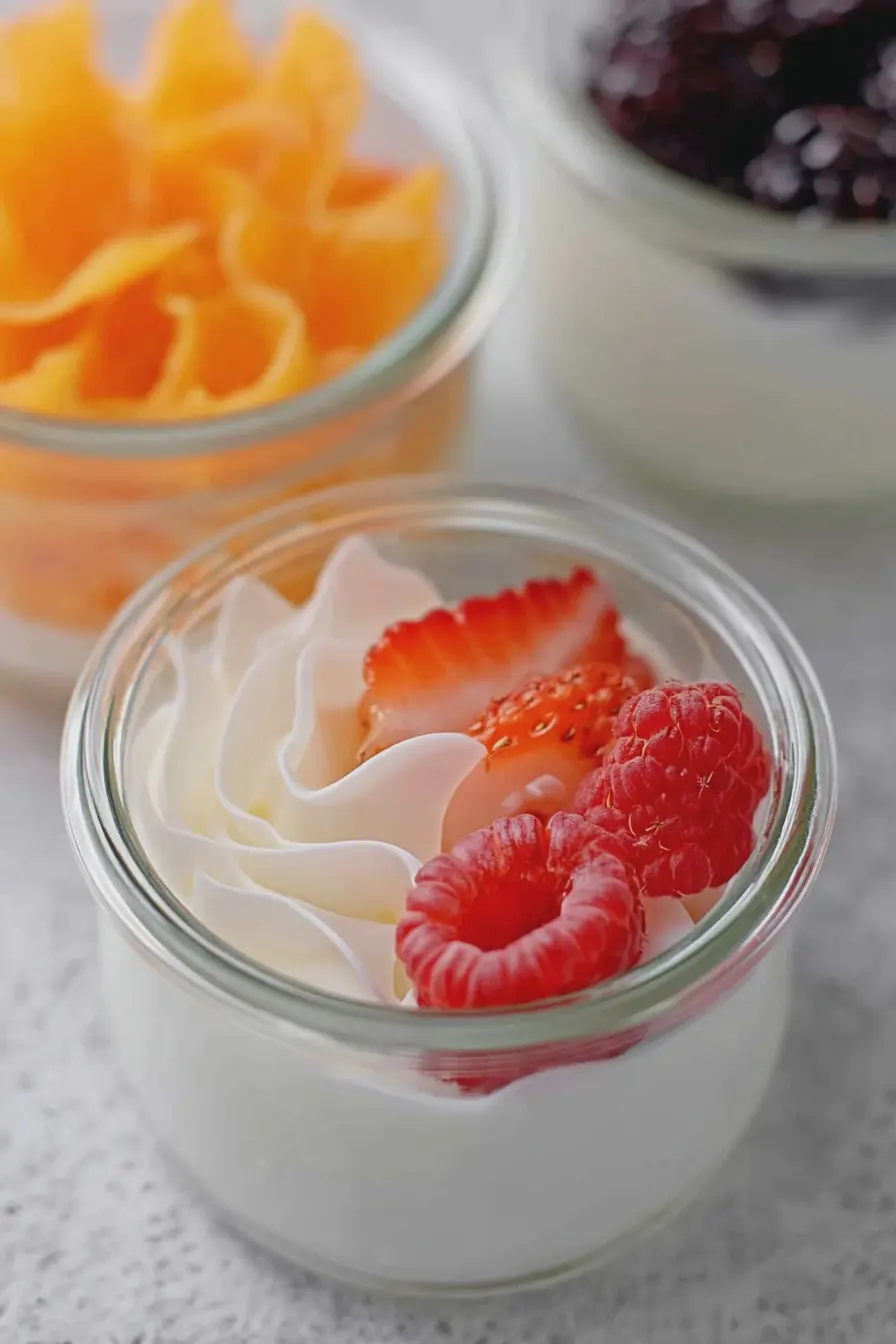
I grew up with coconut desserts in many Southeast Asian homes, and this version nods to that tradition while staying dairy-free and grain-free. I like serving mine in small glass jars—each one looks like a little bowl of pale silk topped with jewel-bright fruit. The texture is what keeps me coming back: glossy, smooth, and just firm enough to hold a spoonful of mango or berries.
I’ll walk you through why the recipe is so forgiving, what tools and swaps work best, and a few tricks I use to get a perfectly even set. I find that a short hands-on time and a relaxed chilling step make this one of my go-to make-ahead desserts for weeknight dinners or a casual gathering.
Why this coconut jelly dessert is perfect for quick, dairy-free treats
This recipe lives in the quick-and-easy lane because it uses a handful of ingredients and minimal active time. You whisk a few things together, pour into jars, and let the fridge do the rest. Because it’s coconut-based and can be set with plant-based agar or animal-derived gelatin, it adapts to paleo, gluten-free, and vegan diets—so it’s useful when you’re feeding people with different preferences.
Think of the finished dessert as a smooth, pale canvas: the creamy coconut base smells faintly of sweet coconut and has a cool, silky mouthfeel that contrasts nicely with bright, acidic fruit or toasted coconut flakes. Keep toppings simple and fresh—sliced mango, kiwi, or a scattering of raspberries add color and a burst of brightness.
Everything You Need for Coconut Jelly Dessert
Tools and ingredients are straightforward. You don’t need fancy equipment—just items to whisk, heat, and strain the mixture for the cleanest finish. Below I list what I use and sensible swaps so you can shop or raid your pantry with confidence.
- Whisk – For smoothing the gelatin or agar into the liquid without lumps; a small balloon whisk is ideal.
- Saucepan – A small saucepan for gently heating the coconut mixture; even heat prevents curdling.
- Fine mesh sieve – Strain the warmed mixture to catch any unmelted particles for a glossy surface.
- Glass jars or small bowls – Individual serving vessels that chill evenly and look pretty on the table.
- Full-fat coconut milk – The backbone of the dessert; choose a creamy, high-fat option for the richest mouthfeel.
- Coconut water – Adds a light, clean coconut note and thins the base so it sets with the right tenderness.
- Gelatin or agar-agar – Use gelatin for the classic silky set or agar for a vegan, firmer finish; see the gelatin vs. agar section below.
- Sweetener – Honey, maple syrup, or another liquid sweetener will dissolve into the warm coconut; choose to taste and for dietary needs.
- Vanilla or extracts – Optional flavor boosters that round the coconut; almond or coconut extract are nice alternatives.
- Optional toppings – Fresh fruit, toasted coconut flakes, or herbs like mint for contrast and color.
Notes on sourcing: if you choose agar-agar, buy powder or flakes labeled “food-grade agar”—it behaves differently from gelatin and may require different amounts and heating. If you want texture contrast, keep some toasted coconut flakes on hand. For sweeteners, maple or agave work well as vegan alternatives to honey.
The Secret to the Perfect Silky Texture
Texture comes down to two main things: proper hydration (blooming) of your setting agent and careful temperature control while dissolving it. When I get these right, the jelly sets with a glossy, velvety surface and a tender bite.
- Bloom your gelatin or agar in cold liquid first so the granules hydrate evenly and melt smoothly.
- Heat the coconut mix gently—hot enough to dissolve the setting agent and sweetener, but not boiling. Boiling can cause separation or a grainy finish.
- Whisk after adding the hydrated gelatin or agar to fully incorporate and remove tiny lumps; finish by straining for a mirror-like top.
- Chill undisturbed so the gel network forms evenly; sudden temperature changes can create pockets or a weepy surface.
Gelatin vs. Agar: Which to Use for a Vegan Coconut Jelly
Gelatin is animal-derived and gives a soft, supple set that jiggles gently. Agar-agar is plant-derived (from seaweed) and yields a firmer, slightly more elastic gel. Both can make excellent coconut jellies, but they behave differently in hydration and heat.
If you want a vegan option, agar-agar is the way to go—keep in mind it often needs a full boil to dissolve and can set at room temperature faster than gelatin, which can speed cooling. For more on working with agar in fruit jellies and its particular handling, see this link: agar-agar fruit jelly.
Sensory guide: imagine gelatin-made jelly as pillowy and yielding, while agar-made jelly holds a firmer, cleaner-cut slice. Agar also adds a small amount of fiber and tends to be lower in calories than gelatin-based versions.
Why Blooming and Temperature Matter for a Smooth Set
Blooming lets the setting agent fully hydrate so it dissolves without clumps. Heat is the activator—too cool and particles remain undissolved, too hot and the fat in coconut milk can separate. I always pay attention to these stages because they decide whether the finished dessert is seamless or slightly grainy.
- Bloom the powder in a small portion of the cold liquid so each particle swells and becomes soft before heating.
- Dissolve over medium heat, stirring constantly; stop once the mixture is hot and steam rises—avoid a rolling boil if using gelatin.
- After dissolving, strain into your serving vessels to remove any stray bits, then let the mixture cool briefly before chilling to reduce surface condensation.
- Chill uncovered for the first hour to allow any surface steam to escape, then cover to prevent fridge odors from being absorbed.
Pro Tip for coconut jelly dessert: Swap gelatin for agar-agar to make it vegan and speed cooling
- If you swap to agar-agar, use its manufacturer’s conversion guidance and be prepared to bring the mixture to a brief boil so the agar dissolves completely.
- Agar sets more firmly and faster than gelatin, so keep an eye on your chilling schedule—check after an hour to avoid an overly firm texture.
- To keep the jelly bright, pair agar-set versions with tart fruit like pineapple or kiwi; the firmer set holds layered patterns well.
- Flavor pairings that work well: lime zest, mango, passionfruit, or a touch of toasted coconut for texture contrast.
How to Make Coconut Jelly Dessert (Step-by-Step)
- Pour a small portion of the cold coconut water into a bowl, sprinkle the gelatin or agar over it, and let it sit to bloom and rehydrate.
- Warm the remaining coconut water, full-fat coconut milk, and your chosen sweetener in a saucepan over medium heat, stirring until the sweetener dissolves and steam begins to rise—do not let it vigorously boil if using gelatin.
- Remove the saucepan from the heat and whisk the bloomed gelatin or dissolved agar into the warm coconut mixture until smooth and fully incorporated.
- Pass the mixture through a fine mesh sieve into a pouring container to catch any undissolved bits; skim off any visible bubbles with the back of a spoon or a small strainer for a glossy surface.
- Divide the strained mixture evenly into small jars or bowls, chill uncovered for about an hour so surface steam can escape, then cover and chill until fully set—typically a few more hours depending on your setting agent.
- Top with fresh fruit, toasted coconut, or herbs just before serving to keep textures and colors vibrant.
Presentation Ideas: Layered Jellies, Fruit Toppings, and Garnishes
Presentation makes a simple dessert feel special. Use contrast in color and texture—bright fruit slices, a sticky fruit coulis, or a dusting of toasted coconut all create an inviting plate. If you want a cool drink to serve alongside, a light option is a refreshing coconut cooler.
- Layered jellies: pour a thin colored layer (use fruit juice or matcha-infused coconut milk) and chill until just set before adding the coconut layer for visual stripes.
- Fruit topping combos: mango + shredded coconut, kiwi + lime zest, or mixed berries + a mint leaf.
- Garnish ideas: toasted coconut flakes for crunch, edible flowers for color, or a small spoonful of fruit compote for acidity.
- Serve in clear jars or coupe glasses so guests can see the glossy surface and any layers you’ve created.
How to Store, Make-Ahead, and Customize Your Coconut Jelly
You can make these ahead and keep them chilled until service. Proper storage preserves the texture and prevents the jelly from absorbing fridge smells. If you’re planning a brunch or party, prepare them a day ahead and add fresh toppings just before serving.
- Storage: keep the jars sealed in the fridge and consume within a few days to maintain the best texture and flavor—any longer and fresh fruit toppings may weep.
- Make-ahead: the dessert can be fully set a day ahead; wait to add delicate fruit or herbs until right before serving to keep them bright.
- Customization: stir in a little citrus zest for brightness, or fold in tiny fruit pieces for a more textured bite; try coconut flakes or a splash of rum extract for adult variations.
- Pairing suggestion: if you want a fruity drink to accompany the dessert, try a mango coconut milk smoothie for a matching flavor profile: mango coconut milk smoothie.
Troubleshooting
- If your jelly is grainy: the setting agent wasn’t fully dissolved—reheat gently and strain the mixture before re-chilling.
- If the jelly won’t set: you likely under-dosed the setting agent or didn’t bloom it correctly; dissolve more gelatin/agar into a small amount of warm liquid and fold into the batch, then chill.
- If the surface is sticky or weepy: sudden temperature changes during chilling or using very ripe fruit can cause weeping—chill slowly and add toppings just before serving.
- If separation occurs: avoid boiling high-fat coconut milk; heat gently and whisk continuously when combining with a setting agent.
Variations
- Lime-coconut: add lime zest and a touch of lime juice to the coconut base for brightness; top with thin lime slices.
- Mango swirl: puree ripe mango and spoon a bit into the jars before the coconut layer sets, then swirl gently for ribbons of fruit.
- Toasted coconut crunch: fold in toasted shredded coconut just before the mixture sets for intermittent texture.
- Matcha layer: make a thin matcha-infused coconut layer for a green band in the jar—matcha’s bitterness balances the sweet coconut.
Frequently Asked Questions
Can I use a different sweetener instead of honey?
Absolutely! You can substitute honey with maple syrup or agave nectar for a vegan option.
How long does the coconut jelly need to set?
The coconut jelly should chill uncovered in the fridge for 1 hour, and then covered until fully set, which takes about 4 hours.
Is this dessert suitable for those with dietary restrictions?
Yes! This coconut jelly dessert is dairy-free, gluten-free, and can be made vegan by using agar-agar instead of gelatin.
Can I add flavors or other ingredients to the recipe?
Definitely! Feel free to add extracts like almond or coconut for extra flavor, or mix in some fresh fruit before serving.
How should I store leftover coconut jelly?
You can store any leftover coconut jelly in sealed containers in the fridge for up to 3 days.
Coconut Jelly Dessert
Ingredients
Method
- Pour ¼ cup of the coconut water into a small bowl. Add the gelatin and whisk until well-incorporated. Set aside to let the gelatin bloom and rehydrate.
- In a small saucepan, combine the remaining coconut water, coconut milk, and honey. Heat the coconut mixture over medium heat, stirring frequently until the honey is dissolved and the coconut milk is hot but not boiling.
- Remove the pan from the heat and whisk in the reserved hydrated gelatin and vanilla, making sure there are no lumps.
- Pour the mixture through a fine mesh sieve into a liquid measuring cup to catch any unmelted lumps of gelatin or honey. Skim off any bubbles on the surface with a fine mesh strainer.
- Evenly divide the coconut milk mixture into 6 small (6-ounce) glass jars.
- Chill the jars in the fridge for 1 hour uncovered and then add the lids and chill until solid, about 4 hours. When you are ready to serve, top with fresh fruit if desired!
- Store the coconut jelly in sealed containers in the fridge for up to 3 days.