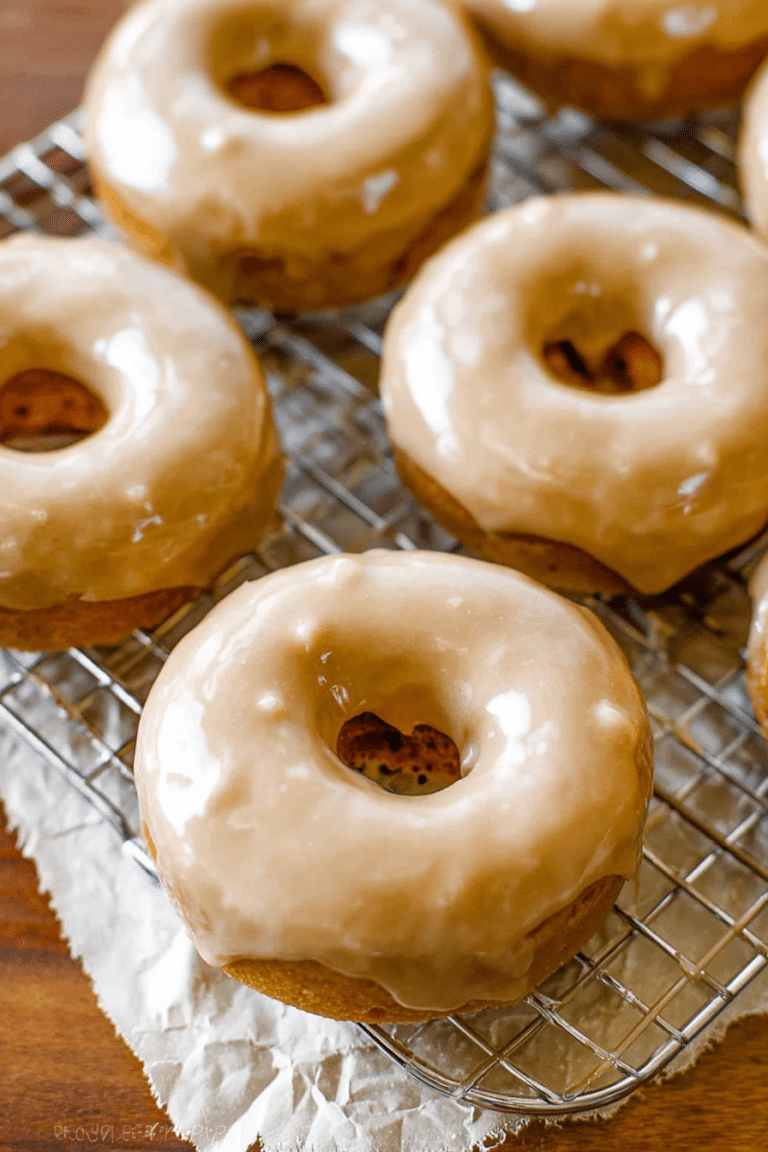
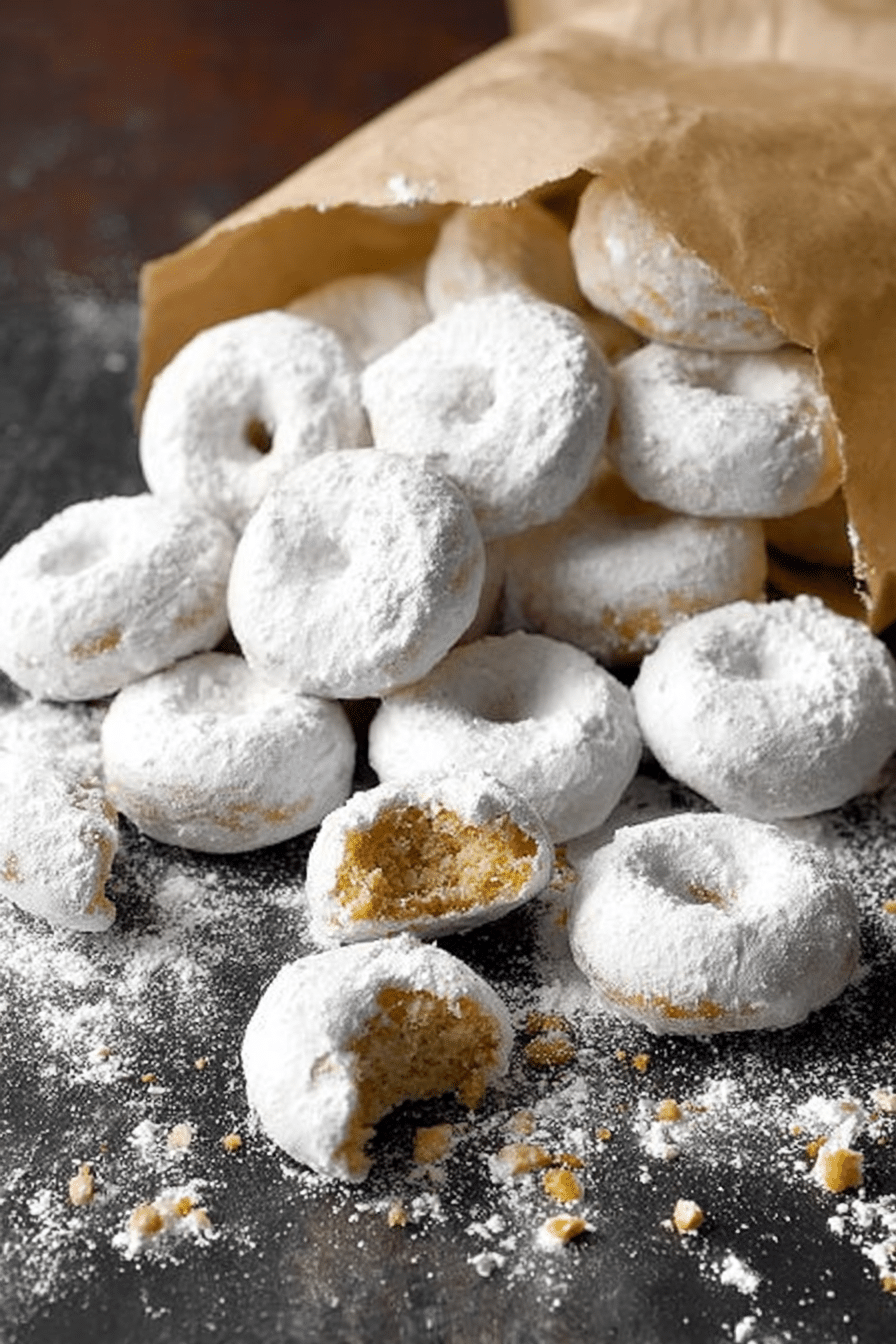
There’s something disarmingly comforting about a stack of tiny, powdered sugar-dusted doughnuts. I tested this recipe on a rainy Saturday morning with a pot of coffee and a curious three-year-old who kept stealing samples as I worked. They’re the sort of treat that brings back school fair memories — warm, soft, and slightly messy in the best way. Because they’re mini, you can pop one (or three) without committing to a huge pastry, and they’re delightfully versatile: breakfast, party finger food, or an after-dinner sweet.
These mini powdered sugar doughnuts are quick — I usually have them start-to-finish in under 30 minutes — and they come out soft and moist every time when you follow a few simple rules. I’ll walk you through what to expect while cooking, the little mistakes I made (and fixed), and how to tweak them for dietary needs. By the end, you’ll know exactly how to get that snowy powdered sugar finish and a pillowy interior.
Ingredients for the Perfect Doughnuts
- All-purpose flour – provides structure and tenderness; you can swap a 1-to-1 gluten-free flour blend if needed.
- Baking powder – the leavener that makes these light and bouncy; fresh baking powder gives the best rise.
- Salt – balances sweetness and enhances flavor; even a pinch makes a difference.
- Egg – binds the batter and adds richness; a room-temperature egg incorporates more evenly.
- Granulated sugar – sweetens and helps with browning; you can slightly reduce it if you prefer less sweet.
- Whole milk – adds moisture and mouthfeel; for dairy-free options, almond or oat milk work well.
- Vegetable oil – keeps the doughnuts tender and soft; neutral oil won’t compete with the vanilla.
- Vanilla extract – brings warmth and depth to the batter; try a little almond extract for variation.
- Powdered sugar – the final dusting that gives the classic look and melt-in-your-mouth sweetness.
Note: The ingredient discussion above keeps things conversational — I’ve left the precise measurements for the recipe steps to keep both clarity and accuracy. Use fresh baking powder and room-temperature wet ingredients for the best results.
Step-by-Step Instructions
Below is the tested, reliable method I use every time. I’ve included notes where I ran into hiccups so you don’t have to.
- Preheat: If you’re using an electric doughnut maker, preheat according to the manufacturer’s instructions. If you’re using two mini doughnut pans, preheat the oven to 350°F (175°C) and grease the pans well. I usually brush the pans with a little oil and then use a light dusting of flour — it helps the edges release cleanly.
- Dry ingredients: In a small bowl, sift together 1 1/3 cups all-purpose flour, 2 teaspoons baking powder, and 1/4 teaspoon salt. Sifting prevents lumps and helps the batter come together smoothly. Set this aside.
- Wet ingredients: In a medium bowl, whisk 1 large egg with 1/2 cup granulated sugar until slightly pale and a bit frothy — this helps incorporate air. Then stir in 3/4 cup whole milk, 3 tablespoons vegetable oil, and 2 teaspoons vanilla extract until everything is combined. The batter should smell sweet and vanilla-y at this point.
- Combine: Gently fold the dry ingredients into the wet mixture just until there are no streaks of flour. Don’t overmix — overworking will activate the gluten and make the doughnuts dense. A few small lumps are fine. The final batter will be similar to a thick pancake batter: pourable but not runny.
- Powdered sugar prep: Add 1/2 cup powdered sugar to a brown paper bag or a resealable plastic bag and set aside for coating after baking.
- Fill pans: If you’re using mini doughnut pans, carefully fill each indentation about 3/4 full. I use a small cookie scoop or a pastry bag with a wide tip to keep things neat. If you overfill, the doughnuts will spill over and won’t have the classic ring shape.
- Bake: Bake the mini doughnuts for 7 to 9 minutes, rotating the pans halfway through if your oven has hot spots. They’re done when a toothpick inserted into the center comes out clean or with just a few moist crumbs. Watch closely around minute 7 — they can shift from perfectly set to slightly too dry quickly.
- Electric doughnut maker option: If you’re using an electric mini-doughnut maker, fill each indentation 3/4 full and bake according to the manufacturer’s instructions or until a toothpick inserted into a doughnut comes out clean. The machine will give you slightly crisper edges compared to baked-in-pan doughnuts.
- Coat in powdered sugar: Transfer the warm doughnuts (still slightly warm, not piping hot) into the bag with powdered sugar and gently shake to coat. The warmth helps the powdered sugar adhere, but if the doughnuts are too hot the sugar can melt and form a paste — that’s okay if you like a thicker coating, but for the classic dusting wait until they’re just warm to the touch.
- Serve: Serve immediately for the best texture — warm and dusted with powdered sugar is the classic experience.
For another delightful baking experience, try making easy monkey bread after your doughnut-making adventure!
Dietary Variations: Gluten-Free & Vegan Options
I’ve made these doughnuts a dozen ways to accommodate friends and family with different diets. You can keep the flavor and texture close to the original with a few swaps.
- Gluten-free option – Use a good-quality gluten-free 1:1 all-purpose flour blend that contains xanthan gum. I’ve had success with blends that are designed for baking (they mimic gluten’s structure). If your blend doesn’t include xanthan gum, add a small pinch (about 1/4 teaspoon) to help bind the doughnuts.
- Vegan option – Replace the egg with a flax egg (1 tablespoon ground flaxseed mixed with 3 tablespoons water, let sit until gelled). Swap whole milk for a creamy non-dairy option like unsweetened oat milk and use a neutral oil. The texture will be slightly different — a touch denser — but still very satisfying.
- Combined gluten-free + vegan – Use both substitutions above together. Expect a slightly different crumb but keep the baking time similar; you may need an extra minute or two. Let them cool slightly before coating to help the powdered sugar adhere.
If you’re looking for a delicious breakfast option to complement your doughnuts, consider pumpkin pie overnight oats.
Creative Serving Ideas and Pairings
Mini powdered sugar doughnuts are blank canvases. Here are some ways I like to present them that get people excited:
- Party stack: Arrange them on a tiered stand for a birthday or baby shower. Kids love the mini size and adults appreciate the nostalgic feel.
- Drink pairings: Serve with hot coffee, a rich latte, or a cold glass of milk. The powdered sugar melts gently into hot coffee if you dunk — a simple, cozy pleasure.
- Dessert topping: Use them whole as a playful topping for scoops of vanilla ice cream. The warm doughnuts create contrast against cold ice cream and the powdered sugar adds pretty visual appeal.
- Dipping station: Offer small bowls of chocolate ganache, caramel sauce, and fruit jam. Dunking gives a fun interactive element at brunches.
- Breakfast plate: Place three doughnuts on a plate with fresh berries and a dollop of Greek yogurt — it feels indulgent but balanced.
For an extra treat, try serving your mini powdered sugar doughnuts with slices of cinnamon donut bread.
Tips for Perfect Texture and Flavor
After testing this recipe many times, a few small techniques consistently deliver the light, tender doughnuts I want:
- Room temperature wet ingredients: Let the egg and milk sit at room temperature for about 20 minutes. They mix together more smoothly and trap less air that would otherwise escape during baking.
- Don’t overmix: Fold dry into wet until mostly combined — overmixing creates a dense texture. Think thick pancake batter, not biscuit dough.
- Fresh leavening: Baking powder loses potency over time. If your doughnuts don’t rise, check the date on your baking powder. I replace mine every 6–12 months for consistent results.
- Watch baking time: These minis bake quickly. Start checking at 7 minutes. Overbaking dries them out; underbaking makes them gummy in the center. A toothpick with a few moist crumbs is perfect.
- Coating technique: For a light dusting, let the doughnuts cool until just warm. If you want a seamless sugar crust, briefly spray the doughnuts with a little vegetable oil spray (or brush lightly with oil) before tossing in powdered sugar — it helps the sugar cling.
- Moisture balance: If your batter feels too thin (runs like water), you likely overmeasured the milk. Add a tablespoon of flour at a time to thicken. If it’s too thick and won’t pour, add a teaspoon of milk at a time.
Frequently Asked Questions
- How do I get powdered sugar to stick to my doughnuts?
You can spray your doughnuts with a little vegetable oil spray! This will help the powdered sugar stick nicely. - Can I make these doughnuts gluten-free?
Absolutely! You can use a gluten-free all-purpose flour blend to make these doughnuts gluten-free without compromising flavor. - How should I store leftover mini powdered sugar doughnuts?
Store your doughnuts in an airtight container at room temperature for up to 2 days. If you need to keep them longer, consider refrigerating them — though refrigeration can dry them slightly, so bring them back to room temperature before serving or warm briefly in the oven. - Can I freeze the doughnuts?
Yes, you can freeze them! Just make sure to place them in a freezer-safe bag or container. They can be frozen for up to a month. Thaw at room temperature and, if you like, pop them in a 300°F oven for 5 minutes to refresh the texture. - Why are mini powdered donuts so good?
Mini powdered donuts are loved for their delicious taste and fluffy texture! They’re convenient to eat and the powdered sugar coating adds that perfect sweetness.
Conclusion: Enjoy Your Doughnuts!
Making these mini powdered sugar doughnuts feels like a small act of joy — quick to make and impossible not to share. I’ve found that a slightly messy coating and a warm center are worth the crumbs on your shirt. Try the gluten-free or vegan versions if needed; all are forgiving and delicious with a few smart swaps. If you bake a batch, let them cool to warm and enjoy while the powdered sugar is still soft and snowy.
After indulging in your delicious mini doughnuts, why not also treat yourself with a slice of strawberry cheesecake lasagna?
Thanks for reading — happy baking, and don’t forget to share a photo of your stack (and your kitchen mess) for bragging rights. These make great gifts wrapped in parchment or a fun addition to weekend breakfasts. The yield for this recipe is about 28 mini doughnuts, roughly 85 calories each — perfect for a crowd or a week of small treats.
Mini Powdered Sugar Doughnuts
Ingredients
Method
- If using an electric doughnut maker, preheat according to manufacturer’s instructions. If using mini doughnut pans, preheat oven to 350°F and grease pans.
- In a small bowl, sift together flour, baking powder, and salt. Set aside.
- In a medium bowl, whisk together egg and sugar. Then add milk, oil and vanilla extract, mixing until thoroughly combined. Gently stir in the flour mixture, stirring until there are no lumps.
- Add powdered sugar to a brown paper bag or a plastic bag. Set aside.
- If using mini doughnut pans, carefully fill each indention 3/4 full. Bake for 7 to 9 minutes or until a toothpick inserted into a doughnut comes out clean.
- If using an electric mini-doughnut maker, carefully fill each indention 3/4 full. Bake according to manufacturer’s instructions or until a toothpick inserted into a doughnut comes out clean.
- Transfer donuts to bag with powdered sugar and shake to coat in powdered sugar.
- Serve immediately!