I started brining chicken in pickle juice on a weeknight because I had one jar of pickles and no plan — just a hungry family and thirty minutes before dinner. It became my go-to trick: the brine gives the meat a bright, salty-tangy lift with almost no fuss. I love how a short soak turns ordinary chicken breasts into something that stays juicy under the high-heat sear.
In my kitchen this method is all about efficiency: you can prep the chicken in minutes, let the brine do the work while you handle a quick side, then finish the bird in a single skillet. The result is a golden-brown crust and a mild pickle aroma that doesn’t overpower — it plays nicely with roasted veg or a crunchy slaw.
Over time I learned a few simple rules that keep the chicken from tasting too salty or turning mealy. A measured brine time, a proper drain before dredging, and steady pan heat are the differences between good and reliably great. I’ll walk you through those points so your weeknight dinner is fast and satisfying every time.
Why Pickle-Brined Chicken Works for Busy Weeknights
Pickle brine is a ready-made, flavorful marinade that skips the measuring and mixing of multiple ingredients — perfect when your time is limited. The acidity and salt in the brine gently alter the chicken’s proteins, so even a short soak yields a more tender, juicier result than plain chicken left to sit.
Texture-wise, brined chicken holds on to moisture during the high-heat sear, so you get a crisp, golden exterior while the interior stays succulent. The tang of the brine adds a bright counterpoint that pairs easily with simple sides, making it versatile: serve it with something creamy, something green, or something starchy depending on what’s in your pantry.
Everything You Need for Pickle-Brined Chicken
- Boneless skinless chicken breasts – Choose evenly sized pieces so they brine and cook uniformly; thicker breasts can be pounded down for the best results.
- Dill pickle brine – This is your flavor base; the brine brings salt, acid and aromatics in one go. If your jar brine is flavored (spicy or sweet), expect those notes to carry through.
- All-purpose flour – Creates the base of the pan crust; you can swap part of it for panko for extra crunch.
- Salt, pepper and aromatics (garlic powder, onion powder, paprika) – These seasonings layer with the pickle flavor; adjust the balance to your taste.
- Cooking fat (olive oil + butter) – A combination of oil and butter gives a high-heat sear and a nutty finish without burning.
- Equipment – A heavy skillet (cast iron or stainless steel) ensures even browning; use a meat mallet or rolling pin to pound breasts to an even thickness; thermometer helps you hit the safe internal temperature reliably.
How to Make Pickle-Brined Chicken (Step-by-Step)
- Place the chicken between plastic wrap and pound the breasts to an even thickness so they cook at the same rate; you want them thin enough to finish quickly but not paper-thin.
- Put the chicken into a shallow dish and pour in enough pickle brine to cover; refrigerate for the recommended brine time (see next section for timing). This short marinate infuses flavor and improves texture.
- Remove the chicken from the brine and discard the brine if it has contacted raw meat. Pat the chicken dry with paper towels — drying is crucial so your dredge adheres and the crust crisps instead of steaming.
- Mix your flour and spices in a shallow bowl, then dredge the drained breasts, shaking off excess so the coating is even but not clumpy.
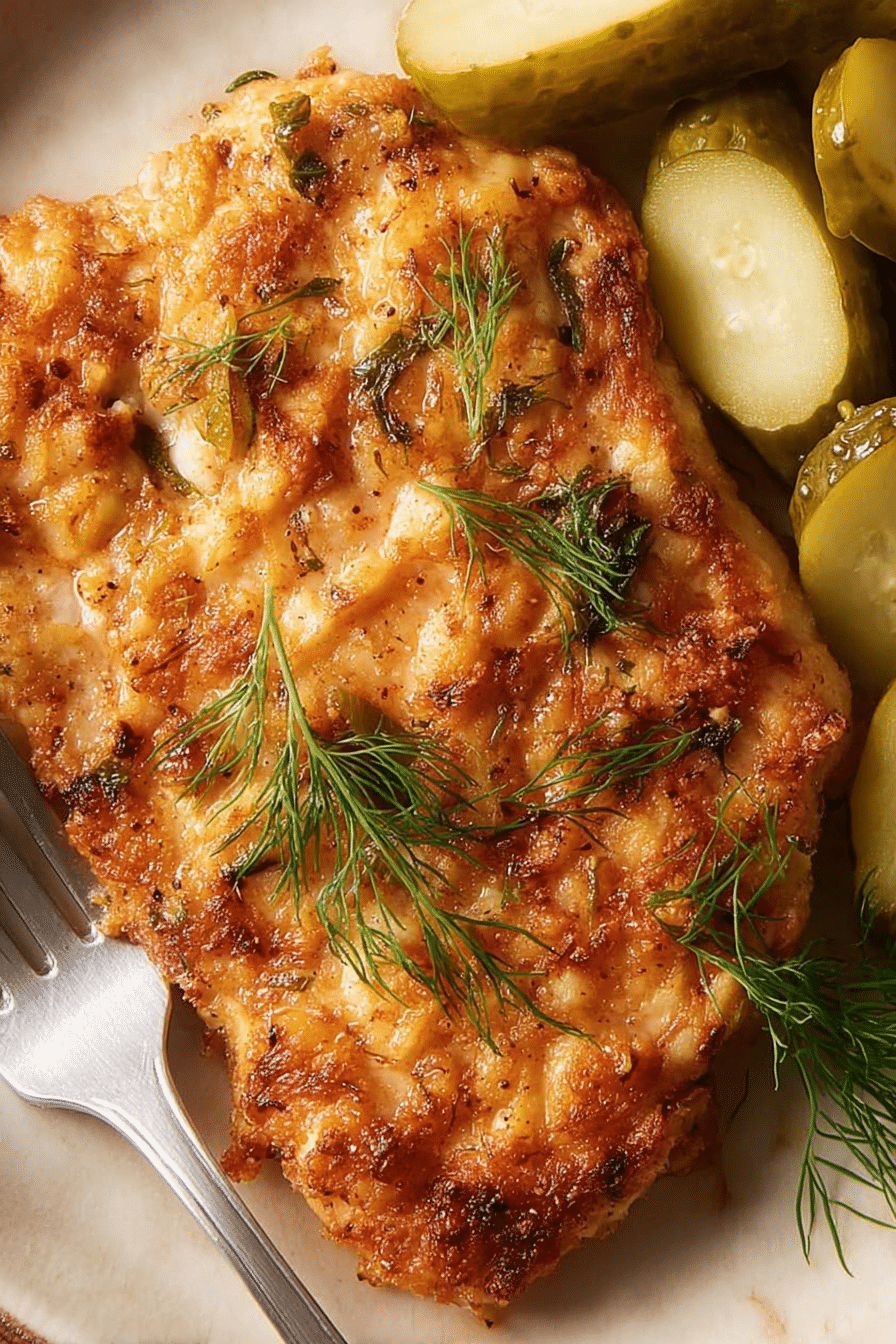
- Heat a skillet over medium heat and add oil and a little butter. When the fat shimmers, add the chicken and listen for that satisfying sizzle — cook without crowding so each piece browns nicely.
- Cook about five to seven minutes per side depending on thickness; adjust heat to maintain a steady brown without burning. Use an instant-read thermometer and pull the chicken at 165°F internal temperature.
- Let the chicken rest for five to ten minutes before slicing so juices redistribute — you’ll notice the meat stay glossy and moist when you cut it.
The Secret to Tender, Evenly Cooked Chicken
Brining works because salt and acid change the muscle fibers and increase the meat’s ability to hold water. The pickle brine’s salt partially dissolves surface proteins so the chicken swells slightly and traps more moisture during cooking. The result is noticeably juicier meat after a short brine rather than a long, complicated marinade.
Time and temperature are your technical controls: even thickness and moderate pan heat produce a browned crust while preventing the interior from overcooking. Resting is not optional — it’s where the cooking evens out and the juices settle back into the meat.
- Pro-Tips (from my kitchen) – I find that patting the breasts completely dry after draining the brine is the single best move for a crisp crust. Also, if your skillet begins to smoke, lower the heat a hair and finish the chicken a little longer — steady heat wins over high heat for an even crust.
- Troubleshooting (what I’ve learned) – If the crust is soggy, it usually means the chicken wasn’t dry enough or the pan was overcrowded. If the meat tastes too salty, reduce brine time or dilute the brine with a little water next time. If slices are dry, the bird was likely overcooked; aim for that 165°F target and remove from heat promptly.
How Long to Brine: Timing for Flavor Without Overdoing It
Brine time depends on thickness. For thin, pounded cutlets, short soaks are sufficient; thicker whole breasts need more time to pick up flavor and moisture. The sweet spot for most boneless breasts is a mid-length brine that seasons without leading to an overly salty or mushy texture.
Guidelines you can follow:
- Thin cutlets or small pieces: short brine — a quick hour or two gives some flavor without over-salting.
- Regular boneless breasts: a moderate brine — a few hours in the fridge produces balanced flavor and tenderness.
- Very thick pieces: extend the time slightly but avoid overnight brines for boneless breasts; too long and the texture can become mealy.
Flavor Boosters: Spices and Add-Ins That Play Well with Pickle Brine
The brine already provides a salty-acid backbone, so build complementary notes rather than competing ones. Mustard powder and dill echo classic pickle flavors; smoked paprika and black pepper add warmth and depth. Fresh herbs bring brightness at the end, and a touch of sugar or honey tames very sharp brines.
- Mustard powder or prepared mustard — amplifies pickle tang.
- Dried or fresh dill — reinforces the dill-brine character.
- Smoked paprika or cayenne — for mild warmth and color.
- Garlic and onion powders — savory backbone that rounds the flour coating.
- Fresh parsley, chives, or tarragon added after cooking — for a fresh finish.
Pro Tip for Pickle-Brined Chicken: What to Do with Leftover Brine
- If the brine has not touched raw chicken (for example, leftover from a jar), use it to quick-pickle thinly sliced vegetables like red onion, cucumbers, or carrots — they make an instant bright garnish.
- Mix unopened jar brine into a vinaigrette to add tang to potato salad or green salads; it replaces some or all of the acid in a dressing.
- Use leftover brine as a flavoring liquid when cooking grains or beans to impart a subtle pickle note.
- Safety note: if the brine has contacted raw chicken, discard it. Alternatively, you can boil it vigorously for several minutes before reusing for pickling or cooked applications, but discarding is the safest route.
- Storage: keep unused jar brine refrigerated and use within a week, or freeze small portions for later use.
How to Store, Reheat and Vary Pickle-Brined Chicken
Store leftovers in an airtight container in the refrigerator for up to four days. For longer storage, freeze in a single layer and transfer to a sealed bag for up to three months. Thaw overnight in the fridge before reheating.
- Reheating tips – Warm gently in a low oven (about 300°F) to keep the crust intact; cover loosely with foil if the edges start to dry. A quick sear in a hot skillet can refresh the crust, but avoid high heat that will overcook the interior.
- Microwave – Use only as a last resort for convenience; reheat at low power in short bursts to avoid rubbery texture.
- Variations – Try switching the dredge to panko for extra crunch; swap dill brine for sweet or spicy pickle brine for different flavor profiles; after cooking, finish with a smear of mustard or a drizzle of honey for contrast.
In-Depth Nutritional Analysis of Pickle-Brined Chicken
Typical pan-fried pickle-brined chicken (boneless skinless breast with a light flour coating, pan-fried in a small amount of oil and butter) will land around 400–450 calories per serving depending on portion size and cooking fat. A representative breakdown is:
- Calories: ~413 per serving
- Protein: ~39 grams — chicken breast is an excellent lean protein source.
- Fat: ~11 grams total (about 3 grams saturated) — depends on the amount of butter/oil used.
- Carbohydrates: ~35–40 grams — mostly from the flour coating; sugars are minimal unless you add sweeteners.
- Sodium: can be elevated because of the pickle brine — this is the biggest nutritional consideration.
Health-conscious adjustments: use low-sodium pickle brine or dilute strong brine with a little water to cut salt exposure; reduce the flour or swap some flour for almond or chickpea flour to lower carbs; and use olive oil instead of butter for a slightly lighter fat profile. If you’re watching sodium closely, test brine times with smaller pieces and taste adjustments to avoid an overly salty final dish.
Pairing Suggestions for Pickle-Brined Chicken Dishes
Pickle-brined chicken has a bright, salty-tangy profile, so pair it with sides that balance creaminess, sweetness or fresh crunch.
- Creamy mashed potatoes or a buttery rice pilaf — adds comfort and soaks up pan juices.
- Crisp coleslaw or a peppery arugula salad — fresh greens cut through the brine’s tang and give texture contrast.
- Grilled corn on the cob or roasted seasonal vegetables — bring natural sweetness and char.
- Condiments and sauces: a simple mustard sauce, tzatziki, or a light yogurt-dill sauce pairs beautifully.
- Beverages: a crisp lager, a dry white wine like sauvignon blanc, or a sparkling lemonade complement the dish’s acidity.
Frequently Asked Questions
How long should I brine the chicken?
For the best flavor and texture, marinate the chicken in pickle brine for four to six hours. This allows the chicken to absorb the flavors without becoming overly salty.
Can I use other types of pickle brine?
Absolutely! While dill pickle brine is the most common, you can experiment with other types of pickle brines for unique flavors, such as spicy or sweet pickle brine.
What can I serve with pickle-brined chicken?
This dish pairs well with sides like coleslaw, corn on the cob, or roasted vegetables. You can also serve it with some crusty bread to soak up the juices!
Can I freeze leftovers?
Yes, you can freeze leftover pickle-brined chicken. Just store it in an airtight container, and it should be good for up to three months. Thaw in the refrigerator before reheating.
What if I don’t have a meat mallet to pound the chicken?
You can use a rolling pin or even a heavy frying pan to gently flatten the chicken. Just make sure to cover it with plastic wrap to prevent mess and keep it safe.
Pickle-Brined Chicken
Ingredients
Equipment
Method
- Set the chicken breasts on a cutting board and cover them with plastic wrap. Pound the chicken with a meat mallet or rolling pin to 1/2-inch thickness.
- Place the chicken into a shallow dish and cover them with the pickle brine. Cover and marinate them in the refrigerator for four to six hours.
- In another shallow bowl, whisk together the flour, garlic powder, onion powder, paprika, salt, pepper and cayenne pepper (if using). Drain the chicken and discard the brine. Dredge the chicken in the flour mixture, evenly coating all sides. Shake off any excess.
- Heat the olive oil and butter in a large skillet over medium heat. Add the chicken and cook for five to seven minutes per side, or until the crust is golden brown and the internal temperature reaches 165°F. Let the chicken rest for 5 to 10 minutes before serving it.