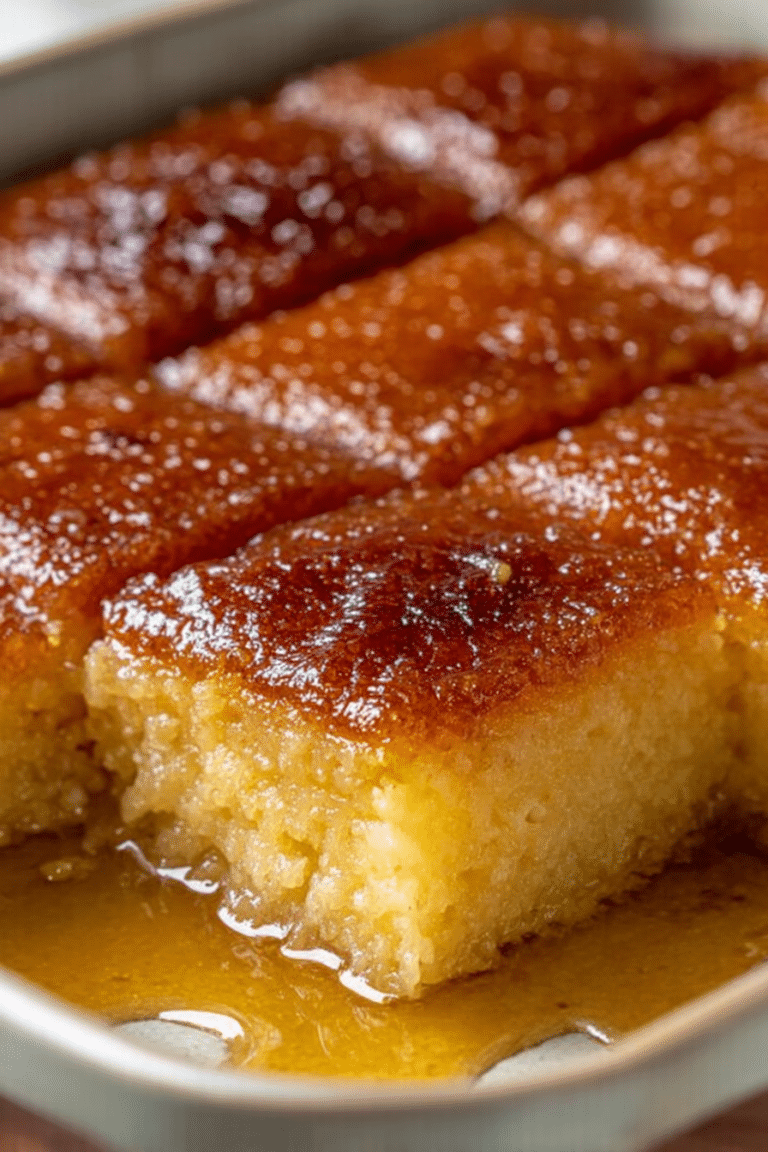
I still remember the first time I flipped a warm pineapple upside down cake out of the pan and felt the hush that fell over my kitchen table. That sticky, golden top—pineapple rings glazed with butter and brown sugar, crowned with bright cherries—always stole the show at potlucks and family dinners. I make this version when I want something effortless that tastes like childhood and sits well next to a tall glass of iced tea.
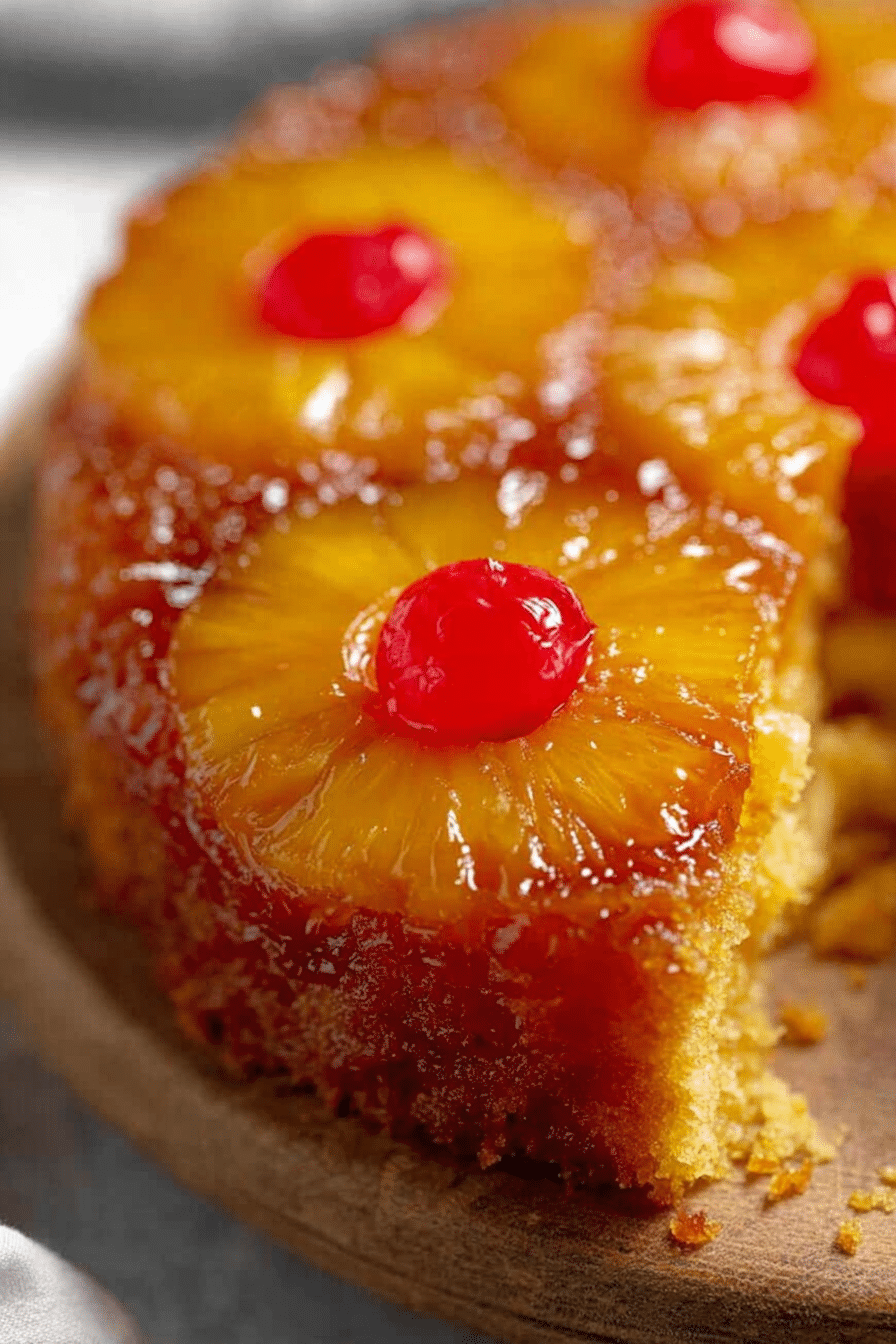
Baking this cake in my kitchen has become a ritual: the little clink of the maraschino cherries, the hiss of butter as it melts, and that first warm slice with a scoop of vanilla ice cream. Over the years I’ve learned what makes a reliable caramelized top and how to avoid the most common missteps—lessons I’ll pass on here so your cake comes out glossy and homey every time.
If you grew up with this as a holiday or Sunday-night dessert, you’ll recognize the way the aroma fills the house—warm sugar and pineapple with a buttery backbone. If this is your first time, I promise the steps are simple and forgiving; take a deep breath and enjoy the smells and textures that make this cake feel like home.
Why This Pineapple Upside Down Cake Feels Like Home
This cake has a long history in American home baking: it rose to popularity when canned pineapple and maraschino cherries became pantry staples, and it carried through generations as an easy, show-stopping dessert. For me, it’s less about culinary innovation and more about the moments it marks—birthday parties, summer barbecues, and slow Sunday afternoons.
I grew up watching my aunt arrange pineapple rings with the concentration of an artist. Her guidance taught me the importance of patience when caramel is involved—too fast and it burns, too slow and it never glosses properly. Those lessons stuck. When you bake this, picture a family gathered around a warm pan; this cake is designed to be shared and to evoke comfort.
Smell and sight are the keys here: the kitchen should smell like browned butter and sweet fruit, and when you lift the pan to invert it, you should see a mirror-like glaze reflecting the kitchen light. That glossy finish is the nostalgia on the plate.
Everything You Need for Pineapple Upside Down Cake
Below I discuss the essentials and why each one matters. You’ll see substitutions and how they affect texture so you can make choices that fit your pantry and dietary needs.
- Butter – Provides the fat that helps the brown sugar caramelize; use unsalted to control seasoning. For a deeper flavor, brown your butter briefly before using, but don’t let it scorch.
- Brown sugar – Gives the caramel its molasses note and chew; light brown keeps it classic while dark brown will deepen the flavor.
- Pineapple slices and juice – The star ingredient for flavor and moisture; canned pineapple is traditional and reliable, but fresh pineapple adds brightness—just be sure to keep some juice to thin the batter if needed.
- Maraschino cherries – Visual punctuation and a pop of sweet-tart contrast; you can swap with glacé cherries or fresh cherries when in season.
- Vanilla cake mix – Using a prepared mix makes this recipe approachable and consistent; if you prefer homemade cake batter, match the texture to a light, tender crumb.
- Eggs, oil, and vanilla – These bind and tenderize the cake; if you’re making substitutions for dietary needs, choose replacements that preserve moisture.
- Pan – A shallow rectangular pan gives the classic look; a cast-iron skillet will deepen caramelization and flavor if you want a more rustic finish.
For gluten-free and vegan bakers, I’ve included specific swaps later in the Dietary Swaps section so you can see how each change alters texture and flavor.
The Secret to a Glossy, Caramelized Top
Caramelization is simple chemistry married to timing. The three keys are the right fat temperature, even sugar coverage, and an oven that behaves predictably. Follow these steps and you’ll get a glossy, not-grainy, finish.
- Warm the pan with the butter so it melts evenly; the butter should be hot enough to liquefy quickly but not so hot that it smokes—this helps the sugar begin to dissolve on contact.
- Sprinkle the brown sugar evenly over the melted butter while the pan is warm so the sugar begins to soak up fat—this prevents pockets of dry, gritty sugar after baking.
- Arrange the pineapple and cherries immediately after the sugar so fruit juices mingle with the sugar and butter, creating an even glaze as they roast.
- When pouring batter over the fruit, do it gently and from a low height so you don’t displace the fruit or introduce air pockets that can break the caramel bond.
- Use an oven thermometer and avoid opening the door early; a steady oven temperature is essential for even caramelization without burning.
For those looking to perfect their technique, check out our guide to making homemade caramel to enhance the cake’s topping.
Why Temperature and Timing Matter
Oven behavior and bake time determine texture: too hot and the caramel scorches before the cake sets; too cool and the top can be dull and the crumb underbaked. Here’s how to think about it in practical terms.
- Use an oven thermometer so you know the actual temperature—many home ovens run hotter or cooler than the dial setting.
- Place the pan on a middle rack for even heat; if your oven browns quickly on top, move to a lower rack to protect the sugar layer.
- Rely on the toothpick test: insert a toothpick into the thickest part of the cake. When it comes out mostly clean with a few moist crumbs, the cake is done—if it’s wet with batter, give it a few more minutes.
- Allow a short resting period before inverting; this helps the caramel set just enough to release cleanly without sticking.
How to Make Pineapple Upside Down Cake (Step-by-Step)
Below are the practical steps I follow. Read through once, then follow the bullets as you bake. Troubleshooting tips follow as a separate bulleted list for quick reference.
- Preheat the oven and prepare your pan so everything is ready when the butter melts; a warm pan encourages even spreading.
- Melt butter directly in the pan in the oven until fully liquid but not browned, then remove carefully and swirl to coat the bottom.
- Evenly sprinkle the brown sugar over the melted butter so it forms a uniform layer; it may look slightly gritty—this is okay.
- Arrange pineapple rings over the sugar, then place cherries in the centers and between rings for an even pattern.
- Mix the cake batter until mostly smooth; pour it gently over the fruit, aiming to cover evenly without lifting pieces out of place.
- Bake until a toothpick comes out mostly clean and the top feels springy to the touch; avoid overbaking to keep the crumb tender and moist.
- Immediately run a thin knife around the pan edges, invert onto a serving platter, and lift the pan. If edges are too browned, trim with a serrated knife and serve warm or at room temperature.
Troubleshooting (my voice here — I’ve fixed these mistakes more than once):
- If the caramel is gritty, the butter may not have been warm enough when sugar was added; next time, warm the pan a touch longer.
- If fruit sticks to the pan, it may need a slightly longer rest before inverting—ten minutes helps—but don’t wait so long that caramel hardens completely.
- If the cake’s center is raw while edges are browned, your oven temperature is probably too high; lower the heat next time and extend bake time slightly.
- If cherries sink or float unevenly, press them gently into place on top of the pineapple before adding batter so they anchor during baking.
Pro Tip for pineapple upside down cake: Prevent Burned Caramel
Pro-Tips, Troubleshooting, and Variations are presented below as bulleted lists for quick scanning.
- Use a light-colored pan so you can see the caramel color through the sides; dark pans speed browning and can hide early signs of burning.
- Place the pan on a lower oven rack if your top browns faster than the cake sets.
- Check at the minimum suggested bake time and then every five minutes; a few minutes can be the difference between glossy and scorched.
- Consider tenting with foil for the last 10 minutes if the top is darkening too quickly while the center is still baking.
Dietary Swaps — Gluten-Free and Vegan Options
Here are practical swaps and how they change the cake. I’ve tested many of these, and each one has trade-offs worth noting.
- Gluten-free cake mix – Choose a blend formulated to mimic all-purpose flour (with xanthan gum included) for the closest crumb; the cake may be slightly more tender and crumbly.
- Vegan egg replacements – Use commercial egg replacers or flax/chia “eggs” (ground seed plus water) to bind; expect a denser but still moist crumb.
- Non-dairy butter & oil – Swap in plant-based butters and keep or slightly increase oil to maintain moisture; flavor will be a touch different but still luscious.
- Non-dairy milk – If a recipe calls for thinning the batter, use almond, oat, or soy milk to keep the batter fluid without changing texture drastically.
Explore more gluten-free and vegan alternatives that can complement your baking, ensuring everyone can enjoy a slice!
Mini Cakes and Individual Servings
Making individual cakes is a charming way to present this dessert and reduces serving fuss. Here’s how I approach it.
- Use a muffin tin or small ramekins and prepare the bottoms with butter and sugar as you would a full pan.
- Place a smaller pineapple ring or a chunk of pineapple and a cherry in each cup; pour batter gently to cover without moving fruit.
- Reduce bake time substantially; start checking earlier with a toothpick—mini cakes can finish much sooner than a full pan.
- Serve each mini inverted on a small plate, garnished with whipped cream, toasted coconut, or a drizzle of warmed juice reduction.
How to Store, Reheat, and Make Ahead
These cakes keep well and can be prepared ahead with a little planning. Follow these simple storage strategies to preserve texture and flavor.
- Store at room temperature for up to two days in an airtight container; refrigeration will extend life but can firm the caramel.
- To reheat, warm slices gently in a low oven or microwave briefly so the caramel softens without drying the cake—top with ice cream if desired.
- Make-ahead: assemble through the bake step, cool fully, then wrap and refrigerate. Rewarm before serving to bring the caramel back to a glossy state.
Variations and Pairings
Try one of these simple variations to give the classic a seasonal or tropical spin. These are presented as a bulleted list for easy selection.
- Rum or coconut variation — Add a splash of dark rum or a handful of shredded coconut to the batter for a tropical twist that pairs beautifully with the pineapple topping.
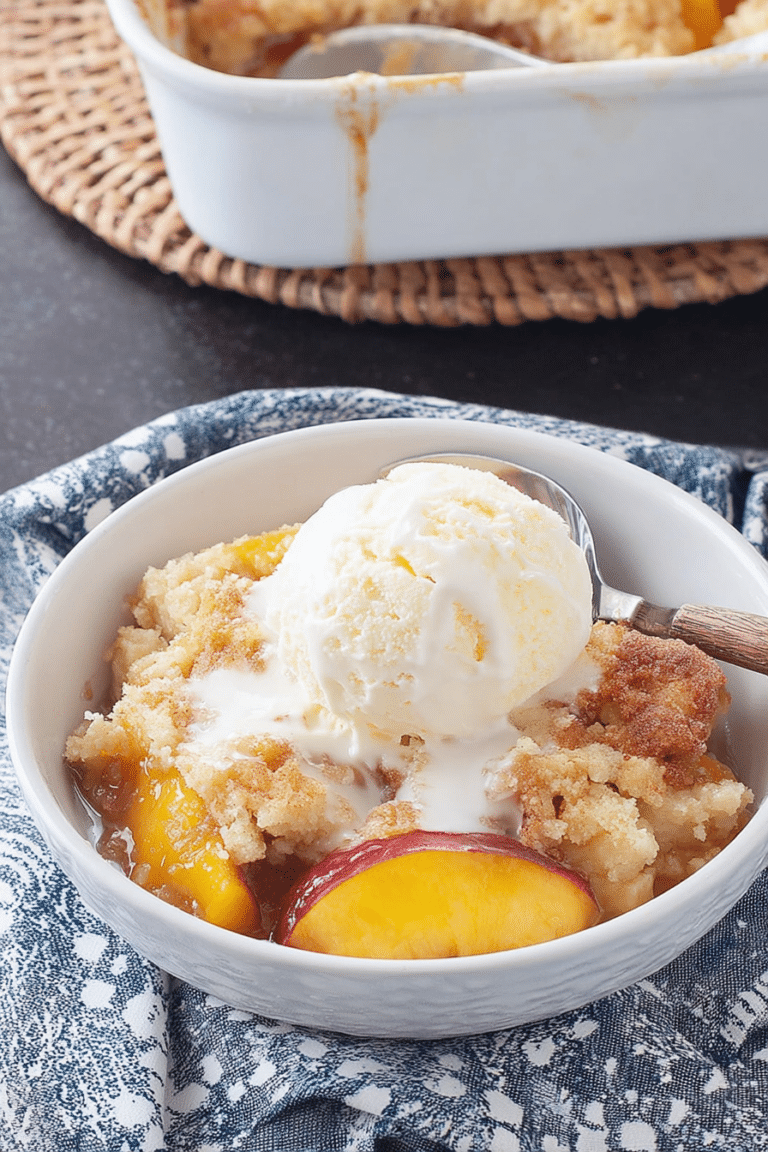
- Peach or berry substitution — Swap pineapple for sliced stone fruit or a mix of berries in summer for a seasonal version with less sweetness.
- Serve with whipped cream or vanilla ice cream — The cold creaminess contrasts perfectly with the warm, sticky caramel.
- For a savory-sweet pairing at a gathering, try serving alongside slow-cooked tropical mains — for example, a slow cooker Hawaiian chicken complements the pineapple flavors beautifully.
- For a more adventurous drizzle, pour a little sweet chili pineapple sauce over slices for a spicy-sweet contrast that guests will remember.
I hope these notes give you the confidence to make this cake the way my family does: simply, lovingly, and with room for your own small twists. It’s a dessert that’s meant to be shared, and the best part is seeing the smiles when you lift that pan and reveal the glossy, caramelized top.
Frequently Asked Questions
What type of pan is best for making pineapple upside down cake?
A 9×13 inch cake pan is ideal for this recipe, but using a cast iron skillet can enhance the caramelization and flavor.
Can I make this cake ahead of time?
Yes! You can prepare the cake in advance and store it in the refrigerator. Just reheat it gently before serving.
How do I prevent the caramel from burning?
To avoid burning the caramel, make sure to monitor the baking time closely and ensure your oven is at the correct temperature.
Are there gluten-free or vegan options for this recipe?
Absolutely! You can use gluten-free cake mix for a gluten-free version, and substitute eggs and dairy with vegan alternatives for a vegan option.
What should I do if the cake sticks to the pan?
Make sure to properly grease your pan and let the cake cool for 10 minutes before inverting it. This will help the cake release more easily.
Pineapple Upside Down Cake
Ingredients
Method
- Preheat oven to 350°F and coat a 9x13 pan with cooking spray along all the bottom and all of the sides.
- Place the butter in the bottom of the pan and then into the hot oven until butter melts, approximately 4-5 minutes.
- Meanwhile, stir together the brown sugar and salt.
- Remove the pan from the oven and swirl so butter covers the bottom. Sprinkle brown sugar mixture over butter, using a spoon to evenly spread into the bottom of the pan. It may not fully absorb and be a little gritty, this is fine.
- Arrange pineapple slices over the brown sugar. Place cherries in the center of each slice and around the slices. Set aside.
- In a large mixing bowl, stir together the cake mix, pineapple juice (if reserved juices do not equal 1 full cup, add enough water to make 1 cup), eggs, oil and vanilla. Stir well until few lumps remain, about 2 minutes.
- Pour cake mix over pineapple slices.
- Return to oven and bake for 45-48 minutes, or until it passes the toothpick test.
- Remove and immediately run a butter knife along the edges. Place a rectangular serving dish over the top and carefully using hot pads, invert. If the edges get a little too browned, use a serrated knife to trim them off.
- Remove the pan and serve warm or at room temperature.
- If you’ve tried this recipe, come back and let us know how it was in the comments or star ratings!