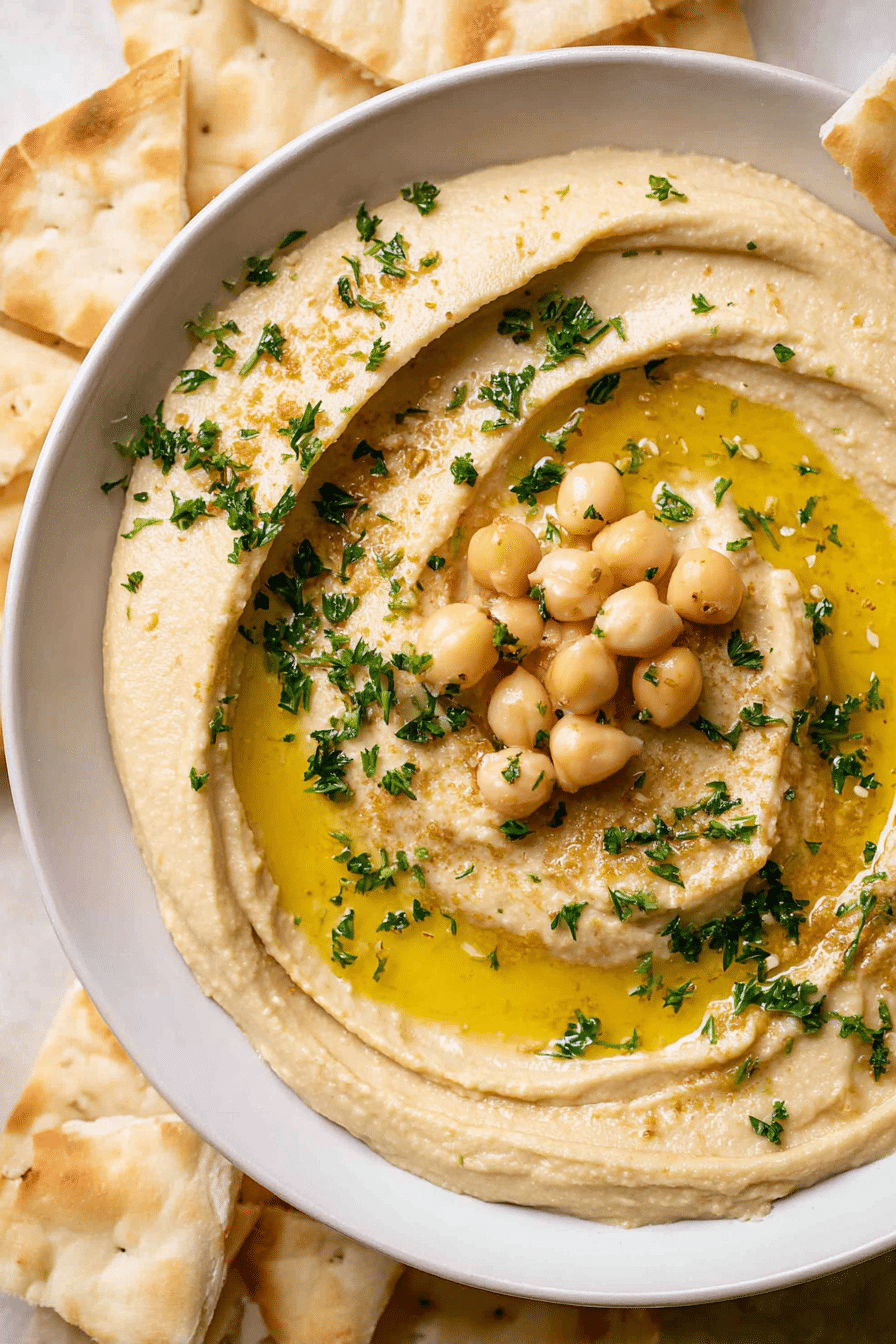
I make this roasted garlic hummus whenever I want a show-stopping dip that still feels effortless. Two large heads of garlic roasted until the cloves are golden and sweet fold into chickpeas, tahini and lemon so the hummus tastes rich without being heavy. At parties it always draws a crowd — people linger over the bowl, dipping bread and asking for the recipe.
I remember the first time I roasted a double batch of garlic for hummus and nearly ate half the cloves with a spoon while the blender worked — the smell filled my kitchen with warm, slightly sweet garlic that felt indulgent and comforting at once. That caramelized garlic is the soul of the dip: softer, less sharp, and deeply aromatic.
Over the years I’ve refined how I roast and blend so the texture is lusciously smooth and the presentation reads as upscale. Below I walk through ingredients, technique, and presentation tips to make this one of the easiest ways you can impress guests.
Why Roasted Garlic Hummus Is Your Go-To Party Dip
Roasted garlic turns the hummus from familiar to memorable. The roasting process tames raw garlic’s bite and produces a mellow, almost sweet caramelized note that perfumes the entire bowl. Visually, the hummus takes on a warm golden hue that contrasts beautifully with a glossy drizzle of olive oil and a scatter of bright parsley.
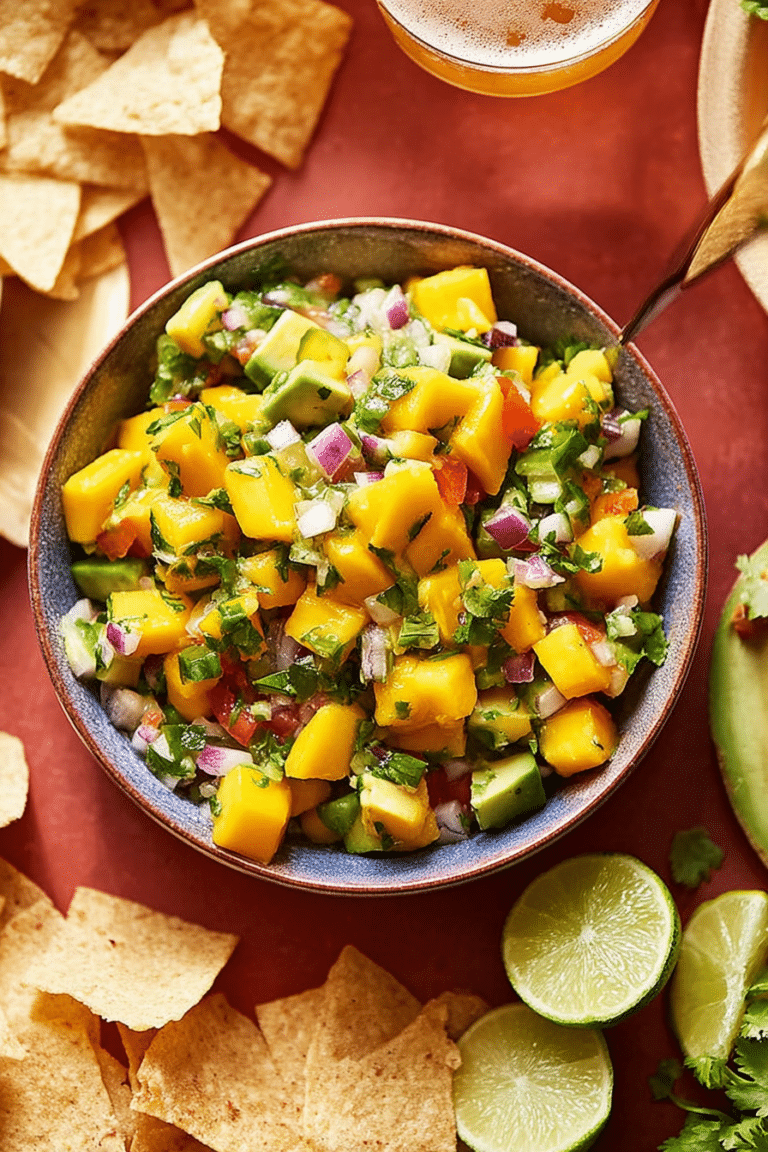
This dip is versatile: serve it with crisp vegetables, toasted pita, or as a spread on sandwiches and small plates. For a complementary plate idea that pairs nicely alongside hummus, try adding a spicy roasted cheese dip to the spread:
This Roasted Garlic Hummus is a must-have for any gathering, just like our Spicy Roasted Red Pepper Feta Dip, which is sure to impress.
Beyond taste and looks, hummus appeals to many dietary preferences — it’s vegan and naturally gluten-free when served with appropriate dippers — which makes it a reliable choice for mixed crowds.
Everything You Need for Roasted Garlic Hummus
- Garlic – Roasting mellows sharpness and gives a sweet, nutty depth; larger heads will yield more roasted cloves.
- Extra virgin olive oil – Use a good-quality olive oil for both roasting and finishing; it carries fruitiness and adds sheen to the finished dip.
- Chickpeas – The creamy base; canned chickpeas are convenient and work beautifully when drained and rinsed.
- Tahini – Sesame paste adds richness and a subtle toasted note; for a nut-free swap, use a sunflower seed butter thinned with a little water.
- Lemon juice – Brings brightness and balances the garlic and tahini; always taste and adjust to your preference.
- Salt – Enhances flavors; a finishing pinch lifts the garlic’s sweetness.
- Ice cubes – A small addition while blending helps keep the paste cool and gives an ultra-smooth texture.
- Garnishes – Whole chickpeas, chopped parsley, a drizzle of olive oil and a sprinkle of smoked paprika or sumac make the bowl look finished.
Dietary swaps: for nut- or seed-free tahini alternatives, try a neutral oil with a little roasted sesame extract if you have an allergy; serve with gluten-free crackers, grilled flatbreads, or crisp vegetable sticks to keep the platter inclusive. I also pay attention to sustainably sourced olive oil and tahini where possible to reduce environmental impact.
The Secret to the Silkiest Hummus
Getting hummus impeccably smooth is all about temperature, liquid balance and processing time. The ice cube trick adds a touch of cold water so the blender doesn’t overheat the mixture, which helps the tahini and chickpeas emulsify into a silkier texture. Use a food processor for more control — it gives you the ability to pulse and scrape as needed; high-speed blenders can work but they tend to overwork the paste.
- Keep the ingredients cool while blending to prevent gumminess.
- Pulse first to break down the chickpeas, then run the processor in bursts, scraping the sides between intervals.
- Avoid over-blending — stopping to taste and check texture will prevent a gummy result.
Roasting Garlic: Oven vs. Air Fryer (Save Time, Add Flavor)
Both oven and air fryer produce beautifully caramelized garlic, but they yield slightly different results. The oven is forgiving and develops a deeper, more even caramelization when roasted slowly. The air fryer is faster and concentrates the caramelized edges, which can give the hummus an extra-roasty note.
- Oven method: slower heat gives soft, evenly golden cloves that mash into a creamy sweetness.
- Air fryer method: shorter time with concentrated heat creates intensified caramelization on the exposed cloves; check a little earlier to avoid burning.
- Health note: roasted garlic contains allicin derivatives that are easier on the stomach than raw garlic and still retain many of garlic’s beneficial compounds.
How Presentation Makes This Dip Look Gourmet
Presentation turns a simple bowl of hummus into an elegant centerpiece. Aim for contrasts in color, height and texture: a shallow bowl, wide swirls made with the back of a spoon, a glossy pool of extra virgin olive oil and a bright scatter of herbs will make the dish look intentionally plated.
For a more refined board, arrange warm pita wedges, roasted vegetables and crisp flatbreads around the hummus. Add a side of cooling sauce to balance the roasted garlic:
Add a side of Greek Tzatziki Sauce for a gourmet touch to your hummus presentation.
Creative serving vessels: use a shallow ceramic bowl for swirls, a wooden board for a rustic spread, or small individual ramekins for guests to sample different garnishes.
How to Make Roasted Garlic Hummus (Step-by-Step)
- Preheat your oven or air fryer and prepare the garlic by slicing the top to expose the cloves; remove any loose papery layers.
- Place the garlic cut-side up on foil, drizzle with olive oil, wrap and roast until the cloves are soft and caramelized. Allow to cool before handling.
- Squeeze the roasted garlic cloves from their skins into the bowl of your processor.
- Add the drained chickpeas, tahini, lemon juice and salt to the processor.
- Add the ice cubes and process, starting with pulses and moving to continuous blending, scraping the bowl as needed until smooth.
- Taste and adjust seasoning with more lemon or salt; if the hummus is too thick, add a splash of cool water or a teaspoon of olive oil while blending to reach the desired consistency.
- Spoon into a serving bowl, create a shallow well with the back of a spoon, drizzle with olive oil and garnish with whole chickpeas and parsley.
Troubleshooting
- I sometimes find the hummus is grainy — a few extra seconds of blending and another small ice cube usually smooths it right out.
- If the flavor feels flat, I add a touch more lemon or a pinch more salt; acidity brightens roasted garlic wonderfully.
- When the mixture splatters in the processor, I stop and scrape down the sides; working in short bursts prevents overheating.
For a pairing while you prepare the hummus, consider making a garlicky main to echo flavors on the table:
For a delicious pairing, consider making our Creamy Garlic Chicken while you prepare the hummus.
Pro Tip for Roasted Garlic Hummus: Ice Cubes for Ultra-Smooth Texture
- Ice cubes add cold moisture that helps the tahini emulsify without heating the mixture.
- Use one or two small ice cubes; they soften quickly and won’t water down the flavor if blended briefly.
- If you prefer not to use ice, chill your chickpeas and tahini beforehand and blend in short pulses to keep temperature down.
How to Store, Make-Ahead, and Serve Roasted Garlic Hummus
- Store hummus in an airtight container in the refrigerator; it will keep for up to a week. Press a piece of plastic wrap directly onto the surface before sealing to reduce oxidation.
- Make-ahead: roast the garlic a day ahead and store roasted cloves in the fridge; blend the hummus the day you plan to serve for the freshest flavor.
- When transporting for a gathering, pack garnishes separately and add them just before serving so the bowl looks pristine.
- Sustainability tip: buy chickpeas in bulk and choose olive oil and tahini from brands with transparent sourcing to reduce packaging waste and support sustainable producers.
Variations and Dietary Swaps
- Nut-free tahini swap: use sunflower seed butter thinned with a little water or neutral oil to mimic tahini’s creaminess and keep the recipe nut-free.
- Roasted vegetable version: blend in roasted red pepper or roasted carrot for a colorful twist with subtle sweetness.
- Spiced hummus: add a pinch of smoked paprika, ground cumin, or a drizzle of chili oil for warmth and visual contrast.
- Serving ideas beyond pita: smear on crostini, dollop onto grilled fish or roasted vegetables, or serve as part of a composed mezze plate with olives, cheeses and pickles.
Frequently Asked Questions
Can I use store-bought roasted garlic instead of roasting my own? Absolutely! Store-bought roasted garlic can save you time and still provide fantastic flavor in your hummus.
How do I store leftovers of roasted garlic hummus? Place any leftover hummus in an airtight container in the fridge. It should stay fresh for up to a week.
What can I serve with roasted garlic hummus? Roasted garlic hummus pairs wonderfully with pita bread, vegetable sticks, or even as a spread on sandwiches!
Can I make roasted garlic hummus vegan? Yes! This recipe is already vegan-friendly, made with chickpeas, tahini, and no animal products.
What is the purpose of adding ice cubes to the hummus? The ice cubes help achieve an ultra-smooth texture by adding a bit of cold moisture during blending.
Roasted Garlic Hummus
Ingredients
Method
- Preheat the oven to 400°F.
- Cut about ½ inch off the tops off of the heads of garlic (enough to expose the top of the garlic cloves) and remove any loose papery outer layers.
- Place garlic cut side up on enough foil to wrap the garlic. Drizzle oil on the exposed surface of the garlic. Wrap the sides up and place the foil wrapped garlic onto a baking tray.
- Roast in the preheated oven until golden and soft, about 40-45 minutes. Roasting time will vary based on the garlic size.
- Set aside to cool, then squeeze out the soft garlic from the paper cloves into the food processor.
- Add the drained chickpeas to the food processor along with lemon juice, tahini, salt, and the ice cubes. Blend for about 5 minutes until smooth. Taste and adjust as needed by adding more lemon juice or salt.
- Spoon the hummus onto a plate or bowl, and spread the hummus with the back of a spoon to create swirls. Drizzle with olive oil, add whole chickpeas for garnish and fresh parsley. Serve with pita bread.