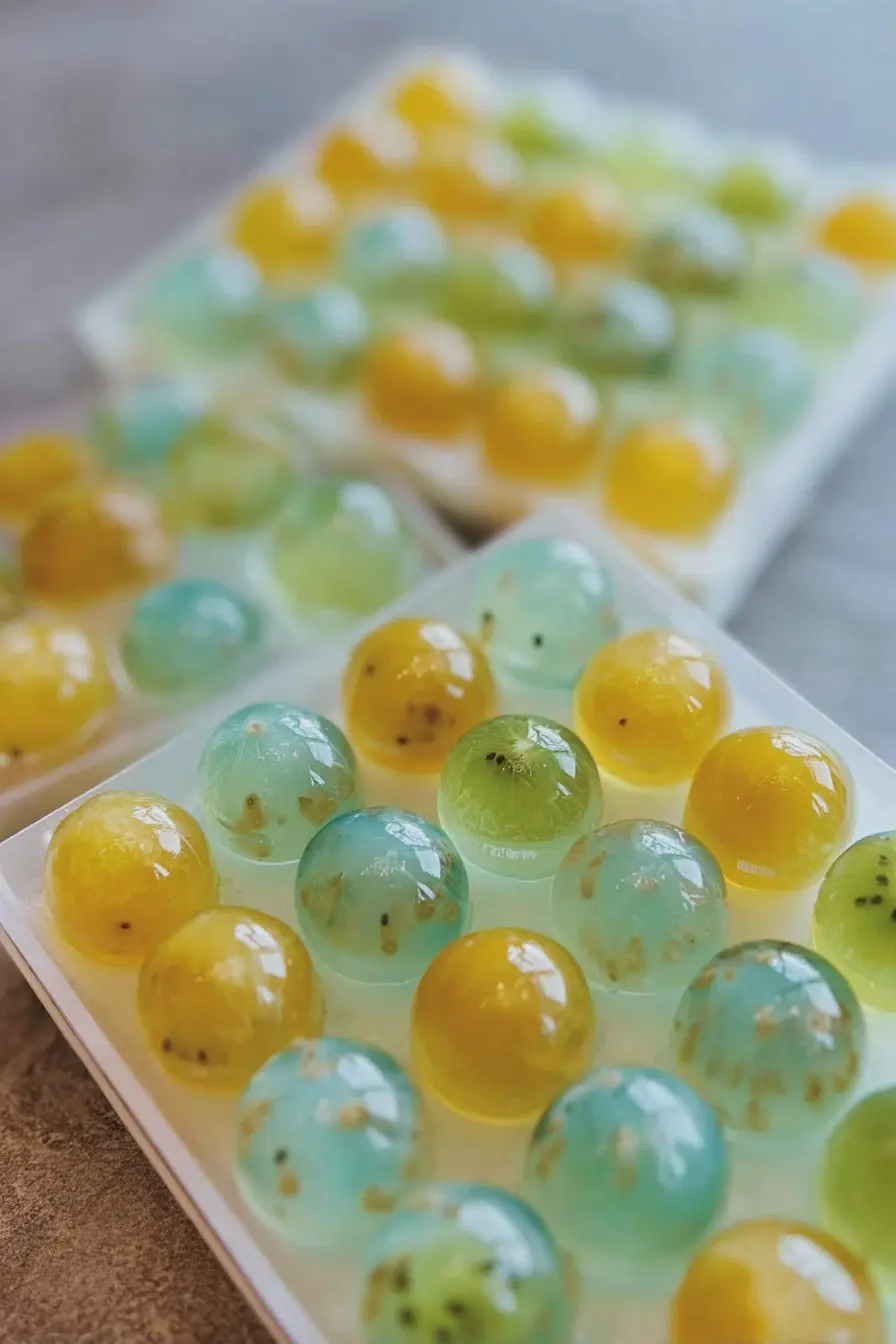
I grew up circling the glowing stalls at night markets, eyes glued to jars of jewel-like jelly that sparkled under the lights. I still get the same grin when I spoon fruit into a clear mold and watch it float, suspended in a glossy, wobbly blanket. Making fruit jelly at home brings that nostalgic buzz to my kitchen in a fraction of the time.
I love this recipe because it’s fast, forgiving, and great to make with kids — they can choose the fruit, arrange the layers, and feel proud when it comes out of the mold. Using agar-agar keeps it vegetarian-friendly and gives a clean, bright wobble that’s refreshing on hot afternoons.
Over the years I’ve played with acid levels, juice strength, and amounts of agar to get a jelly that’s firm enough to hold fruit but soft enough to be pleasant to bite. Below I’ll share exactly what I use, common mistakes I’ve learned to avoid, and fun ways to present your jellies so they look as good as they taste.
Why Fruit Jelly Is the Quick, Fun Dessert Your Family Will Actually Eat
Fruit jelly hits a sweet spot: it’s familiar, playful, and fast. The kids love the bright colors and the spoonable texture, while adults appreciate a lighter, fruit-forward dessert after a heavy meal. Because assembly takes only a few active minutes, it’s great for weeknights, backyard gatherings, or a hands-on activity with friends.
Making it together becomes a memory — I still remember my sister carefully layering mango and kiwi when she was nine. The visual payoff of clear jelly holding suspended fruit is instant gratification; the chill time lets you relax with a cup of tea while the refrigerator does the work.
Everything You Need for Fruit Jelly
Choose good fruit and simple tools — those two decisions make the biggest difference between ho-hum and wow. Below I list the key ingredients and tools conversationally so you know what each element does and what you can swap in a pinch.
- Any fresh fruit – Pick fruit that’s ripe but not overly soft; it adds natural sweetness and texture. (Think berries, mango, kiwi, melon, pineapple.)
- Fruit juice or water – Acts as the liquid base and carries flavor; use juice for more taste or water for a lighter result.
- Lemon or citrus – Adds a bright lift and helps balance sweetness; great with sweeter fruits.
- Sweetener – Honey, sugar, or a liquid sweetener to taste so the final jelly complements the fruit you chose.
- Agar-agar powder – The vegetarian gelling agent that sets the jelly; alternatives are listed below.
- Clear molds or cups – See-through containers show off the fruit layers; silicone molds are the easiest for unmolding.
- Small saucepan and whisk – For dissolving agar and heating the liquid evenly.
- Mixing bowls and ladle – Helpful for portioning warm liquid and layering without splashing.
The Secret to the Perfect Jelly Texture
The texture comes down to three things: the amount of agar, the heat you use to activate it, and how juicy your fruit is. Get those balanced and you’ll have a glossy, slightly springy jelly that isn’t rubbery or weeping.
I learned the hard way that undercooking agar gives a floppy jelly, while overcooking (or too much agar) makes it glassy and rubbery. Also: very juicy fruits dilute the setting liquid, so they demand a bit more agar or less added water.
- Measure and test: If your fruit is especially watery, expect to nudge the agar level up so the jelly holds shape.
- Heat matters: Bring the agar mixture to a full simmer and keep it for a minute to fully activate the gelling power.
- Cool gently: Let the jelly cool at room temperature briefly before refrigerating so condensation doesn’t cloud the surface.
Troubleshooting (what I do when things go sideways):
- Too soft: Reheat gently with a pinch more agar dissolved in a little hot liquid, pour over the set jelly and chill again.
- Too firm or rubbery: Next time, reduce the agar slightly or add a bit more juice to soften the set.
- Watery or weepy surface: Use less high-water fruit per mold or add a thin agar ‘seal’ layer first so fruit juices don’t seep into the whole jelly.
Best Fruits to Use — Seasonal Picks and How They Change Flavor
Different fruits change the personality of the jelly. I try to match fruit textures so softer fruits rest on firmer layers or are enclosed in pockets rather than mixed into a very loose base.
- Berries (strawberry, blueberry, raspberry) – Bright color and punchy flavor; raspberries add tartness that cuts sweetness.
- Mango and papaya – Rich, tropical sweetness and smooth texture; pair with lime for balance.
- Kiwi and green grapes – Acidic and pleasantly tangy; they make the jelly taste fresher.
- Pineapple – Very juicy and enzymatic; can interfere with gelling if too fresh — use briefly cooked juice or canned if you have setting issues.
- Uncommon picks (dragon fruit, passion fruit) – Dragon fruit offers subtle sweetness and striking color; passion fruit adds tart perfume and seeds for crunch.
- Seasonal swaps: In summer go for stone fruit like peaches and plums; in cooler months use citrus segments and pomegranate arils for a festive look.
Adjust sweetness based on fruit: very sweet fruits need less added sugar; tart fruits usually benefit from a touch more sweetener or a sweeter juice base.
How to Make Fruit Jelly (Step-by-Step)
Follow these clear, beginner-friendly steps — I use this exact flow in my kitchen every time. Use steady heat, give the agar time to bloom and simmer, and chill until fully set.
- Prepare your fruit by washing and chopping into bite-size pieces; remove cores and large seeds so they don’t puncture the set jelly.
- Arrange fruit in your clear molds or cups, leaving space for the liquid to cover them without overflowing.
- Mix your liquid base (juice or water) with sweetener and lemon juice in a small saucepan and warm to combine.
- Add agar-agar powder while whisking, bring the mixture to a strong simmer, and keep it simmering for a full minute so the powder dissolves completely.
- Cool the mixture for a minute off the heat (so it’s not scalding) and slowly pour over the fruit in each mold to avoid splashing fruit out of place.
- Let molds cool briefly at room temperature, then transfer to the refrigerator until fully set; test by gently nudging the surface — it should jiggle but hold its shape.
- Unmold if using silicone, or serve directly in clear cups with a spoon. If you want layers, allow each layer to chill until almost set before pouring the next.
Layering and Presentation Ideas for Colorful Jellies
Presentation turns simple jelly into a party trick. Clear glasses and neat layers make the colors pop; little details like mint leaves or zest add aroma and contrast.
- Layer by color: Use contrasting fruit juices (berry, mango, lime) and chill each layer until just set before adding the next for clean bands of color.
- Fruit pockets: Pour a thin base, chill, then nestle fruit into the semi-set layer before topping with more jelly so fruit appears suspended in pockets.
- Clear cups: Serve in clear plastic cups or glass bowls so the layers and fruit are visible — kids love picking out the pieces.
- Garnish: Finish with fresh mint, a curl of citrus zest, edible flowers, or a light drizzle of honey to add gloss and aroma.
Pro Tip for Fruit Jelly: Balance Agar, Heat, and Fruit Juiciness
I pay attention to this trio every time I make jelly — it’s the technical heart of success. Below are compact, practical tips I rely on in my kitchen.
- Activate agar properly: Always bring the mixture to a hard simmer so the agar dissolves fully; a quick simmer won’t do.
- Scale for juiciness: If your fruit is particularly watery, reduce added water or increase agar slightly to compensate.
- Mind acidity: High-acid fruits like pineapple or kiwi can interfere with gelling; pre-cooking the juice or using less raw fruit helps.
- Temperature control: Don’t pour boiling liquid over delicate fruit; let it cool slightly to avoid cooking the fruit and to prevent air bubbles.
For those looking to explore unique textures in their desserts, try our agar-agar fruit jelly guide.
How to Store, Make-Ahead, and Serve Fruit Jelly
Fruit jelly is one of the easiest desserts to make ahead. Proper chilling and airtight storage keep texture and flavor stable for a couple of days.
- Refrigeration: Store in the fridge covered with plastic wrap or in airtight containers to prevent the surface from drying out or absorbing fridge odors.
- Make-ahead window: You can prepare jelly a day ahead without losing freshness; for best texture serve within 48 hours.
- Transport: Keep the jellies chilled and upright; silicone molds are forgiving for travel if you need to unmold on arrival.
- Serving: Serve chilled on a warm day with a small spoon and optional honey drizzle, citrus zest, or a sprig of mint for fragrance.
Dietary Swaps and Variations for Fruit Jelly
Making this jelly accessible to different diets is easy — swap sweeteners and gelling agents, or add herbs and spices for grown-up flavor twists.
- Sugar-free: Use a liquid natural sweetener or a no-calorie sweetener you prefer; taste the warm liquid before setting to get sweetness right.
- Vegan and vegetarian: Agar-agar is already vegetarian; for different textures you can try other plant gelling agents but expect texture differences.
- Herb and spice infusions: Steep mint, basil, ginger, or a cinnamon stick in the warm liquid and strain before adding agar for subtle aromatics.
- Texture play: Mix in small diced fruit for chewiness or use blended fruit for a smoother, thicker gel layer.
Cultural Variations of Fruit Jelly Recipes from Around the World
Jellies and agar-based desserts show up across Asia and beyond with distinct local twists. In Japan, kanten jellies are often lightly sweetened and focus on seasonal fruit slices. Vietnamese che often combines agar or gelatin with coconut milk and beans for a textural contrast. Western fruit jellies may lean toward firmer gelatin and emulsified fruit purees for molded desserts.
The look, aroma, and expected sweetness vary: some cultures prefer a subtle, tea-like sweetness and fragrant citrus, others favor bold tropical fruit and cream. Trying these variations will give you a sense of how one method can yield many expressions depending on local ingredients and palate preferences.
Frequently Asked Questions
Can I use any type of fruit for this jelly?
Absolutely! You can use any fruit of your choice, just make sure to chop them into bite-size pieces for the best results.
Is this fruit jelly suitable for vegetarians?
Yes! This recipe uses Agar-agar powder, which is a vegetarian alternative to gelatin, making it perfect for vegetarian diets.
How long does it take for the jelly to set?
It typically takes about 1-2 hours in the fridge for the jelly to set properly.
Can I make this jelly ahead of time?
Definitely! You can make the fruit jelly a day in advance; just store it in the refrigerator until you’re ready to serve.
What’s the best way to serve fruit jelly?
You can enjoy it on its own or drizzle some honey on top for extra sweetness. Get creative with your presentation by layering different fruits or serving in clear cups!
Fruit Jelly
Ingredients
Method
- Add the chopped fruit to the mold/container.
- Next, add water, lemon juice, honey, or sugar in a pot. Mix well.
- Bring to a slight simmer, and add in agar powder, mix well, and bring to a hard simmer for 1-2 minutes and mix well.
- Pour the mixture into the container, let it rest in the fridge for around 1-2 hours, and enjoy with honey or on its own!