I make these honey lemon gummy bears almost every weekend when my kids ask for a special snack — it’s hands-on, a little sticky, and always full of giggles. I love that the process gets them involved: they pick the juice colors, press the tiny molds, and feel proud when those little bears pop out shiny and cheery.
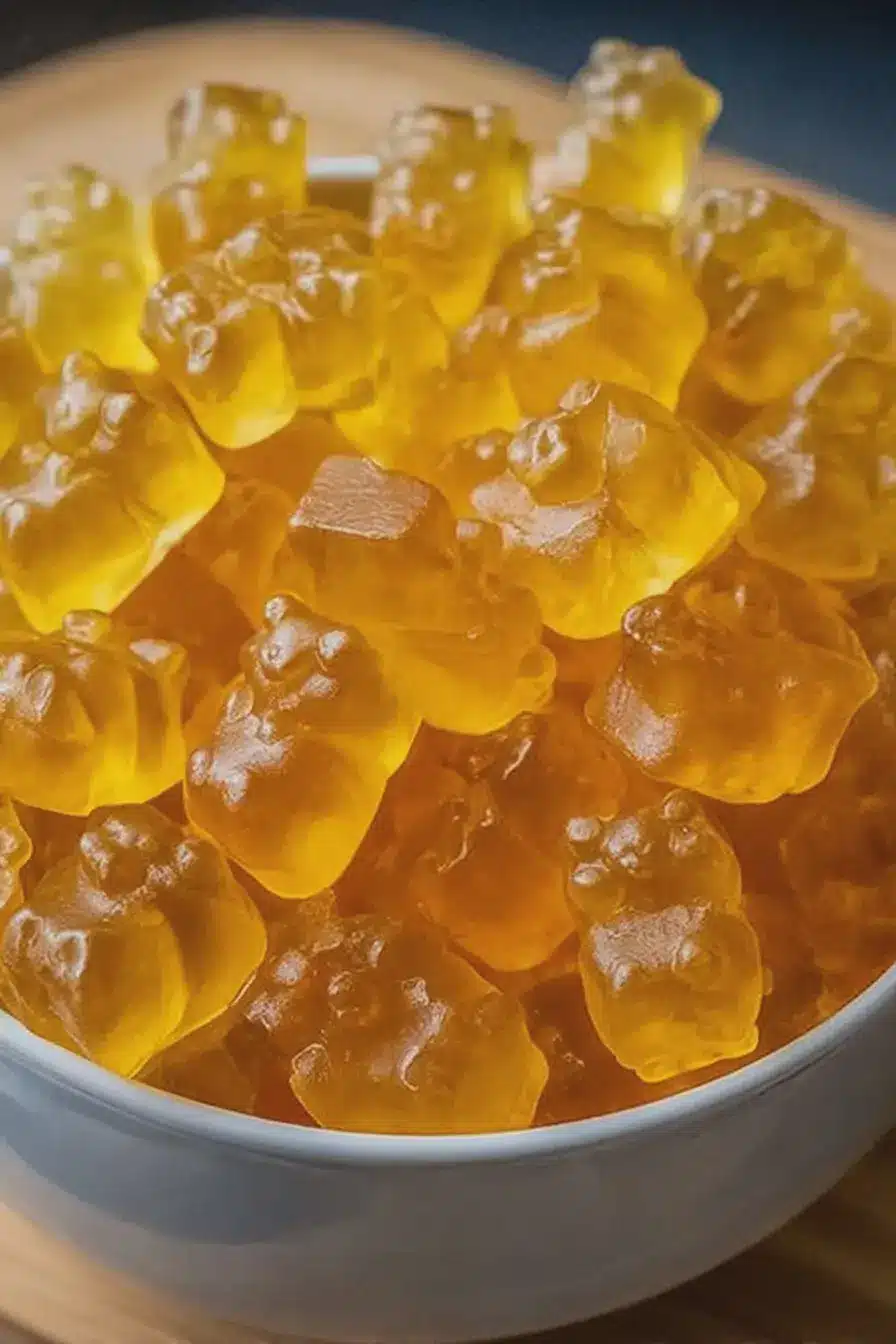
The moment the honey and lemon warm together in the pan, the kitchen fills with a sunny, citrusy aroma that always gets my kids asking when they can taste one. The texture is soft and chewy — perfect for little mouths — and making them at home means I control what goes into the treats.
I’ll walk you through everything I’ve learned: the must-have tools, how to bloom gelatin so your gummies set just right, vegan alternatives if you prefer plant-based options, and the small tricks I use to keep the molds happy and the kids safe while helping.
Everything You Need for DIY Honey Lemon Gummy Bears
Before you begin, gather a few simple ingredients and tools so the process stays breezy and fun. Below I explain why each item matters and offer easy swaps for allergies or preferences.
- * Fruit juice – The flavor and color base for your gummies; pick something your kids already like (apple, grape, or berry juices are great).
- * Honey – Adds natural sweetness and a touch of flavor complexity; you can substitute a mild maple syrup if you prefer.
- * Lemon juice – Brightens the flavor and adds a fresh citrus note plus a bit of acidity to balance the sweetness.
- * Gelatin – The magic ingredient that gives gummies their chew; see the blooming section below so your texture is spot-on.
- * Cold water – Used to hydrate (bloom) the gelatin so it dissolves smoothly later.
- * Molds – Tiny silicone molds work best because they’re flexible and kids can press the bears out themselves.
- * Tools – A small saucepan, a heatproof bowl for blooming, and a dropper or small measuring cup for filling molds neatly.
If you want a vegan option, read the dedicated section below for plant-based substitutes and what to expect from textures and flavor. For a chilly pairing on a hot day, try serving these with a refreshing homemade lemonade for a double citrus treat the kids will love.
The Secret to the Perfect Texture: Blooming Gelatin the Right Way
Blooming gelatin is step one if you want even, chewy gummies. The idea is simple and scientific: hydrate the gelatin in cold water so the granules swell, then dissolve it gently in warm liquid. That pre-hydration prevents clumps and gives the finished candy a consistent bite.
Here’s how to do it clearly so you don’t run into grainy or soft gummies:
- Sprinkle the gelatin evenly over cold water in a shallow bowl so each granule has a chance to absorb liquid; you’ll see the granules swell and become jelly-like as they sit.
- Let the gelatin sit undisturbed for a few minutes until it looks glossy and gelled; this is the bloomed state you want.
- Warm the fruit juice, honey, and lemon separately until comfortably warm — avoid boiling — then whisk in the bloomed gelatin over low heat until the mixture is smooth and clear.
- When properly bloomed and dissolved, the mixture should pour easily and set into a uniform, tender chew once chilled.
Watch the transformation: the gelatin goes from dry grains to a shiny, plump gel. That visual change tells you it’s doing its job.
Vegan Options: Plant-Based Gelatin Substitutes and What to Expect
If you’re making these for vegan family members, there are solid substitutes — but each behaves differently, so it helps to know what to expect.
- Agar-agar – A seaweed-derived powder that sets very firmly and often needs to be boiled to activate. Gummies made with agar will be firmer and slightly less chewy than gelatin-based ones.
- Pectin – Fruit-derived and commonly used in jams; pectin needs the right balance of sugar and acid to set, and gives a softer, more tender finish than agar.
- Carrageenan – Another seaweed option that can create a smooth, jelly-like texture but may require different heating and cooling steps.
- What to expect – Vegan substitutes can change the mouthfeel and the clarity of the gummy. Agar tends to be clearer and firmer; pectin can be slightly more opaque and tender. You may need to adjust how long you heat the mixture and how long you chill it.
When trying plant-based options, test a small batch first so you can adjust the technique without wasting ingredients.
Why Honey and Lemon Make a Healthier, Kid-Friendly Treat
Choosing honey and lemon helps reduce refined sugars and adds a little nutrition: honey brings natural sweetness and trace antioxidants, while lemon contributes vitamin C and a bright flavor that makes kids feel like they’re getting something fresh and wholesome. Together they make a balanced, tasty snack that feels special without extra processed sugar.
These gummies pair wonderfully with other citrus treats; for a summer picnic, serve them alongside a cold pitcher of homemade lemonade to amplify the lemony fun.
How to Make DIY Honey Lemon Gummy Bears (Step-by-Step)
- Warm the fruit juice, lemon juice, and honey gently in a small saucepan until everything is evenly heated and fragrant; avoid boiling so the honey keeps its character.
- In a separate bowl, sprinkle the gelatin over cold water and let it bloom until the granules have swelled and turned glossy.
- Turn the heat to low and whisk the bloomed gelatin into the warm juice mixture until completely dissolved and smooth; keep stirring so there are no visible granules.
- Use a small dropper or a teaspoon to fill your gummy molds—this is a great step for kids to help with under supervision so they feel involved.
- Refrigerate the filled molds until the gummies are fully set and firm to the touch; this usually takes a couple of hours.
- Gently pop the bears from the silicone molds and transfer them to an airtight container. Let kids admire their colors before grabbing a taste.
Kids love the filling step and the popping step most of all—give them a few molds to fill and let them experiment with color combinations.
If you and your kids enjoy these, try another fun flavor project like our sour watermelon gummies or pair the treats with a frozen snack like blueberry lemonade popsicles for a cool summer platter.
Troubleshooting (quick fixes I use):
- Too soft? I’ve found that letting the mixture sit a little longer before pouring or using slightly less liquid next time helps firm them up.
- Grainy texture? Warm gently and whisk until smooth; if needed, strain the warm mixture through a fine sieve before pouring into molds.
- Sticking to molds? Chill fully before unmolding and use flexible silicone molds — they make popping out shapes much easier.
Pro Tip for diy honey lemon gummy bears: Chill Time and Mold Tricks
- Set your fridge to a regular cold setting; aggressive freezing can cause the texture to become brittle, so avoid the freezer unless you’re short on time—then use it briefly and watch closely.
- I prefer flexible silicone molds because they make unmolding foolproof; metal or rigid plastic molds require a light oiling or careful popping technique.
- Fill molds over a tray so any spills are easy to move; this keeps little helpers from dripping sticky juice all over the counter.
- To speed chilling without harming texture, place molds on a chilled metal tray in the fridge—this increases contact and shortens set time slightly.
How to Store, Shelf-Life, and Easy Variations to Try
Store your gummy bears in an airtight container in the refrigerator to keep them fresh and maintain chewiness. Homemade gummies will typically stay good for about one to two weeks refrigerated; they won’t last as long as store-bought candies that contain preservatives.
For a health-forward variation, try adding vitamin-rich ingredients—see suggested pairings for inspiration: black elderberry gummies are a great immune-boosting alternative if you want a seasonal twist.
Variations and ideas (easy to try):
- Swap the fruit juice for apple or grape for kid-approved sweetness and different colors.
- Add a tiny drop of natural food coloring or a small amount of pureed berries for vibrant hues and extra fruit flavor.
- Infuse the liquid with mild herbs like lavender or mint for a subtle floral or cooling note—use sparingly so kids still love the taste.
- Mix a little vitamin syrup or fruit concentrates into the warm liquid for a nutrient boost parents appreciate.
Serve these gummy bears straight from the fridge for the best texture and let kids help choose which variation to try next — it’s a fun way to teach flavor pairing and simple kitchen skills.
Frequently Asked Questions
What kind of fruit juice can I use for the gummy bears?
You can use any fruit juice you like! Options such as apple, grape, or berry juice work well. Just choose a juice with a flavor you love!
Can I make these gummy bears vegan?
Yes! You can use plant-based gelatin substitutes, such as agar-agar or pectin, to make these gummy bears vegan-friendly.
How long do the gummy bears last?
When stored in an airtight container in the refrigerator, your gummy bears will last for about 1 to 2 weeks.
What is blooming gelatin and why is it important?
Blooming gelatin involves soaking it in cold water to hydrate it. This process is crucial for achieving the perfect texture in your gummies!
Can I add additional flavors or colors to my gummy bears?
Absolutely! You can mix in natural flavor extracts or food coloring to customize your gummy bears to your liking.
DIY Honey Lemon Gummy Bears
Ingredients
Method
- In a saucepan, heat the fruit juice, lemon juice, and honey until warm. Do not boil.
- In a separate bowl, mix the gelatin with cold water and let it bloom for 5 minutes.
- Add the bloomed gelatin to the juice mixture and heat over low flame, stirring until gelatin is completely dissolved.
- Pour the mixture into a gummy bear mold and refrigerate for at least 2 hours.
- Once firm, remove gummy bears from mold and enjoy.